Clear out grain, noise, and traces of compression
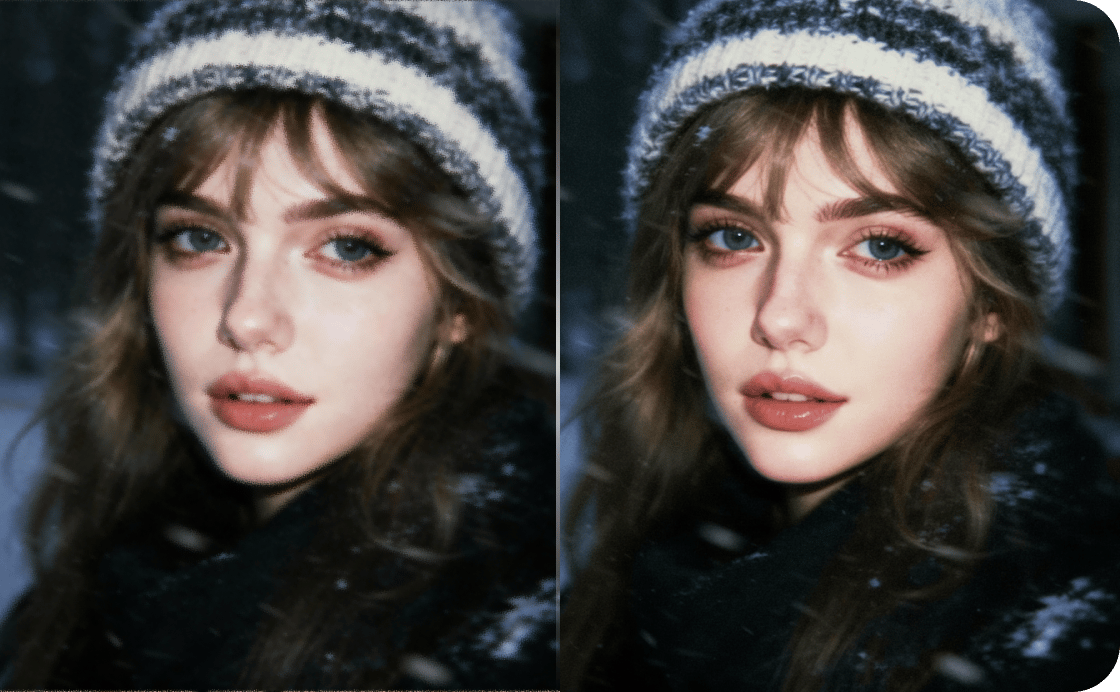
VanceAI removes sensor noise, grain, and traces of compression while preserving the real detail of the original photo, where conventional denoising tends to smear faces into wax and blur fine texture. Most photos clean up in under five seconds, even heavily-grained shots taken in low light.
Drag your image here, or
Free to start. No watermarks, no credit card.
VanceAI brings the tools to take unusable assets and upgrade them to save the day.
Trusted and loved by


Clean grain, noise, and traces of compression
VanceAI removes grain, sensor noise, and JPEG compression artifacts from photos in one pass, while preserving the real detail of the original. Our denoiser is trained on millions of photos, so cleaned images don't end up looking smoothed-over.
Clean any photo
Denoise without the manual editing
Conventional denoising tools force you through threshold sliders, masking, and per-region adjustments. VanceAI handles all of it automatically, with no settings to tweak. Drop a grainy photo in and get a clean version back, sharp and natural.
Skip the sliders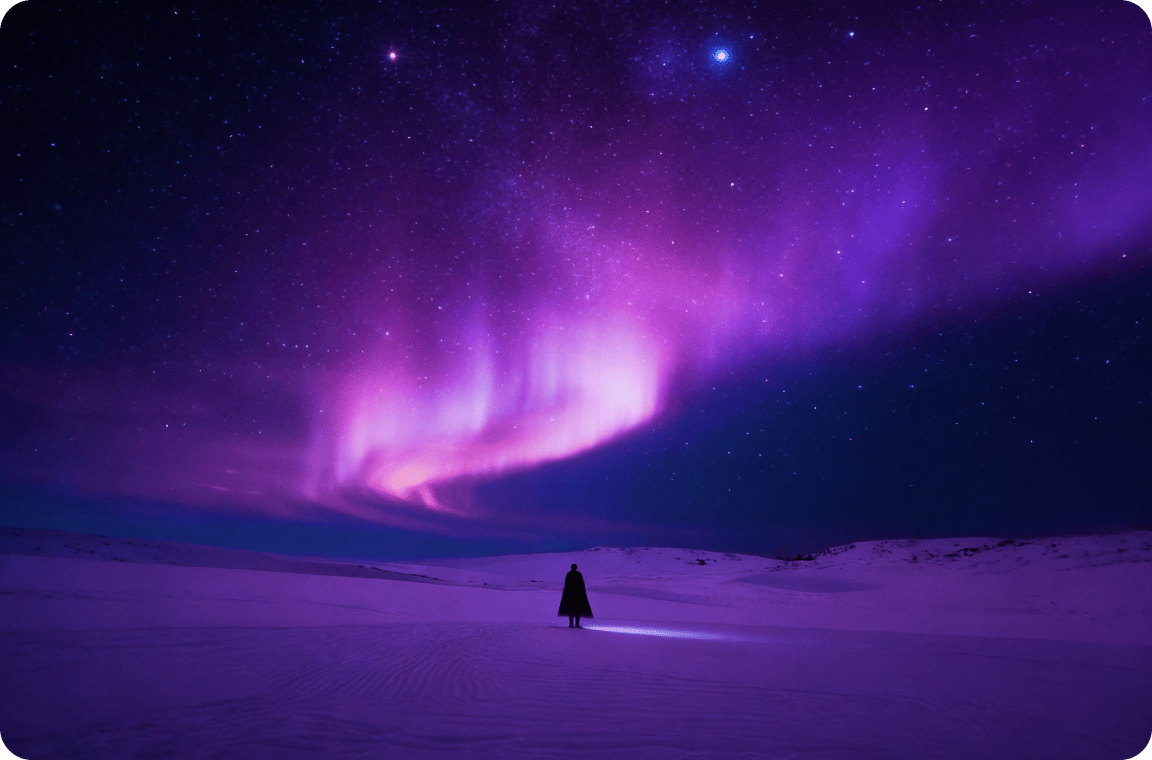
Capture clear stars and skies from high-ISO shots
Night photography forces high ISO, which produces grain in the sky and stars alike. VanceAI cleans high-ISO shots while preserving the fine point-light detail of stars, where conventional denoising tends to blur them into the sky.
Salvage your night shots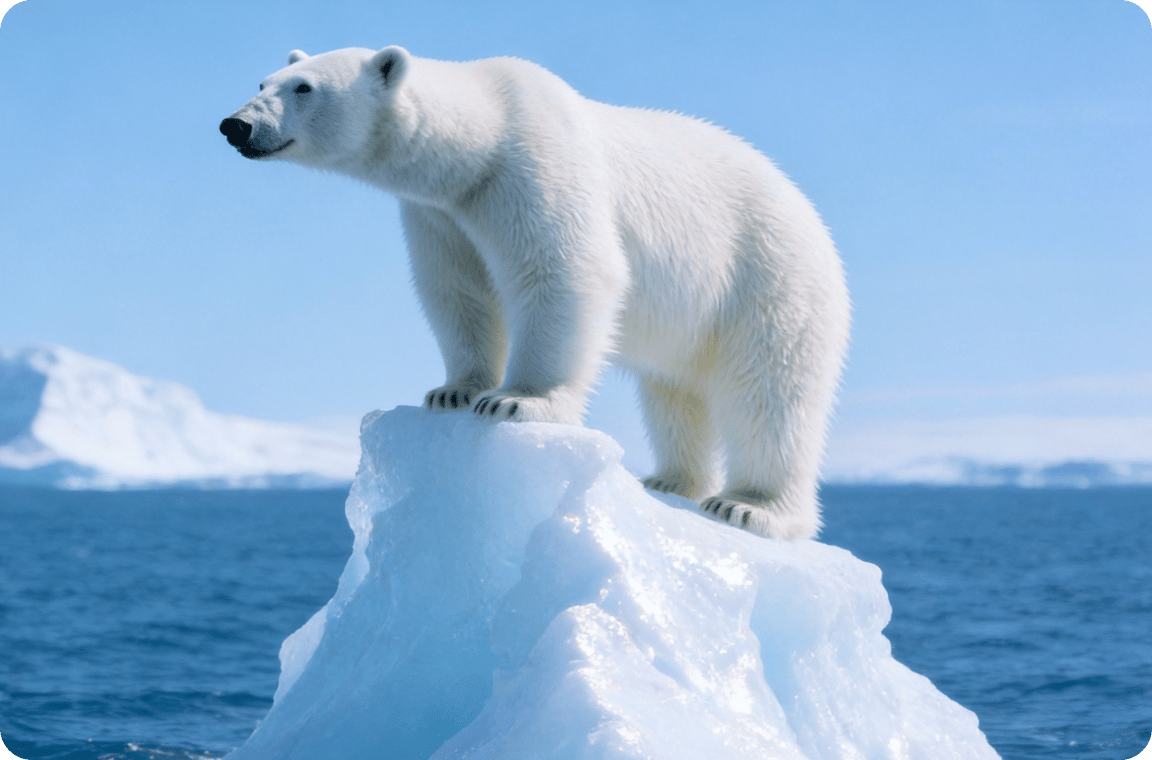
Extract crisp wildlife photos from long-lens shots
Long-lens wildlife shots often need high ISO and fast shutters, which produce grain and lose subtle texture. VanceAI cleans the noise while preserving the glint in an animal's eye and the fine texture of fur and feathers.
Rescue every wildlife shot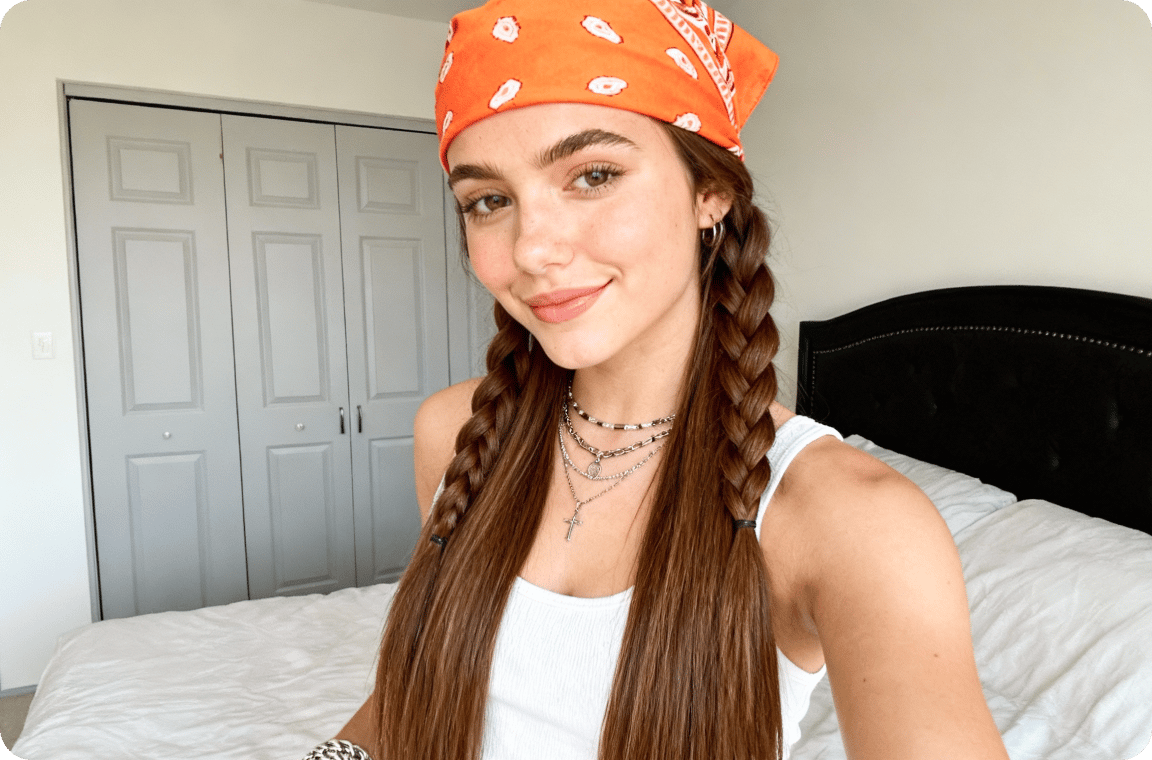
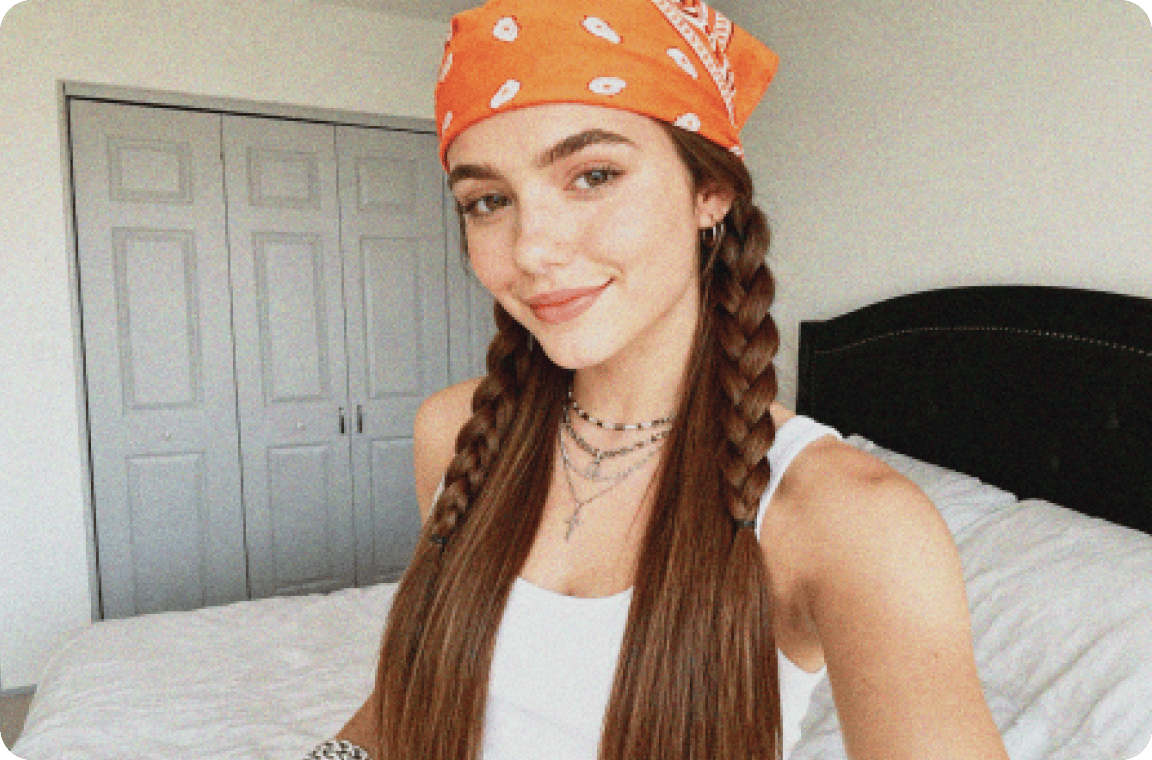
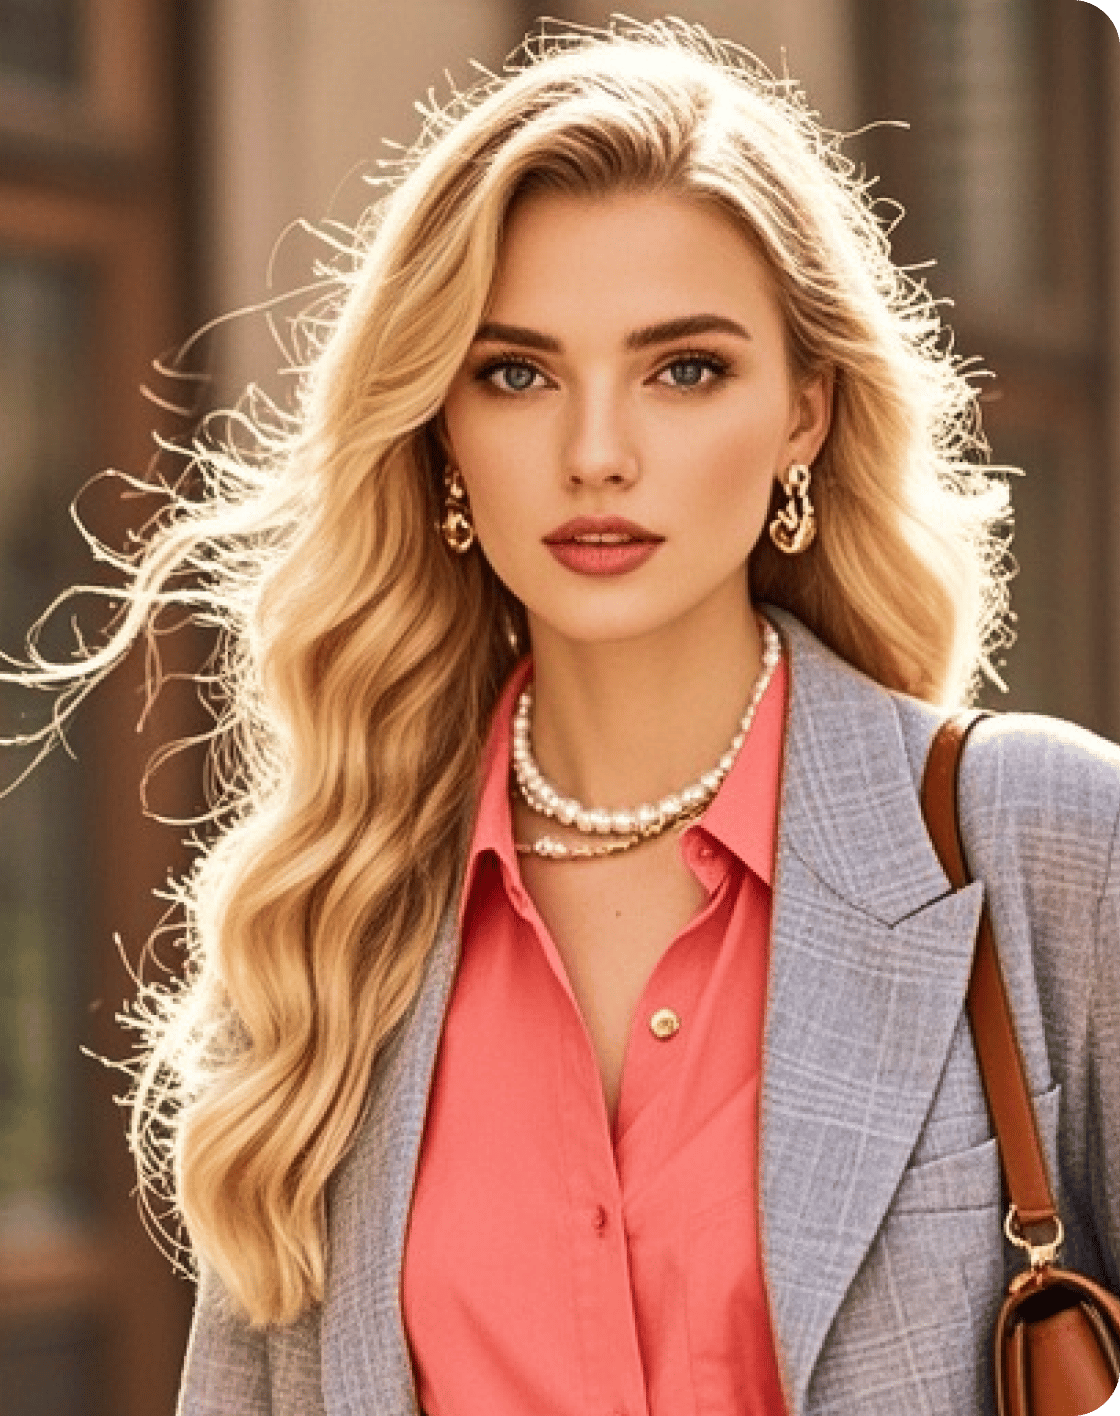
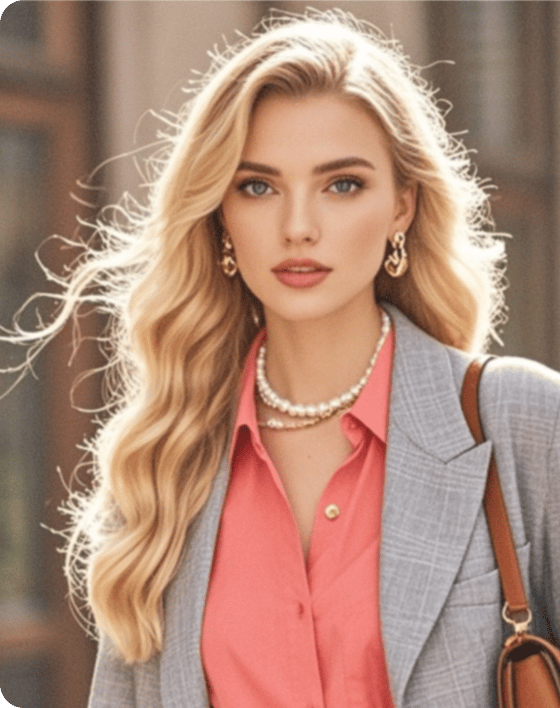
Skin-aware denoise that doesn't plasticize faces
Conventional denoising tends to over-smooth faces into the plastic, waxy look that ruins portraits. Our denoiser distinguishes noise from real skin texture, so cleaned portraits keep pores, fine lines, and the natural surface of the face intact.
Keep skin looking realThe world's top denoiser model.
Precision-built for the artists and creators
who agonize over every frame
Eliminate all noise
VanceAI removes sensor noise, grain, and compression artifacts while preserving the real detail of the original photo, so cleaned images don't look smoothed-over.
Faces in full detail
Our denoiser preserves skin texture, eye sharpness, and hair fineness, where conventional denoising tends to smear faces into wax.
Complete in seconds
Denoising a full-resolution photo finishes in under five seconds, even on heavily-grained shots from low-light sensors.
Private by default
Every uploaded image is encrypted in transit and permanently deleted within 24 hours of processing.
Trusted by 9,800,000 users worldwide


FAQs
Photoshop's noise reduction takes practice with masks, selections, and threshold sliders. VanceAI handles all of it automatically: upload your noisy photo, and the model removes grain, sensor noise, and JPEG artifacts in seconds. No expertise needed, no manual setup.
Upload the grainy photo to VanceAI's denoiser. The model handles most grain automatically, or you can adjust the noise reduction and sharpness sliders before running it. Preview the result and download the clean version in seconds.
An AI denoiser is a model trained to distinguish real image detail from noise, then strip the noise without smoothing away texture. VanceAI removes grain, sensor noise, and compression artifacts from photos in one pass, with the real detail of the original preserved.
Go back to the workspace and adjust the noise reduction and sharpness sliders, then re-run the process. For more complex cases, chain the result with VanceAI's other tools to upscale resolution, sharpen detail, or enhance overall quality.
Ready to denoise?
VanceAI's denoise AI removes grain, sensor noise, and compression artifacts from grainy photos in seconds. Try the AI noise reduction tool free in any browser, or download VanceAI for PC for batch denoising on Windows.