
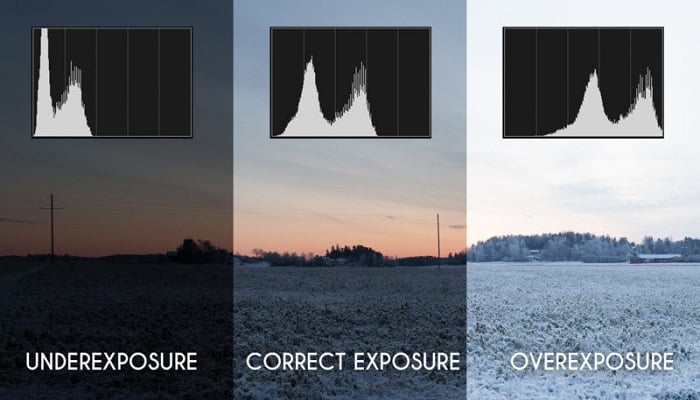
Overexposed vs Underexposed Photos — The Quick Definition
What is an underexposed photo, and what is an overexposed photo? A photo is fundamentally a recording of light, and "exposure" is simply the amount of light that reaches the camera sensor. There are two opposite-direction failures you might hit when the light is wrong:
What Is an Underexposed Photo?
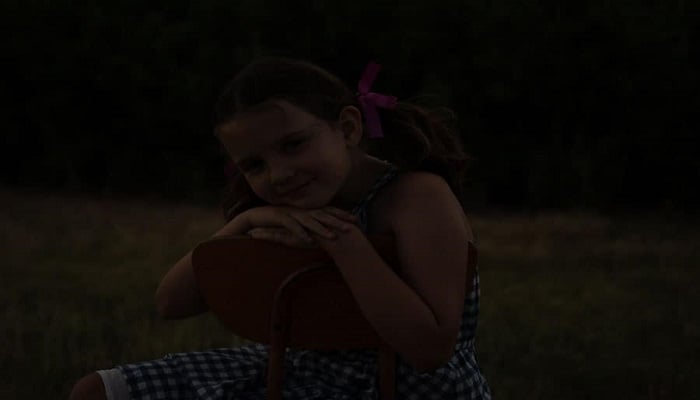
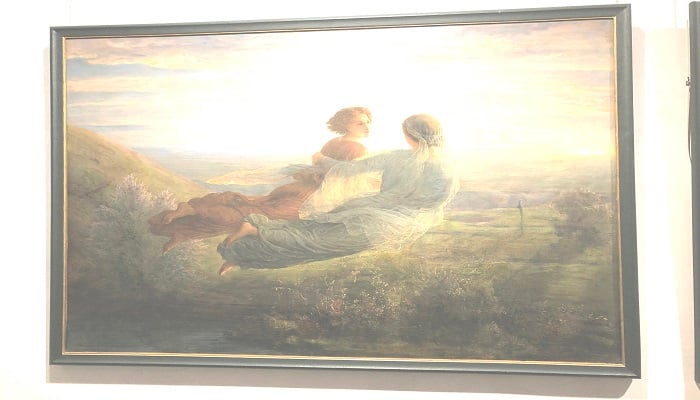
When your image is too dark, details get lost in the shadows and the darkest areas. An underexposed photo blends the focus subject in front with the background, which makes it hard to identify the structure or aesthetics of the shot. Below is an example of an underexposed photo — notice how the foreground subject loses contrast against the background.
What Is an Overexposed Photo?
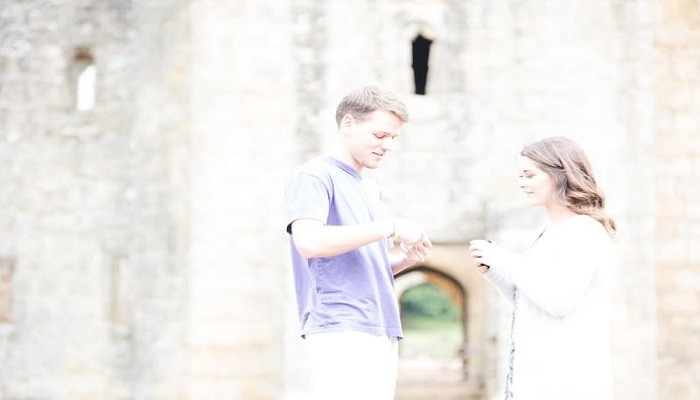
Overexposed photos look washed out and significantly brighter than they should be — too much light hit the camera sensor, so highlights are blown out and details disappear. The whole image can appear too white, especially in skin tones and skies. For a deeper photography-side explanation, see this article from StudioBinder: What is Overexposure in Photography.
Why Do Overexposed and Underexposed Photos Happen?
Exposure problems happen because of the amount of light that hits the camera's sensor — and it's easiest to think about it as filling a bucket with water:
- Overexposure: If you leave the tap on for too long (too much light reaches the sensor), the bucket overflows and the image gets too bright and loses detail. This typically happens with a wide aperture, a slow shutter speed, or a high ISO setting.
- Underexposure: If you don't leave the tap on long enough (not enough light reaches the sensor), the bucket doesn't fill and the image looks too dark and lacks detail. This is usually caused by a narrow aperture, a fast shutter speed, or a low ISO setting.
In a perfect world, you'd want just the right amount of light to capture all the details in your photo. With practice, you can learn to control these three settings — aperture, shutter speed, and ISO — and even use over- or underexposure creatively for specific artistic styles. For shots that already exist with bad exposure, the AI workflow below corrects them in seconds without a single Photoshop slider. You can also pair the fix with an image enhancer to lift overall clarity.
How to Fix Overexposed and Underexposed Photos with VanceAI
How to Fix an Overexposed Photo with VanceAI Image Sharpener
To fix an overexposed photo, the VanceAI Image Sharpener brings back the detail that the blown highlights washed away. Open the tool in your browser and use the upload area to load the photo.
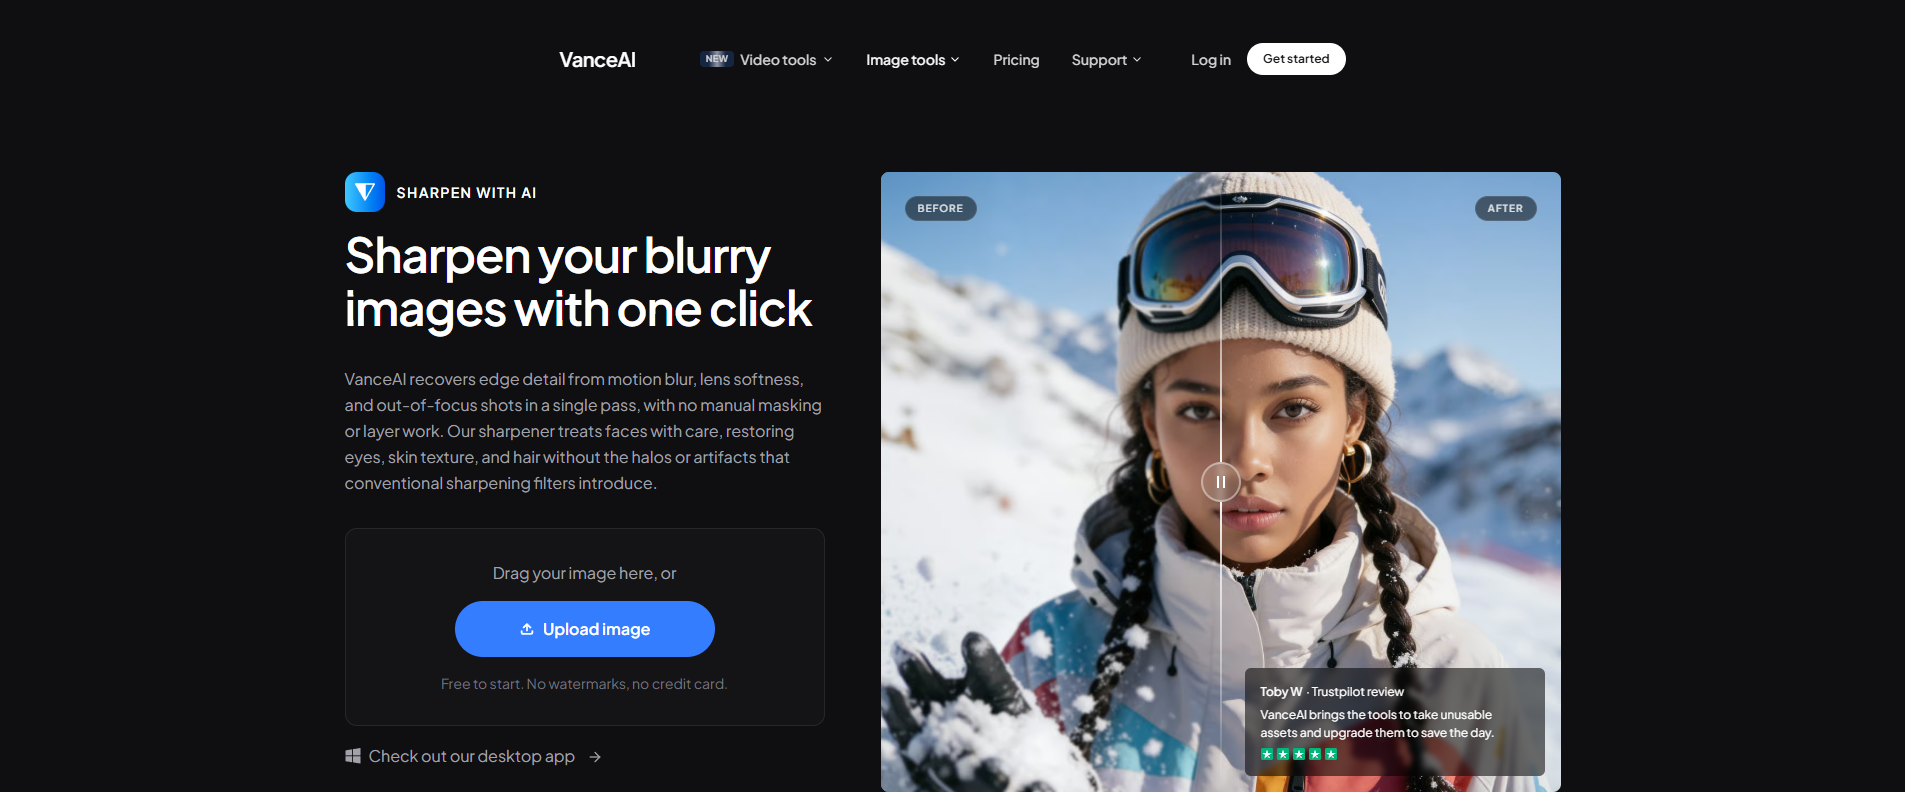
Click "Upload image" and add the overexposed photo. When the workspace opens, use the slider to control how aggressively the tool intervenes — a lower setting preserves the original tone, a higher setting restores more contrast. Click "Start to process" and the model rebuilds edge detail and reins in the overexposed regions.
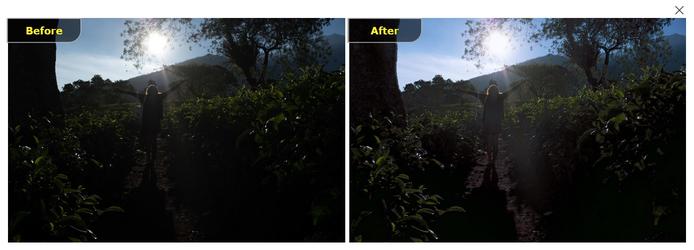
Once processing finishes, download the corrected image. The before-and-after below shows the kind of recovery you can expect from a typical overexposed shot.
Before
After

The results consistently beat what you'd get from a quick "Auto" pass in Lightroom — especially in highlight recovery on skin tones and skies. For a deeper dive into the underlying sharpening approach, see the related chromatic aberration and unblur workflow.
How to Fix an Underexposed Photo with VanceAI Image Denoiser
Step 1: Open VanceAI Image Denoiser in your browser. If your image is very dark, run a quick brighten pass first using a photo retoucher, then send the brightened version into the denoiser.
Step 2: Click the "Upload Image" button on the home page.
Step 3: Drag or click to upload the underexposed photo. Wait a couple of seconds while the workspace loads, then choose the noise level — a higher setting removes more grain from heavily underexposed images. When ready, click "Start to Process."
Step 4: Once processing finishes, your underexposed photo will have a corrected exposure with the noise reduced — a typical side effect of underexposure that becomes much more visible after brightening.
With the Denoiser tool, fixing an underexposed photo is a piece of cake. It saves time and the result is closer to what a more complex program like Lightroom or Photoshop would produce after several minutes of manual adjustment.
How AI Works to Fix Overexposed and Underexposed Photos
The whole process is automatic and predictable, with no quality loss in the light correction. Modern AI exposure-recovery models save you all the manual adjustments you would otherwise make to balance highlights and shadows. The model has been trained on millions of photos in many lighting conditions and quickly identifies the best correction path for your image — restoring detail in seconds.
The underlying technology combines noise prediction, highlight reconstruction, and shadow brightening.
Why Choose AI to Fix Overexposed and Underexposed Photos
| Tool | Easy to Use | Speed | Multitasking | AI-Based | Online | Targeted Sharpen Model |
|---|---|---|---|---|---|---|
| VanceAI Image Enhancer ⭐ | Three steps to fix exposure | Fast (seconds) | Sharpening + enhancing + denoising in one pass | Yes | Yes — browser only | Four sharpen models |
| Lightroom (manual) | Steep — sliders + masks | Slow (multiple sliders) | Yes (manual) | Limited | No (desktop) | No — manual |
| Photoshop (manual) | Steepest — layers + curves | Slowest | Yes (manual) | Limited | No (desktop) | No — manual |
| Generic auto-fix apps | Easy | Fast | No (single function) | Sometimes | Yes | No |
Thanks to AI- and machine-learning-based technology, the VanceAI Image Enhancer family can restore poorly exposed photos in seconds. The algorithms balance light and detail accurately and consistently — and you don't need to know the difference between a histogram and a tone curve to use them.
Frequently Asked Questions
Why are my photos overexposed?
You typically get an overexposed photo when the aperture is too wide, the ISO is too high, or the shutter speed is too slow — any of those settings allows more light to reach the sensor than the scene needs. Shooting in bright sunlight with auto settings calibrated for indoor light is another common cause. Always check the histogram on your camera screen before committing the shot.
Why are my photos underexposed?
The most common cause of an underexposed photo is shooting against a backlit scene with the camera in fully automatic mode — the meter reads the bright background and underexposes the subject in the foreground. A narrow aperture, fast shutter speed, or low ISO are also frequent culprits, especially in indoor or evening shots.
Is it better to shoot slightly overexposed or slightly underexposed?
For post-processing, a slightly overexposed photo is usually easier to correct than a slightly underexposed one. Bringing down highlights preserves more detail than brightening shadows, which introduces noise. The professional rule of thumb is "expose to the right" — push the histogram toward the right edge without clipping highlights — so you keep maximum signal-to-noise ratio.
How do I fix an overexposed photo in Photoshop?
Open the file, duplicate the background layer, then go to Image → Adjustments → Exposure. Pull the Exposure slider negative to recover highlights, then use Curves to reshape the contrast. For most users, an AI exposure-fix tool reaches a comparable result in a fraction of the time without any manual sliders.
Can AI really fix a fully blown-out (clipped highlights) photo?
Partially. If the highlights are fully clipped to pure white, the original data is lost and no tool can invent it — AI fills in plausible texture but cannot recover the original colors. For salvageable shots, AI exposure fixes recover impressive detail; for fully blown-out skies or skin, manual reshoots are the only true fix.
Will exposure correction reduce my photo's resolution?
No. AI exposure correction operates on the existing pixel grid and does not downscale. If your starting image was already low-resolution, run a separate upscaling pass after the exposure fix to lift it to display resolution — this is the standard fix-then-upscale flow for archival photos.
What's the difference between fixing exposure and editing in HDR?
Fixing exposure recovers a single misexposed file, while HDR combines multiple bracketed exposures into one composite that captures the full dynamic range. AI exposure tools effectively give you HDR-like results from a single shot, which is useful when you didn't bracket at capture time.
How long does it take VanceAI to fix an overexposed or underexposed photo?
Typical processing finishes in three to ten seconds per image on the web tool, depending on resolution and your network. Batch processing through a paid plan handles dozens of images in a single run.
Is VanceAI free to use for exposure correction?
VanceAI runs on a credits-based model. You can try a fixed number of free credits when you sign up, and paid plans start at $9.95 per month for 100 credits on the Starter tier. Pay-as-you-go top-ups are available with a 7-day money-back guarantee, and unused credits roll over up to 5x the monthly allowance.
Can I batch-fix many overexposed photos at once?
Yes. The VanceAI workspace supports batch upload on paid plans, so you can correct an entire shoot in a single run — useful for wedding, event, and product photographers who hit consistent exposure problems across a whole shoot.
Conclusion: Fix Bad Exposure Without Lightroom or Photoshop
You now have a complete AI workflow for fixing both underexposed and overexposed photos — in seconds rather than minutes, and without juggling Lightroom curves or Photoshop layers. From the head-to-head of overexposure vs underexposure, the VanceAI Image Enhancer family is the cleanest one-tool answer for both directions: it brings back highlight detail, lifts shadows, and outputs a sharper, more usable image — saving time while delivering the kind of polish that used to require a dedicated edit suite.


