The GIMP sharpen image software application is a really popular image editing and enhancement tool that is available for free. In this GIMP review, we will take a look at the software’s features, such as to sharpen image in GIMP, and more. Also, we will look into a GIMP alternative, image clearer, catering to users who may want an online AI based image editing tool.
GIMP Review (2026): Sharpen Images + Best AI Alternative
Last updated: Jul 14, 2026
Why do you need GIMP?
GIMP, which stands for GNU Image Manipulation Program, works just as its name suggests. The sharpen image GIMP software is actually capable of more than that, as it is also capable of processes like photo retouching, changing compositions, etc. It also provides enough tools to users who want to create entire artworks from scratch. Overall, the GIMP image editing software is similar to Photoshop since it provides just about anything a designer would want.
How to sharpen image in GIMP?
The GIMP how to sharpen image steps can vary because this software allows multiple ways of sharpening images.
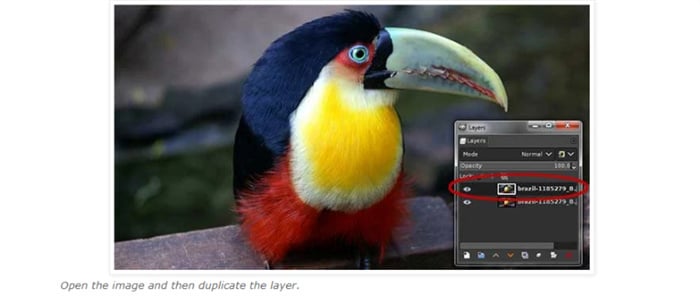
1. To sharpen an image in GIMP, first launch the program which you can download from this link. Once launched, choose the Open Image option and duplicate layer by going to Layer > Duplicate Layer. You will see the duplicate layer being added on top of the original image at the bar. The duplicate layer will avoid any permanent changes on the original image.
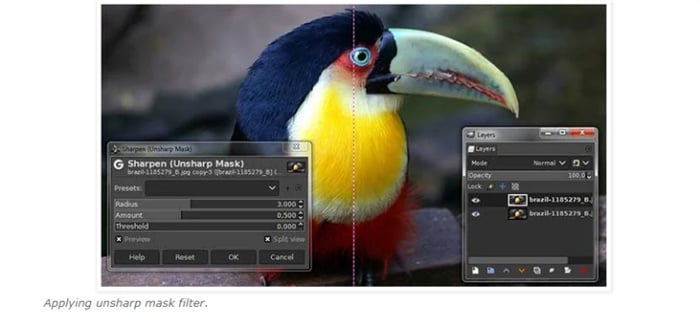
2. Now you need to apply the Unsharp Mask. To do that, go to Filters > Enhance > Sharpen. You will see the dialog box with a few settings that you can change accordingly. Every bar changes the image, so keep checking as you change the settings. You can also press CTRL + Z to undo any changes.
3. Once done, apply the changes. After that, you can simply go to the File tab and save the image. You will find it in the local directory.
How does GIMP work?
Now that we know how to unblur image online in GIMP, let’s test an image by sharpening it in the software and checking the results.
This is the before image:
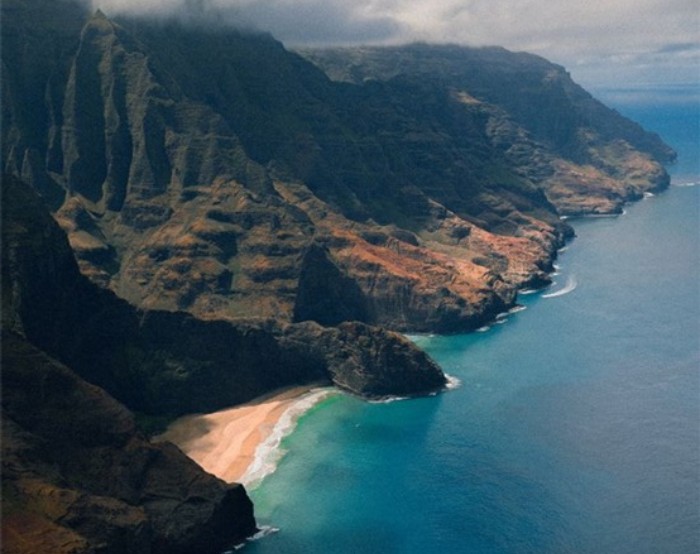 After following the same steps as shown in the how to sharpen image in GIMP guide, you will get an image close to this:
 GIMP allows users to set the intensity of the sharpening effect as well as add some filters for automatic work. Thus, users have some form of flexibility when it comes to editing and the results. This image, for instance, has a much better lighting, as evident from the vibrant ocean and mountains at the back.
Best Alternative to GIMP
| Product | Free | Speed | Multitasking | Compatibility | Online | Targeted Sharpen Model |
| VanceAI Image Sharpener | × (3 credits/month for trial) | √ | √(Sharpening image while enhancing image quality) | √(MacOS, Windows and more operating systems) | √ | √(Four Sharpen Models) |
| GIMP | √ | √ | × | √ | × | × |
How to use AI Image Sharpener from VanceAI?
A pretty good alternative to GIMP is VanceAI, an online image editing tool built from AI and Deep Learning technologies. We will show you how to use AI image sharpener.
1. Start by clicking on the link given above to access the application. There, you will see the app info throughout the page. Click on Upload Image to open the Workspace.
2. The Workspace is where you get to see your current image credits, select Workflow, select different VanceAI applications, and also upload pictures. Click on the box to select an image or drop the image directly onto it. Click on Start to Process to unblur image.
3. Now, go to the Processed tab and use the Preview button on the right of the image. Use the Download Image option to save the image in your local device. If you are interested, you can try to sharpen your image now or download it directly from the pop-up window on the right without leaving this article.

Performance of VanceAI
This image is downloaded from VanceAI Image Sharpener.
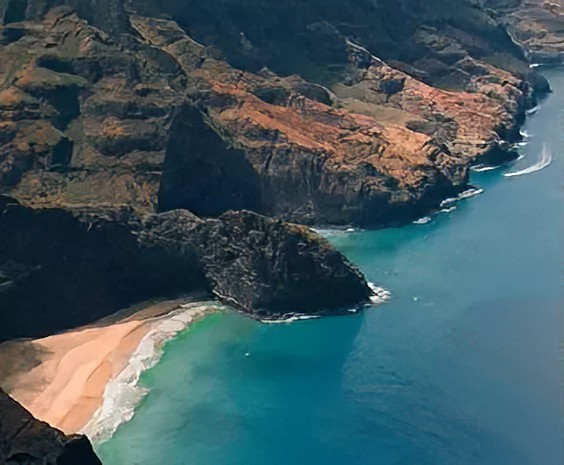
The image is noticeably clearer after being processed with the application. Since the application is designed to make AI unblur image, it is able to deliver great results with remarkable speed. Looking at the ocean, beach, and mountains, their details are more apparent in the After image.
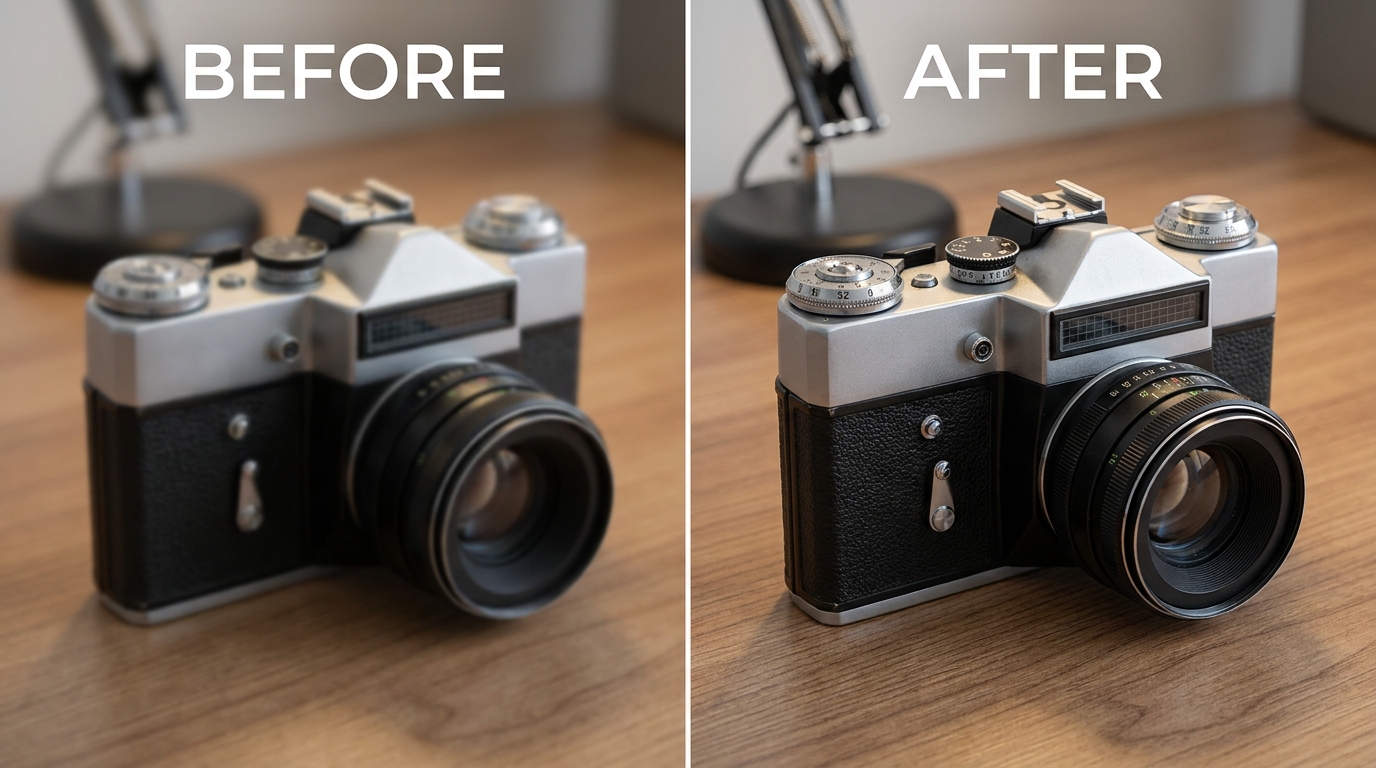
Where GIMP needs several manual steps, an AI sharpener rebuilds edges and texture in one click — the difference between the soft and razor-sharp versions above — with no layers or masks to manage.
Frequently Asked Questions
Is GIMP good for sharpening images?
GIMP can sharpen images well using filters like Unsharp Mask, but it requires manual adjustment and some experience to avoid over-sharpening.
Is GIMP really free?
Yes, GIMP is free and open-source for Windows, Mac and Linux, which is a big part of its appeal as a Photoshop alternative.
What is the best alternative to GIMP for sharpening?
For one-click, no-install sharpening, VanceAI Image Sharpener is the top alternative — it applies a dedicated Sharpen model in the browser without GIMP's learning curve.
Is VanceAI easier than GIMP?
Yes. VanceAI needs no layers, masks or manual filters — you upload, adjust one slider and download, which is far simpler than GIMP for quick fixes.
Is VanceAI free to use?
VanceAI lets you preview results for free, then downloads use its credit system so you only pay for what you process.
How does VanceAI's credit system work?
Monthly plans start at Starter (.95/100 credits), Standard (.95/200), Pro (.95/500) and Premium (.95/1000), plus pay-as-you-go, with unused credits rolling over up to 5x.
How do I fix a blurry photo without GIMP?
Use an AI sharpener that deblurs in one click — see our guide on how to make a blurry picture clear.
Can sharpening fix colored fringing?
Sharpening alone won't; that is chromatic aberration. Follow fixing chromatic aberration to remove color fringes.
What image formats does VanceAI support?
VanceAI supports common formats like JPG, JPEG and PNG, covering most photos.
Can I also enhance overall photo quality?
Yes. Beyond sharpening, an AI photo enhancer can improve color, contrast and resolution together.
Conclusion
GIMP is an amazing software to have, especially if you are a user who doesn’t prefer Photoshop. It is also a great choice for beginners who don’t want to pay for Photoshop straight away. However, in situations where you need stunning results in mere seconds, you can use an image resolution enhancer to level up your photos. It will deliver the best possible details and super HD output for you. It will also optimize your product photos by increasing resolution, sharpening details, correcting colors, and improving quality, and make photo HD.
Was this article helpful?

A passionate content writer. Mostly likes to write about technology and social media related topics. You can see more of my work over on my own blog Amaya Hamilton.


