Excited to print a favorite photo as a poster, only to see it turn blurry when blown up? Learn how to enlarge a picture to poster size without losing quality using an AI image upscaler, with a step-by-step VanceAI walkthrough, an honest tool comparison, and pro print-prep tips for sharp, wall-worthy results.
How to Enlarge a Picture to Poster Size Without Losing Quality
Last updated: Jun 23, 2026
Why Enlarging Photos to Poster Size Is Harder Than It Looks
Have you ever scrolled through your camera roll and thought, "That shot would look awesome on my wall"? Many of us have — excited to print a family photo or a favorite vacation snap, only to watch it turn into a blurry, pixelated mess when blown up to poster size. Isn't it supposed to be simple? Just hit "enlarge" and voilà? Sadly, not quite.
Most standard photo editors can't increase image size for large-format printing without quality loss. Online upscaling tools try to solve this, but they often leave images blurry or introduce strange digital artifacts.
That disappointment isn't just about technology — it's about wanting to relive a memory in crisp detail, not through a fuzzy blur. The truth is, making a photo sharp at poster dimensions comes with real challenges:
- Resolution limits: Most smartphone or social media images fall short of the pixel counts needed for an eye-popping print.
- Quality loss: Enlarging with basic editors simply "stretches" the pixels, leading to softness and jagged edges.
- Online tool woes: Plenty of "free" upscalers look tempting, but cap their resolution, watermark your creation, or output cartoonish results.
- Print costs: It stings to waste money on a big print that looks underwhelming.
The good news: with the right AI upscaler you can get pro-level clarity without Photoshop skills or expensive studio visits. Here is how to choose one and use it.
What Makes a Good AI Image Upscaler?
Essential Features Checklist
Not all AI upscaling tools are created equal. If you're serious about making your photos poster-worthy, here are the must-have features to look for:
- High upscale ratios (up to 8x or beyond): Can the tool reliably enlarge images for large-format prints like 24x36 inches?
- Output resolution limit: Does the service support 8000px or more on the long side?
- Edge and detail preservation: Are skin, hair, and typography kept sharp, or do they get weirdly smoothed out?
- Batch processing and speed: If you're prepping lots of images, can it handle them quickly?
- User-friendly interface: It should be "upload, click, done."
- File-type flexibility: Supports JPG, PNG, WEBP, and outputs print-friendly files.
- Transparent pricing: Free previews? Clear about watermarking or restrictions before you spend any credits?
To choose the best tool, focus on upscale ratio, output size, speed, and whether print details actually look natural — not just "digitally crisp."
Why Most Free Online Upscalers Disappoint
On paper, free is great. In practice, here's where most free upscaling tools fall short:
- Low resolution limits: Many "free" editors restrict your output to tiny web-friendly files — good luck printing those.
- Aggressive watermarks: Some tools slap a logo right in the center unless you pay.
- Artificial over-sharpening: You want a natural "wow," not an oil-painting filter.
- Privacy risks: Uploading family photos? Make sure the site isn't mining or sharing your data.
- Hidden costs: You get deep into a process, only to find the best features are locked behind a paywall.
If you're tired of finding out that "free" means "frustrating," a dedicated AI upscaler is worth the small investment.
Hands-On Review: VanceAI Image Upscaler
Step-by-Step Walkthrough (from upload to download)
Let's get practical. Here's how to use the VanceAI Image Upscaler to turn an ordinary phone picture into a crisp, poster-ready file — and it only takes a couple of minutes.
Step 1 — Upload: The drag-and-drop box is refreshingly simple. Upload your photo (for example, a vacation snap around 1.5 MB, JPG).
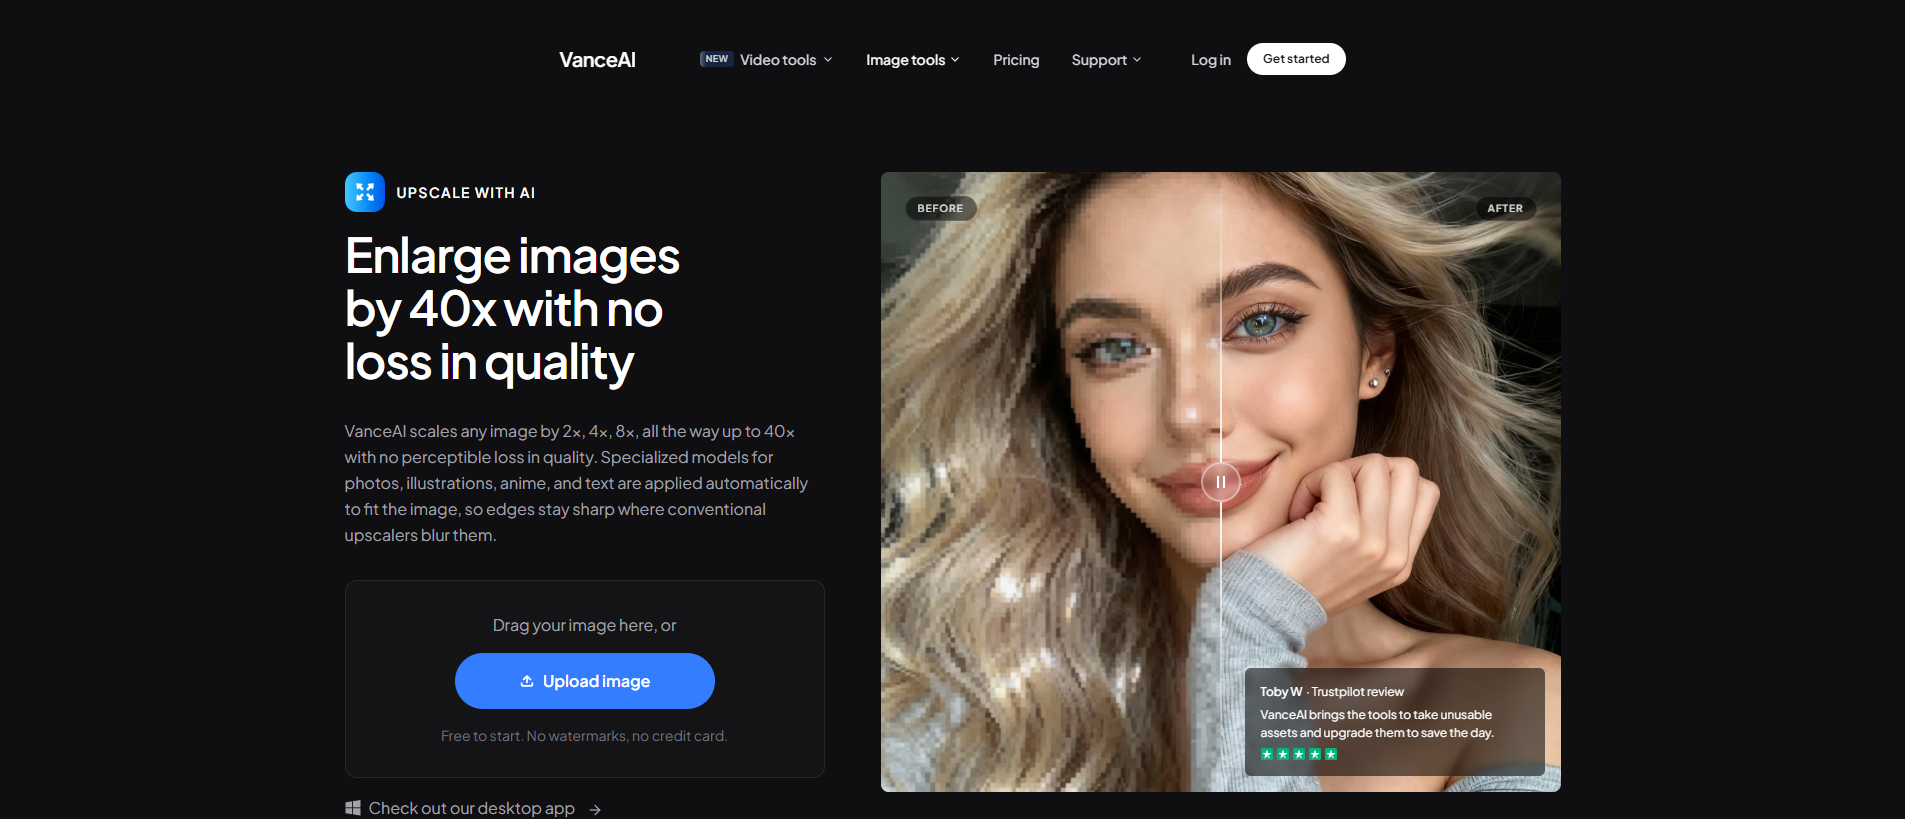
Step 2 — Choose upscale level: Select 2x, 4x, or up to 8x. For most posters, 4x works well if your source is mid-resolution; go higher for maximum sharpness.

Step 3 — One click: Hit "Start to Process" and wait about 10 seconds.
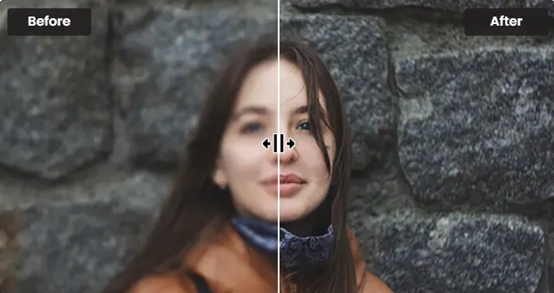
Step 4 — Preview: The side-by-side preview is instant. Drag the split line to compare details.
Step 5 — Download: Save as JPG or PNG, ready for printing.
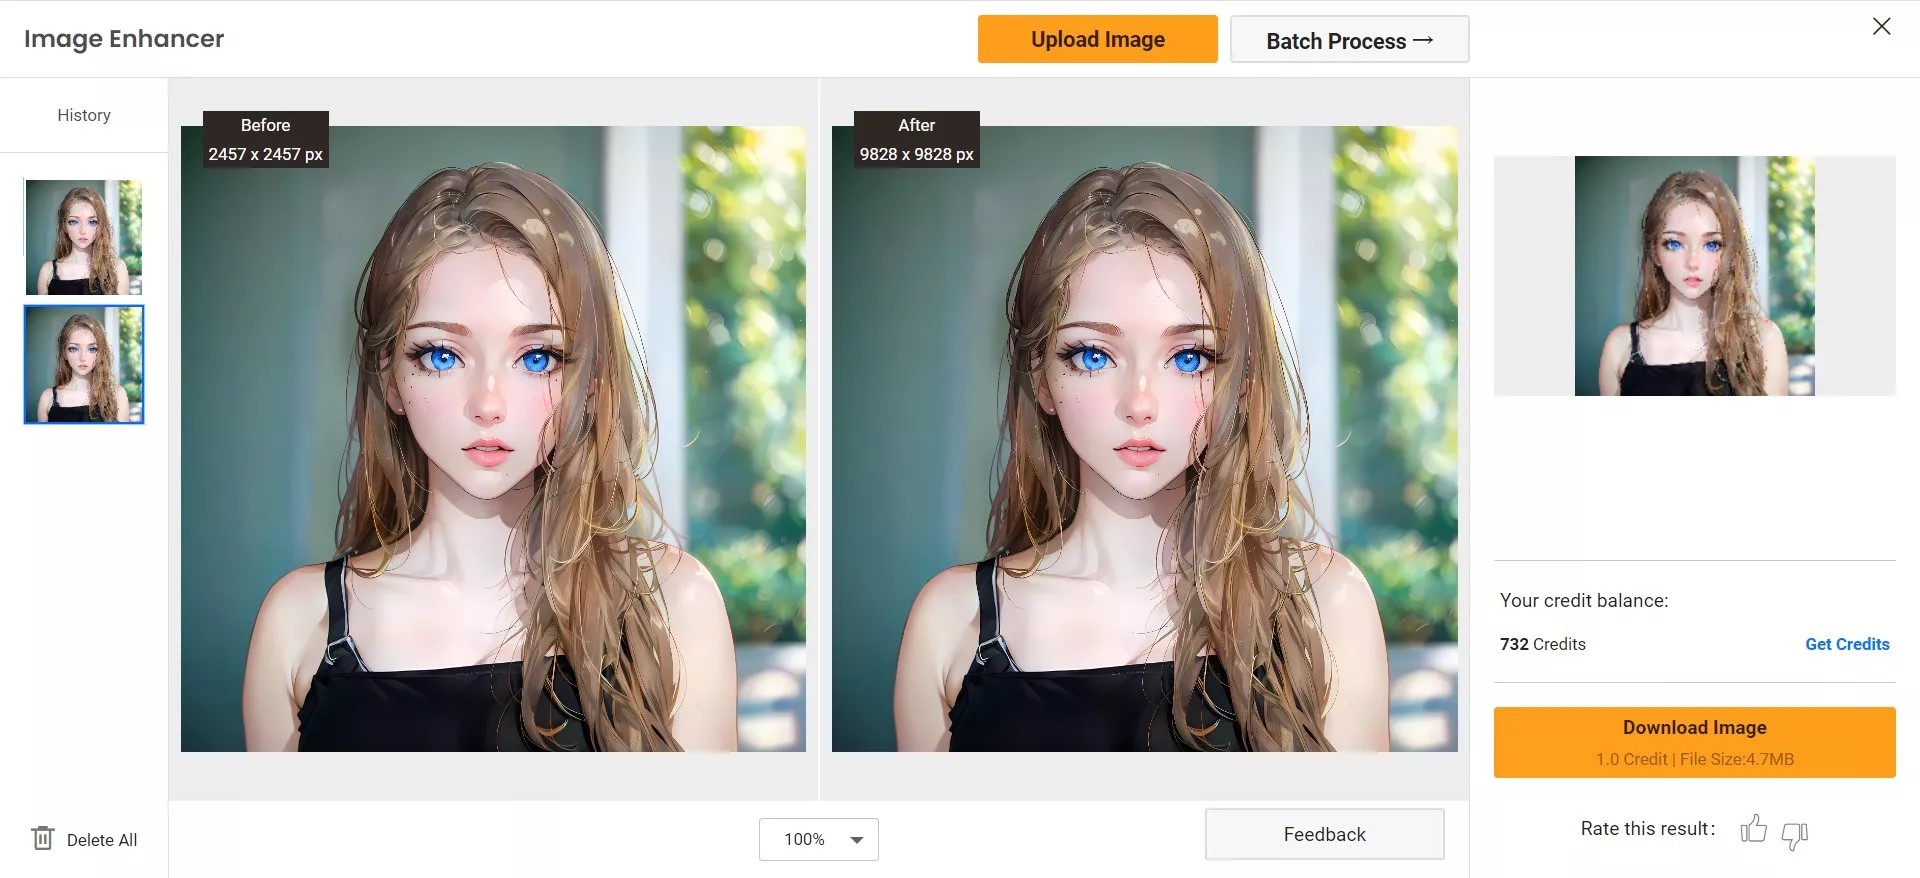
No 10-layer menus, no cryptic sliders — it is genuinely "set-and-go," no tech degree required.
Before-After Quality Comparison
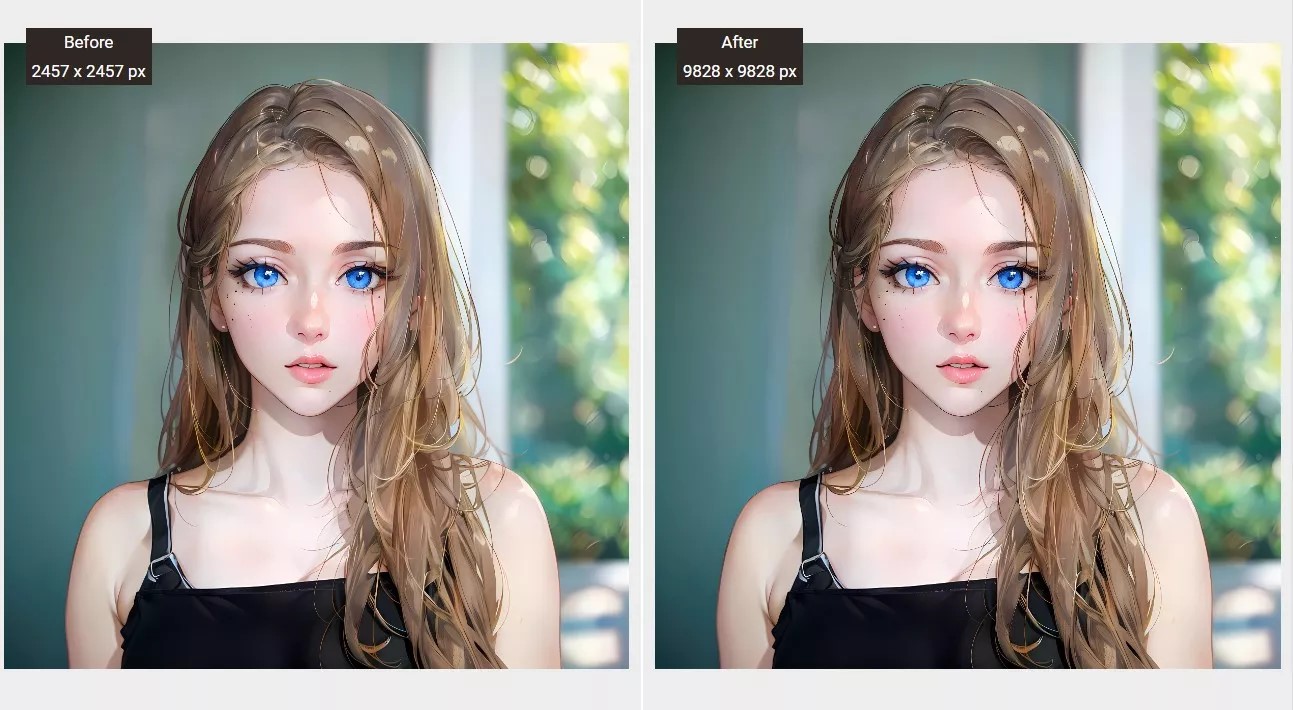
Zooming into an 8x upscaled portrait, the difference is obvious:
- Preserved textures: Skin, hair strands, even distant sand on a beach stay impressively clear.
- Edge sharpness: Glasses frames and facial outlines stay crisp, not fuzzy or blocky.
- Natural results: No "plastic beauty" or fake smooth-over that plagues many AI upscalers.
- Minimal artifacts: No weird lines, halos, or color blotches, even under close inspection.
| Detail area | Original (200%) | VanceAI upscaled (200%) |
|---|---|---|
| Skin texture | Blurry and patchy | Smooth, defined pores |
| Hair | Pixelated | Individual strands |
| Eyes / glasses | Soft outline | Sharp, clear lines |
| Background | Blocky | Natural edges |
The upscaled test print can genuinely look better than some pricier studio enlargements.
Typical Use Scenarios (who is it for?)
VanceAI isn't just for techies. It's for parents who want sharp, milestone prints in the living room; for artists bringing pen sketches and watercolor pieces into gallery-ready detail; for shop owners reviving product shots and retro logos into eye-catching banners; and for event planners who need fast, high-quality poster decor from "just okay" mobile snaps.
And honestly, it's for anyone who has been let down by free tools that promise big results but never quite deliver. Whether you're celebrating a family moment, prepping for an art show, or trying to wow a client, the right upscaler turns everyday images into something you'll be proud to print big.
Who Wins? VanceAI vs Other Online Upscalers
Quick Comparison Table
To see whether VanceAI really stands above the crowd, it helps to run the same photos through several popular online upscalers. Here's how they compare:
| Tool | Free quota | Max upscale | Max output (px) | Pricing model | Strengths | Drawbacks |
|---|---|---|---|---|---|---|
| VanceAI ⭐ | 3 credits/month | 8x (up to 40x) | 8000 | Credit-based, money-back, rollover | Great detail, natural look, fast, flexible output | Free quota low; credits needed for bulk |
| Let's Enhance | ~10 images | 16x | 5000 | Subscription | Affordable, decent UI, batch | Lower detail, capped at 5K px |
| Upscale.media | Limited web | 4x | 2048 | Freemium | Simple, quick for small images | Too low-res for big posters |
| Adobe Photoshop | 7-day trial | 2–4x | "Unlimited" | Subscription | Full professional editing suite | Steep learning curve, slow for simple upscaling |
VanceAI stands out for authentic detail, true-to-life results, and the ability to handle large poster-size projects with ease. Free tools work fine for simple web images but quickly hit their limits for high-quality posters, while Photoshop is powerful but often too complex and time-consuming for straightforward upscaling. Note that VanceAI runs on a credit system — you get 3 free credits per month, paid plans add more credits, every plan has a money-back guarantee, and unused credits roll over, so there is no per-tool license to buy.
Specific Benchmark Cases (faces, documents, art)
Three photo types are useful for benchmarking realism and sharpness:
- Portrait selfie: VanceAI gives crisp skin and clear eyes, where many tools make skin waxy or pixelated.
- Scanned document: VanceAI's "Text" mode preserves fine print and logo edges, where others blur them.
- Watercolor art: VanceAI's "Art" model keeps brush textures visible — no odd halos or washed-out colors.
In each test, VanceAI balances fine detail with natural results. Many free tools, by contrast, deliver harsh lines, digital smudges, or lost information. For tricky cases, the extra control and smarter models really shine. If you also need to sharpen a soft source first, an AI image enhancer helps clean up noise before you upscale.
Printing Your Poster: Size, Resolution, and File Prep Tips
Recommended Poster Sizes and Pixels
To print sharp, poster-size images, here are some quick rules.
Standard poster sizes and pixel counts (at 300 dpi):
- 24 x 36 inches (big poster): 7200 x 10800 px
- A2 (16.5 x 23.4 inches): 4961 x 7016 px
- A1 (23.4 x 33.1 inches): 7016 x 9933 px
VanceAI's 8000 px output easily covers A2 and nearly all A1 prints. For massive A0 banners, you may need to upscale in sections and stitch them together.
File Type Settings and Common Mistakes
- Choose PNG for best quality, especially if you plan to edit further.
- JPG is fine for direct printing, but always export at maximum quality.
- Avoid resaving compressed images; each round reduces detail.
- Check your printer's recommended specs — some shops want files in CMYK color mode.
Common mistake: up-sizing too little (ending up with visible pixels), or sending low-grade web files that look blurry in print. When in doubt, output bigger.
How Much Does It Cost to Print?
Typical poster printing runs from $10–$30 per 24 x 36 inch print at most online shops. Local prices vary, but sending a sharp, print-ready file always saves headaches and avoids costly do-overs.
Conclusion
Enlarging a picture to poster size without losing quality used to mean expensive studio scans or hours in Photoshop. With an AI upscaler like VanceAI, it takes a few clicks: upload, pick your ratio and model, and download a sharp, print-ready file. Start with the best original you have, match your output to the poster size you need, and you'll get a wall-worthy print without the guesswork — or the surprise disappointments.
FAQs
Will upscaling an old or low-res photo really make it look good at poster size?
It depends on the starting quality. VanceAI's AI can improve most images significantly — especially when the photo is sharp and well-lit — but it can't add detail out of thin air. For the best posters, start with the highest-resolution original you have.
Can I enlarge iPhone or Android photos to poster size?
Yes. Most recent phones shoot at 12 MP or more (4000 x 3000 px+). A 4x or 8x upscale can easily reach A2 or even A1 size, which is ideal for wall art, family posters, or art prints.
Is there a watermark on the free version?
VanceAI's free credits let you test the tool, and paid credits unlock full high-resolution output up to 8000 px without watermarks. Always preview before downloading so you know exactly what you'll get.
Do I need any editing experience?
No. VanceAI is beginner-friendly — just upload, select your upscale setting, and click "Start." No Photoshop or complex settings required.
Is my privacy safe?
VanceAI states that uploads are deleted from its servers after processing. As always, read the privacy policy if you're handling sensitive images.
How do I enlarge a picture without losing quality?
Use an AI upscaler that reconstructs detail rather than simply stretching pixels. Upload your image, choose a 4x or 8x ratio, pick the model that matches your content, and download the high-resolution result for printing.
What resolution do I need for a 24x36 poster?
For a crisp 24 x 36 inch poster at 300 dpi, aim for roughly 7200 x 10800 px. An 8x upscale from a decent phone photo gets you close, and even 150–200 dpi can look fine for posters viewed from a distance.
What is the best AI upscaler for poster printing?
Look for high upscale ratios, large output resolution (8000 px+), and natural detail retention. VanceAI checks these boxes with up to 8x upscaling, 8000 px output, and dedicated models for photos, art, and text.
Can I upscale images in bulk?
Yes. Batch processing lets you upscale many images at once, which is useful when prepping a series of posters or product shots. Bulk jobs consume more credits, so plan your plan accordingly.
Which file format should I send to the print shop?
PNG is best for maximum quality and further editing, while a maximum-quality JPG is fine for direct printing. Confirm whether your shop prefers RGB or CMYK before exporting.
Was this article helpful?

A passionate content writer. Mostly likes to write about technology and social media related topics. You can see more of my work over on my own blog Amaya Hamilton.


