Tips and Tricks: How to Fix an Out-of-Focus Picture
You bought a camera and started photographing everything you see around it. But some of the pictures don't come out as they should. If you are not satisfied with the result, you can use some tools to make photo hd. To overcome this moment victoriously, I want you to read very carefully and then apply everything you learn.
In this article, I will talk about what causes out of focus images, what are the focus modes and focus points for a technically correct photo. Also, you will learn how to fix an out of focus picture through image enhancer, AI photo enhancement and editing tools. With one click you can save a defocused picture.
Table of Contents
What causes out of focus pictures?
When you shoot your subject is not always in focus, is it blurry? I thought so. At first, focusing a subject was one of my biggest problems. I was one of out of focus photographers, but not in a good way. After a few months of practice (shooting and editing), I managed to take more and more successful photos. So, over time, I realized where I was wrong: the camera was set to autofocus mode. Even if this mode is useful, sometimes it gives you headaches. This is the major problem, but there are many reasons that cause an out of focus picture.
- 1.While the shutter is open, the subject moves
- 2.While the shutter is open, the camera moves
- 3.Depth Of Field is too low
- 4.Pressing the shutter button too quickly

How to avoid shooting out of focus photography?
Reasons 1 and 2 are self-evident, they are obvious. Its solution is to try to avoid these behaviors.
The third reason, when dealing with a narrow depth of field (for example, macro photography), it is difficult to estimate the optimal distance to the point of maximum sharpness. At least, trying to focus on backgrounds. In addition, if the subject is very small, the camera will be difficult to focus, and many novice photographers fool themselves into believing that everything is fine if they hear the click characteristic of a successful focus. In reality, the camera may have focused behind the subject, and this is visible after the photo is taken.
Reason 4. Basically, the camera does not focus before exposing. Most devices require some time (usually milliseconds) to determine which object is closest and calculate the distance to it. Depending on the lighting conditions and settings used, this time may be longer or shorter. So, take your time and your...camera time.

I mentioned earlier the autofocus mode. Well, this is an entirely different story. Unfortunately, this is not smart enough to always guess the best targeting strategy. So, on some occasions, you will get an out of focus background picture. When you leave the camera on autofocus, focus algorithms interpret the framed scene and evaluate different aspects to determine which point should be focused on. But it is not good enough, I recommend to get use these modes:
- AF-S (Nikon) or One Shot (Canon) - this mode is recommended whenever you photograph still subjects: still life, portraits, landscapes etc. With this, you will avoid an out of focus picture.
- AF-C (Nikon) or AI Servo (Canon) – Get rid of out of focus pictures using this mode when you have subjects such as animals, children, athletes. In situations where the automatic mode fails and you get unwanted results, evaluate which of the other two modes can be useful. And don`t forget: keep your hands steady.
As you can see, there are lots of causes of out of focus pictures. I didn't even mention some of them. This subject is quite vast. The great news that everything has a solution. If the above doesn't work right now for you, just use VanceAI Image Sharpener with confidence. He saved me many times. This can fix an out of focus picture in a blink and it is not necessary to have a technical skill, thanks to the VanceAI technology.
Also, maybe you are interested in fix grainy night photos.
How to unblur out of focus pictures with AI Image Sharpener?
Step 1. Click image clearer to go to the home page.

Step 2. Click Upload Image to adjust parameters in VanceAI Workspace
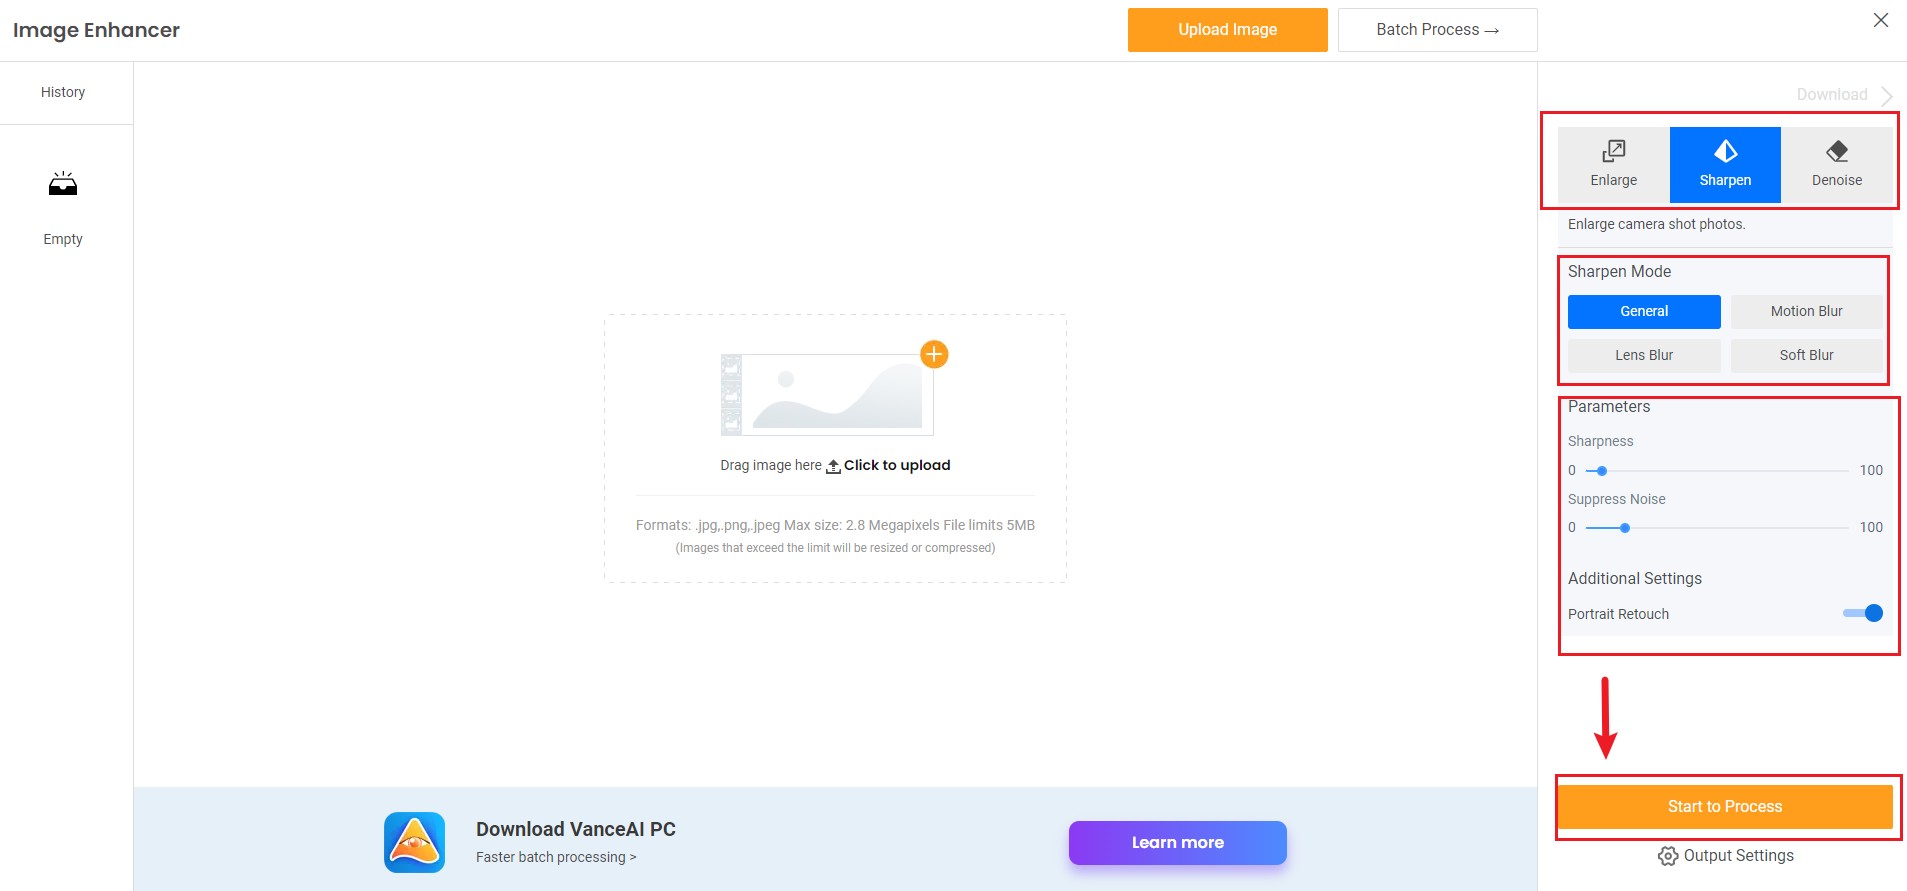
Step 3. Preview and download image. If you are interested, you can try to sharpen your image now or download it directly from the pop-up window on the right without leaving this article.
And the out of focus picture:
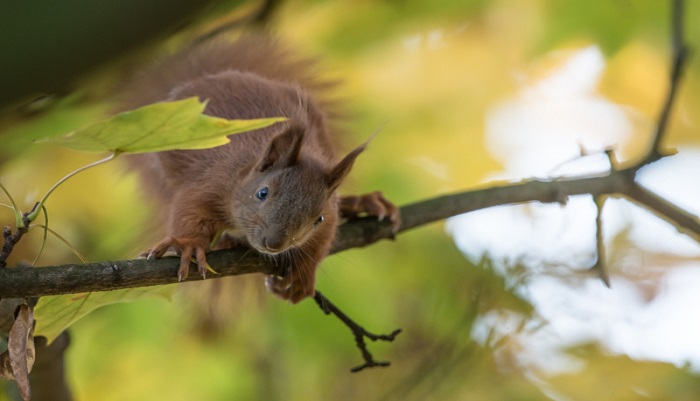
And AI unblur image to give the really stunning result.
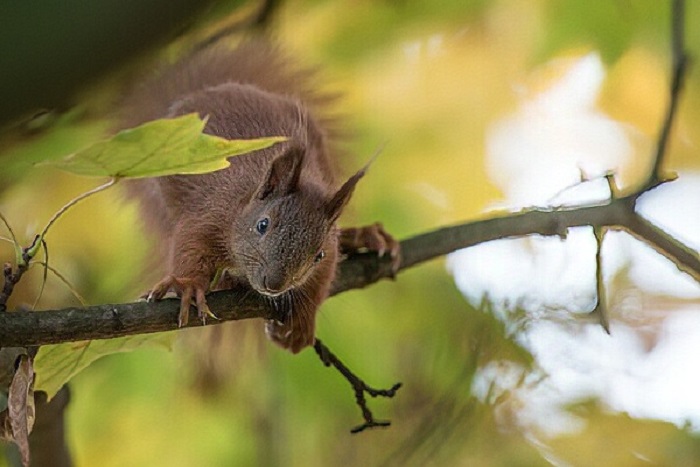
Obviously, the squirrel is sharper as you can see in the picture processed by this image sharpener. Her fur and face are clearly visible, and the rest of the elements have kept their blur. This is very good because this program knows how to differentiate between foreground and background and the native blur obtain by the camera, thus making it possible to unblur image online.
How to fix out of focus pictures with AI Image Denoiser?
Step 1. Click Image Denoiser and it will take you to the site of this software. Then, click "Upload Image”.

Step 2. Prepare to Denoise your out of focus pictures. Use the "Degree” slider bar, in order to adjust the level of denoising. Click "Start to Process".
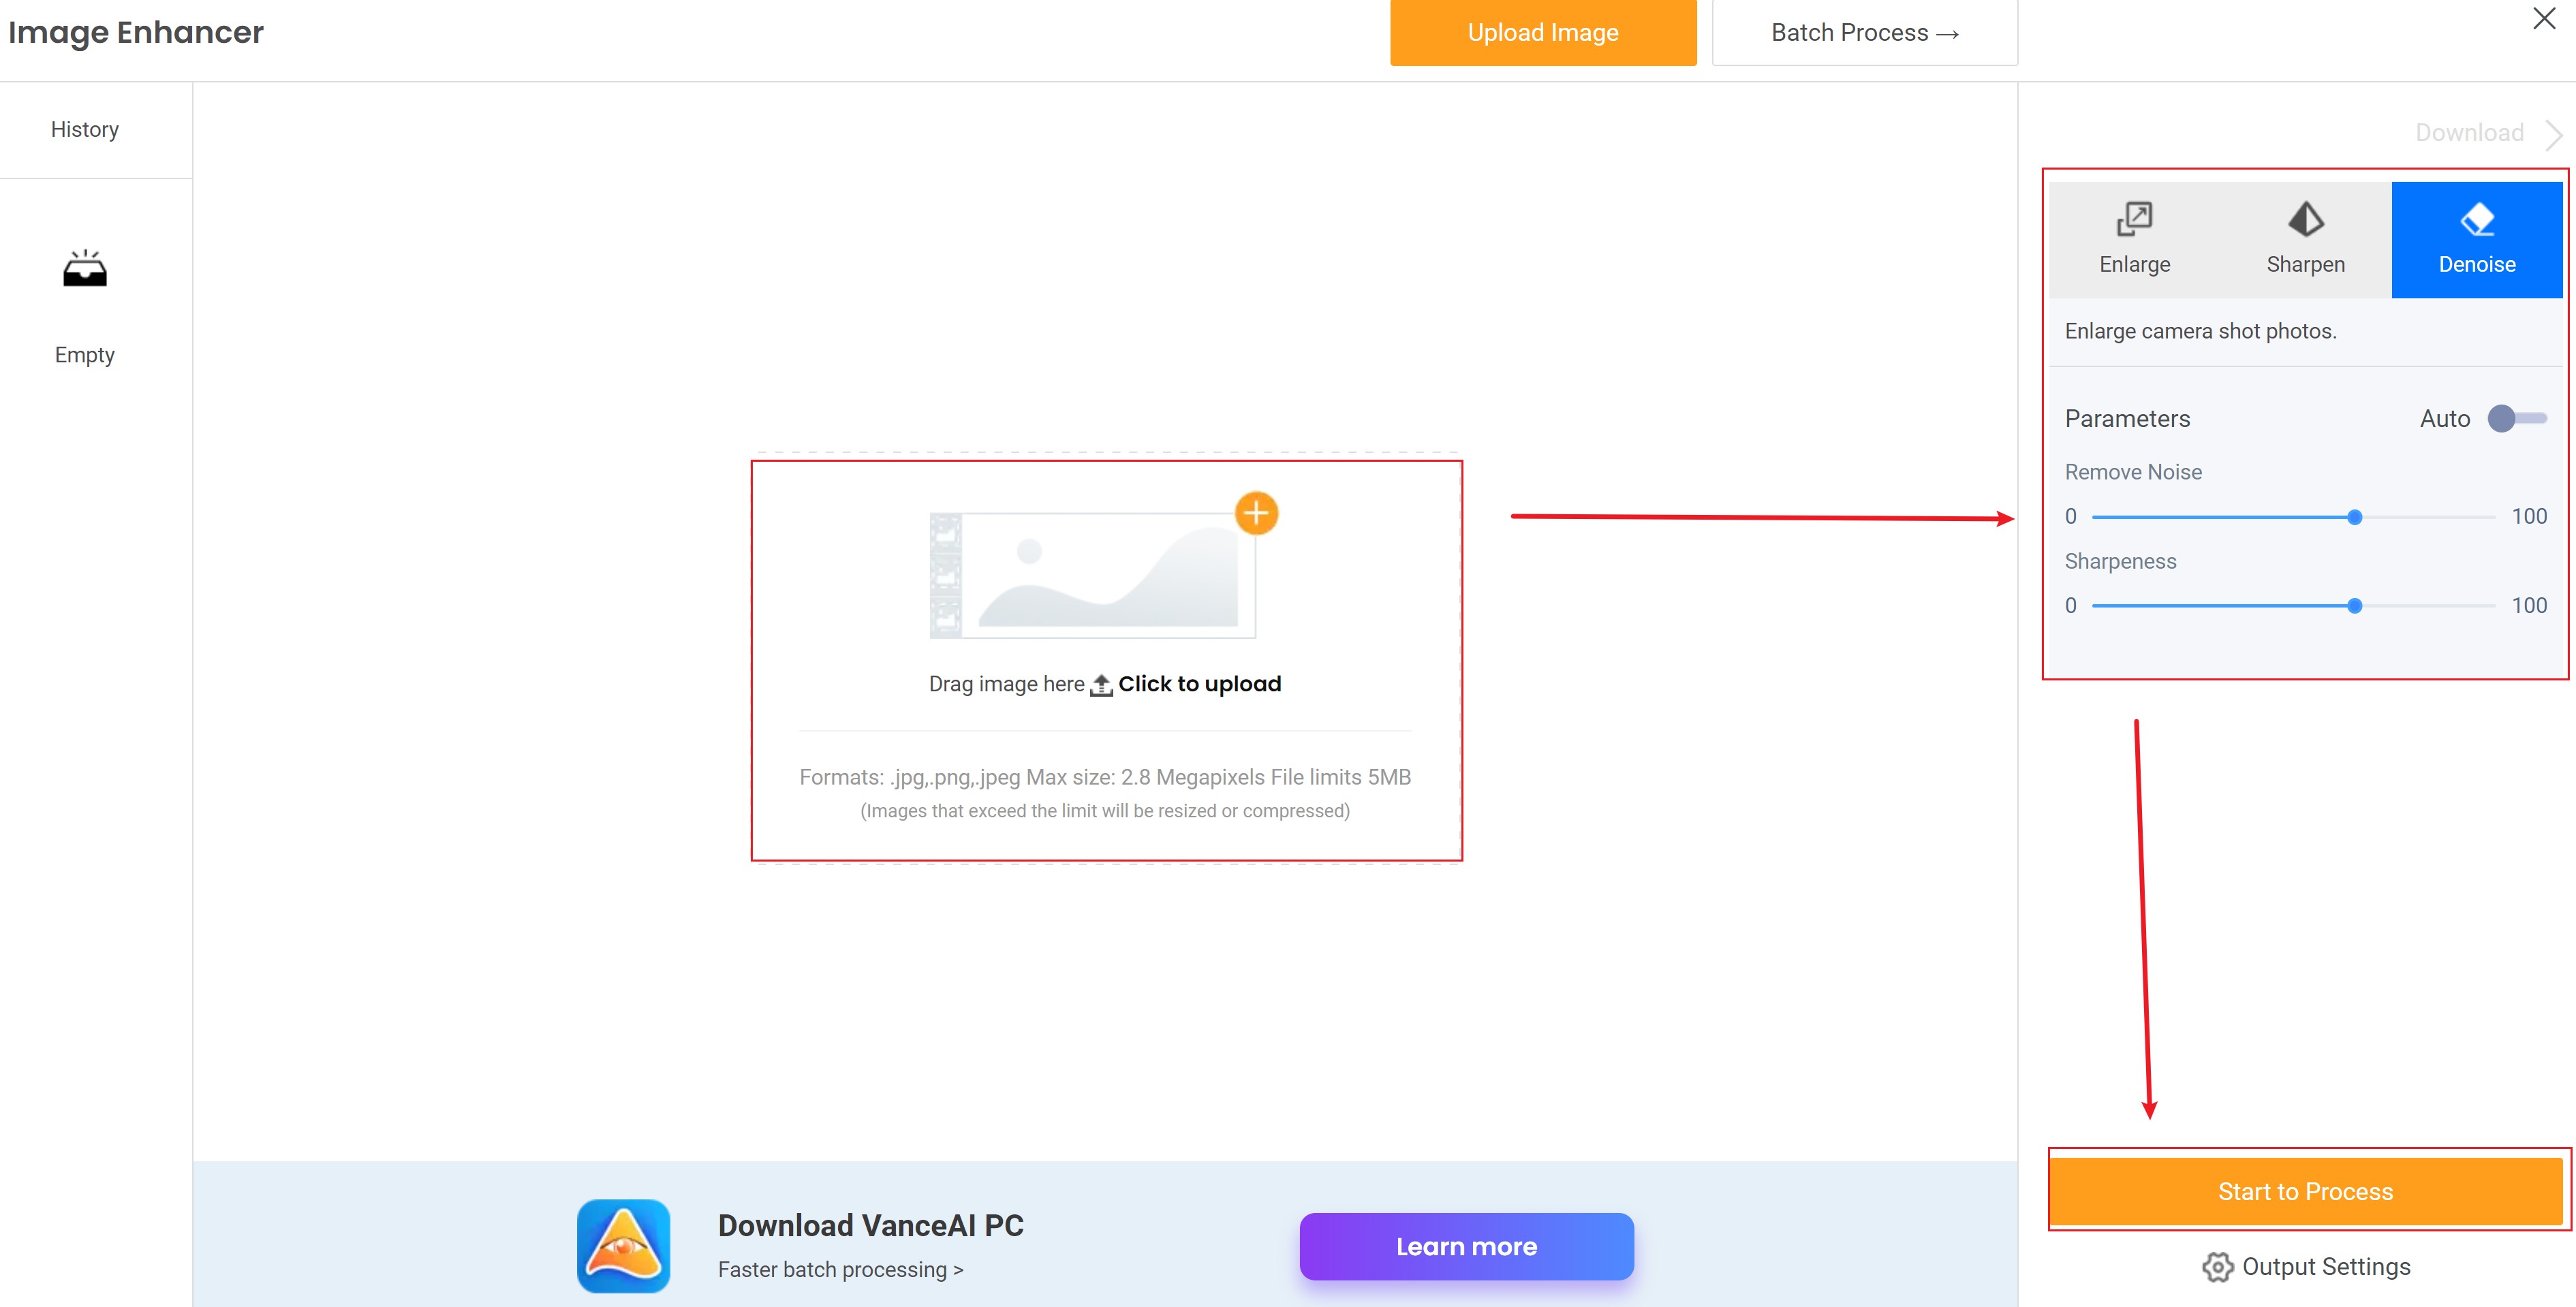
Step 3. Preview and download image
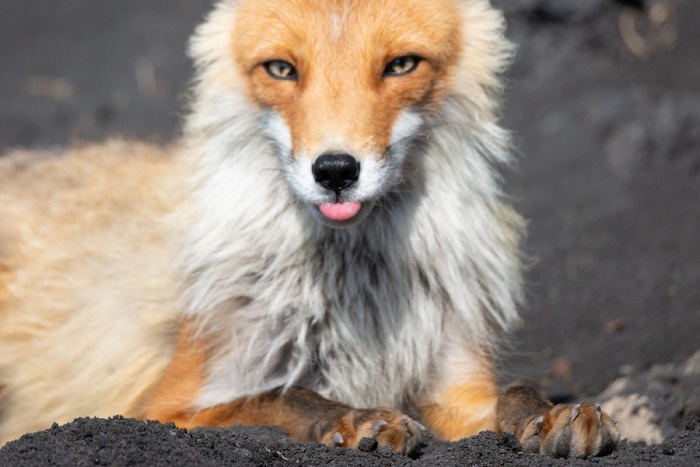
Ok, here is the out of focus picture:
And here is the fixed photo:
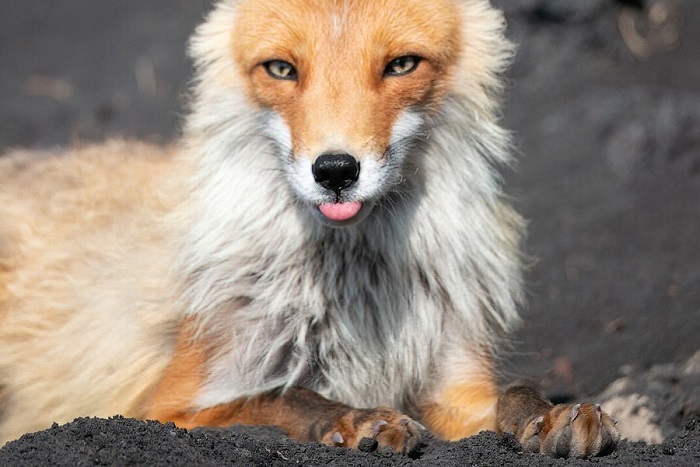
The differences are really visible. I can't believe how an out of focus picture can be restored with a few clicks. If you look at the animal's face, nose, eyes, tongue, you will see that they are much clearer now. The subject is sharper.
Conclusion
I hope these tips and tricks will help you unblur your image, even though they have been briefly described. You can restore an out-of-focus picture in a matter of seconds. Also, you can use an image resolution enhancer to level up your photos. In any case, even a professional photographer can miss an important photo. That's why there is a VanceAI Image Sharpener.


