
Taking a screenshot is pretty useful for keeping records or fixing any issues because unlike typical wallpapers, designs, or covers, screenshots include the entire screen and hence reveal everything going on. With that said, this is a guide on how to crop a screenshot on Mac. After that, we will also go over how to edit a screenshot on Mac to enhance photo. Both of these aspects and skills are equally important because they help you to properly highlight issues or points that you would want to communicate to the receiver of your screenshot. Sometimes, taking a screenshot is not as easy on desktop as compared to how it is on mobile. With this guide, you will know how to crop a screenshot on a Mac easily and quickly.
Table of contents
How to crop a screenshot on Mac?
Before we go on to cropping a screenshot, it is important to know how to take a screenshot on Mac in the first place.
1. While there are multiple quick keyboard commands for taking a screenshot, the Shift + Command + 3 command can be considered ideal since it gives you more options. This command is simple as it simply takes the screenshot first and shows a quick thumbnail on the corner of your screen.
2. By pressing the thumbnail, you can then edit a screenshot on Mac. Otherwise, search for the image in your local directory and choose the Edit option.
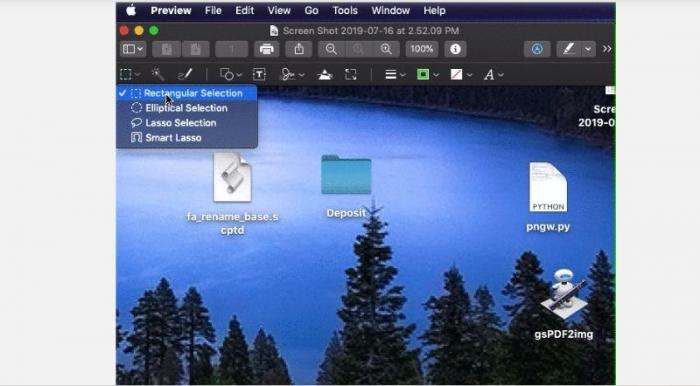
3. Use the drag box tool to select the area that you want to keep in your image. Apply your changes. Mac will save those changes instantly and you can then go over to the File tab and save the cropped image in your device.
In short, how do you crop a screenshot on a Mac? Simple. Press Shift + Command + 3, click the thumbnail when it pops up, use the drag tool to mark the cropping area, and save.
How to edit a screenshot on Mac?
More often than not, you do need to make changes and edits to the screenshot in order to make it presentable to others. In such cases, having a professional photo editing application such as the AI image upscaler can help a lot. The image upscaler app can enhance your image through resolution and quality and make photo hd. If you want to use the screenshot somewhere, chances are that its quality isn’t up to the mark. Now that you know how to crop a screenshot Mac or otherwise, let’s see how to edit it.
1. Use the link given above to access the website and click on Upload Image to proceed ahead. This will open up the VanceAI Workspace.
2. This is where you can upload images and more. Use the upload button or simply drop the image directly there. Click on Start to Process.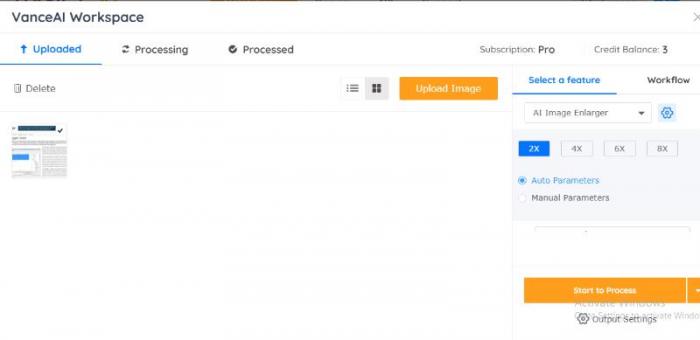
3. Go to the Processed tab, use Preview, and click on Download Image to save your image.

About VanceAI
VanceAI is an online and offline based image editing product that offers many options to improve your image quality while also offering creative tools for design related tasks. With tools such as AI image enlarger, AI image cropper, AI background remover, etc you can give your image much needed polish before sharing it out. Apart from that, you can also engage with tools such as the AI photo to sketch converter, AI photo colorizer, AI color correction, etc to enhance your images and make them look artistic and aesthetic.
The photo enhancer offers around three image credits per month for free whereas the paid versions start with the Basic account, costing at $9.99 per month with useful features and more credits.
Conclusion
Now you know how to crop a screenshot on Macbook and also how to edit in a way that makes it sophisticated and shareable. In just a few quick steps, Macbook allows you to take accurate screenshots and the steps can be followed easily enough by anyone. Additionally, the photo enhancer of VanceAI recommended also can enhance the resolution of your screenshots to a higher level within several seconds. Make better screenshots with AI image enhancer easily. One click to increase screenshot resolution and get your them crisper, cleaner, and ultra HD.