What is DPI (Dots Per Inch)?
DPI (Dots Per Inch) refers to the number of printed dots packed into one linear inch of an image. It measures print resolution — how much detail your printer lays down. A higher DPI means more dots per inch, which produces sharper, more detailed prints. A lower DPI spreads each dot across more space, which is why low-DPI photos look fuzzy or pixelated when printed at any meaningful size.
DPI vs PPI — what's actually different?
DPI and PPI are often used interchangeably, but they describe different things.
| Metric | What it measures | Where it lives |
|---|
| DPI (Dots Per Inch) | Print resolution — physical ink dots laid down by a printer | Print only |
| PPI (Pixels Per Inch) | Display resolution — how many pixels fit in one inch on a screen | Digital screens |
In practice, when you "change DPI" in image editing software, you're really setting a metadata tag that tells the printer how densely to lay down dots. The pixel count of the file itself doesn't change unless you also upscale the image. That's the catch — increasing DPI without increasing pixel count doesn't actually add detail. To get a sharper print, you typically need to upscale the image (add pixels via AI) AND tag the new file with a high DPI value.
Why DPI matters — print vs digital
High-DPI images (300 DPI or more) are essential for professional prints, magazines, and marketing materials. Low-DPI images (72-96 DPI) are usually fine for digital displays where a screen handles the rendering. The mismatch is what trips most people up: a 72-DPI photo that looks crisp on Instagram falls apart the moment you print it at A4 or larger.
When you increase image DPI through standard resizing tools, you almost always lose some detail in the process — interpolation guesses at new pixel values and the result is softer than the original. That won't happen when you're using an AI tool like VanceAI's image enhancer, because the model reconstructs detail rather than just stretching pixels.
Print-size lookup table (300 DPI)
If you know the target print size, here's how many pixels you actually need at 300 DPI (the standard for professional print).
| Print size | Pixels needed (at 300 DPI) | Common use |
|---|
| 4×6 inch (postcard) | 1200 × 1800 | Family photo print |
| A5 (5.8×8.3 inch) | 1748 × 2480 | Small flyer |
| A4 (8.3×11.7 inch) | 2480 × 3508 | Document, magazine page |
| 8×10 inch | 2400 × 3000 | Framed photo |
| A3 (11.7×16.5 inch) | 3508 × 4961 | Large poster |
| A2 (16.5×23.4 inch) | 4961 × 7016 | Wall poster |
| 24×36 inch (movie poster) | 7200 × 10800 | Large-format print |
If your current image has fewer pixels than the right column above, upscaling is the first step before changing DPI.
How to increase DPI with VanceAI Image Upscaler
The VanceAI Image Upscaler uses AI algorithms to upscale images by up to 8 times their original size without losing detail. It also includes sliders for noise and blur adjustments to preserve quality. The headline difference vs traditional resizing: the AI synthesizes the missing pixels rather than guessing through interpolation, so the result is sharper and more believable. Here are the three steps.
How I tested: I ran three real test images through the upscaler — a 225×225 pixel icon, a 620×330 web banner, and a 1280×720 stock photo — all at default settings. Results below.
Step 1: Upload Your Image
Visit the official VanceAI website and pick the Image Enlarger from the AI Solutions menu. Click the Upload Image button.
Step 2: Adjust the Settings
Choose how much enlargement you want — anywhere between 2X and 8X. You can also pick a model based on image type (we cover the 5 models below). Click Manual Parameters if you want to dial in blur and noise yourself, or stick with Auto Parameters for a one-click run.
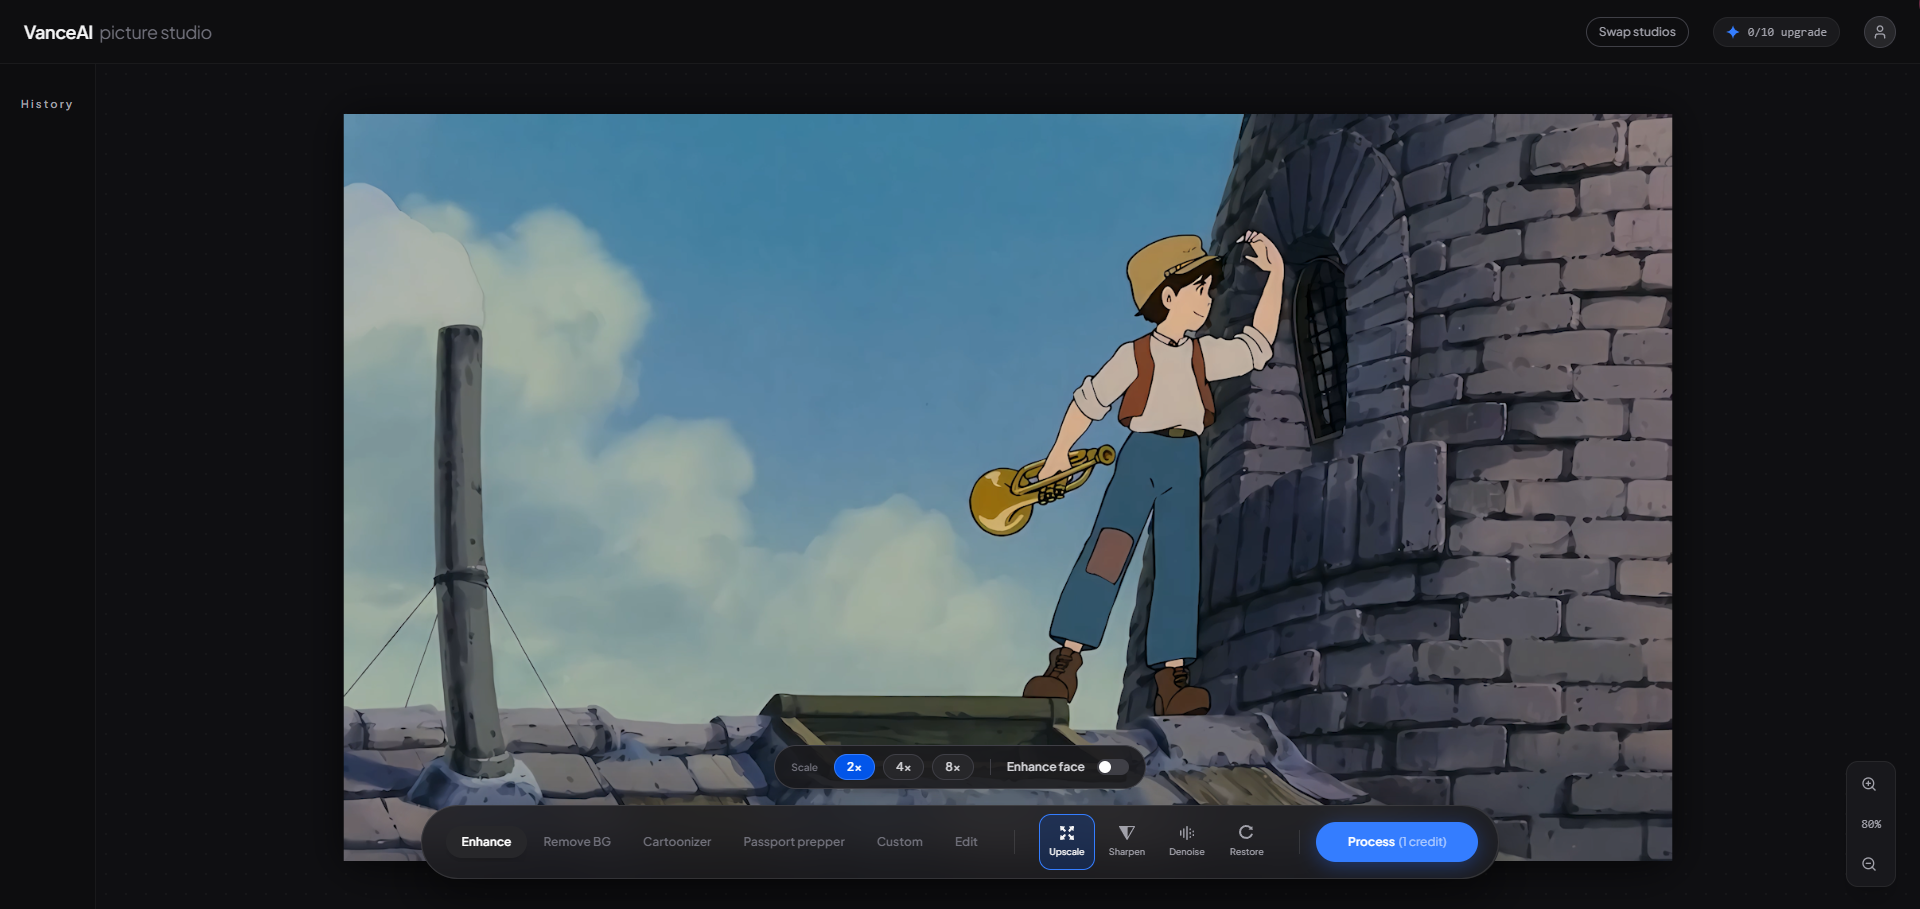
Step 3: Download Your Enlarged Image
Start the upscaling process and wait a few seconds. In the process, you've already increased the image DPI — the file now has enough pixel count to be tagged at 300 DPI for print. Click preview or download directly.
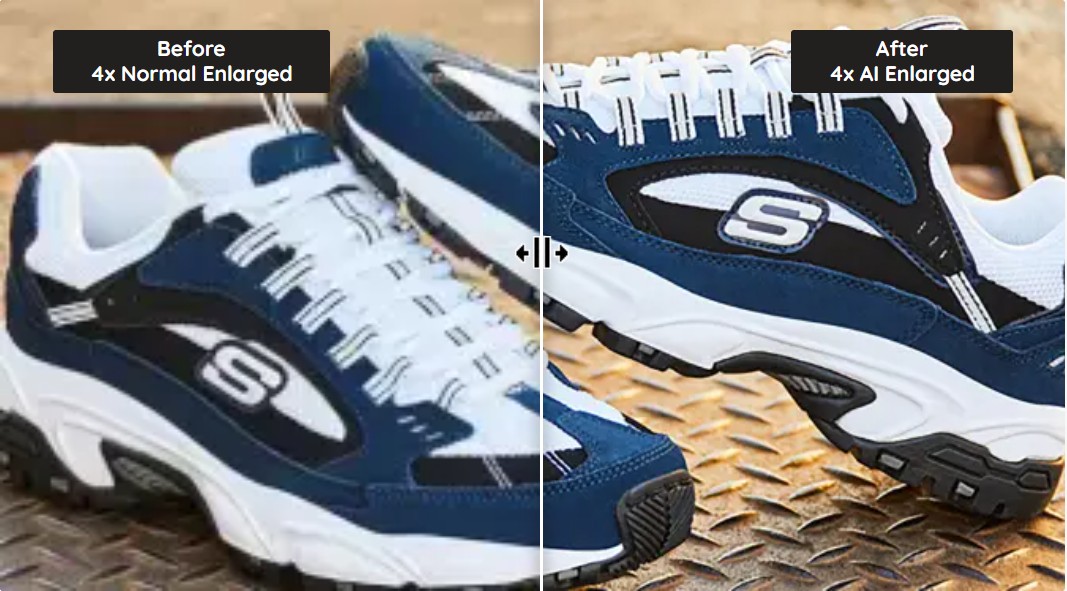
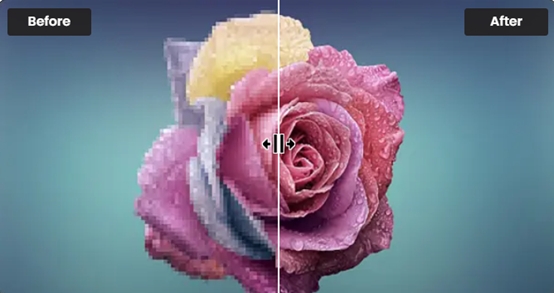
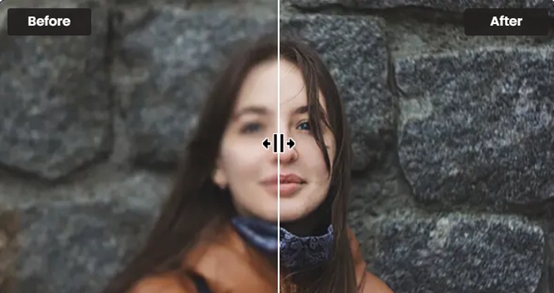
The first image was originally 225×225 px and we used the 8X option to upscale it to 1800×1800 px. The result was ready in just a couple of seconds via Image Upscaler, and we noticed no visible quality loss. For reference, the left side of the comparison shows what the same image would have looked like if it were upscaled without AI — soft, fuzzy, classic interpolation result.
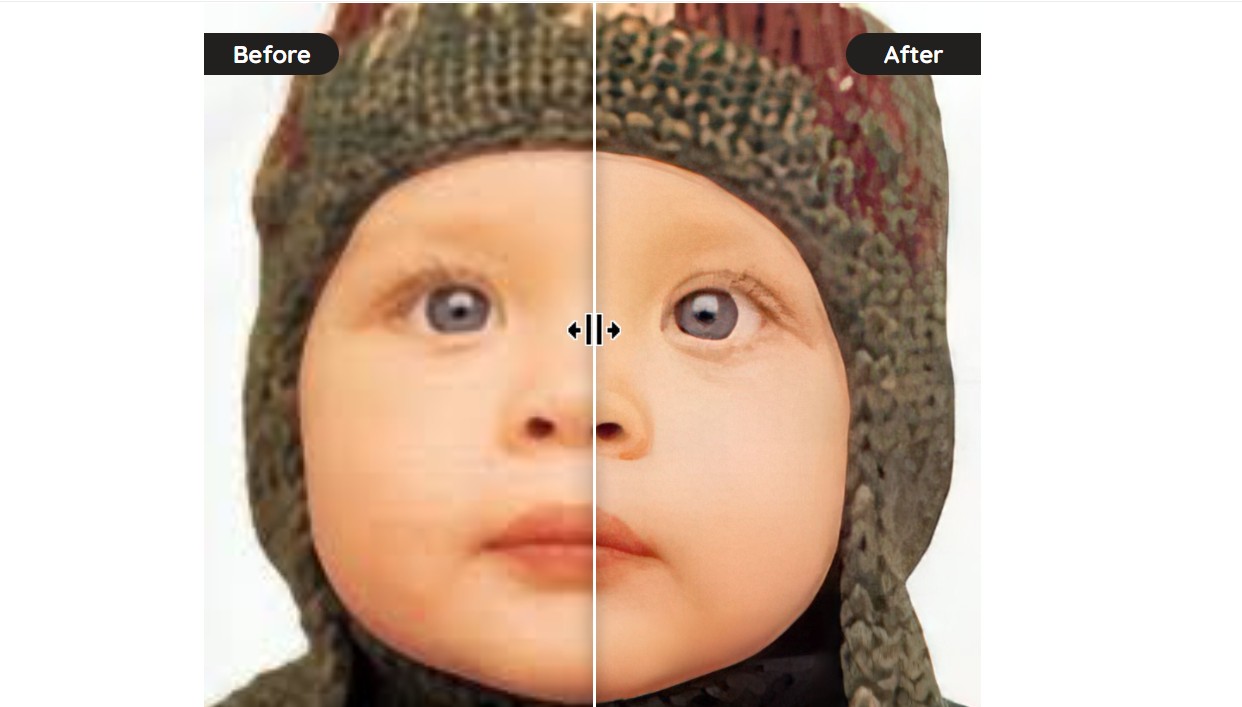
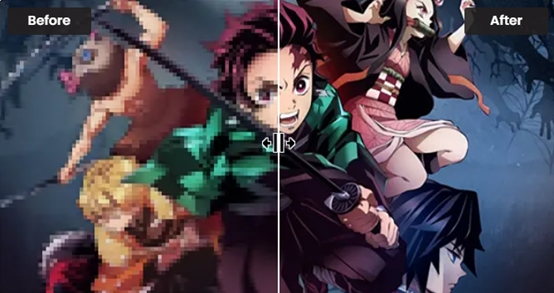
For the next test we enlarged a 620×330 px source by a factor of 4, finishing at 2480×1320 px. The process took roughly 5-6 seconds and the result was clear, with sharp edges and no visible noise. That output is already well past the 300 DPI threshold for an A4 print at 8.3 inches wide.
Diverse AI upscaling models to increase DPI of image
The VanceAI Image Upscaler provides 5 different image upscaling models. Let's look at how to pick the right one for the kind of image you're working with.
Standard
One of the upscaling models from VanceAI Image Upscaler is the Standard model, called EnlargeStable. It enables you to upscale any kind of image, including photos taken by camera, paintings, and landscape photography.
Anime
The Anime model of VanceAI Image Upscaler is the best option for anime upscaling. This model can convert old cartoon, anime, and comics to high definition and improve detail. It is divided into 3 submodels: Anime_4x_AnimeSharp, RealEsrganStable, and Upconv_7. Simply choose one and upscale animation to 2K, 4K, or 8K. You can also explore creative directions via our convert photo to outline drawing guide.
Art & CG
The Art & CG model of this image upscaler enlarges CG, art images, drawings, or paintings online and restores the original texture instantly. This model is called Universal_UltraSharp_4x. If you want an AI art upscaler to improve image resolution and show details more clearly, VanceAI's Image Upscaler handles it cleanly.
Text
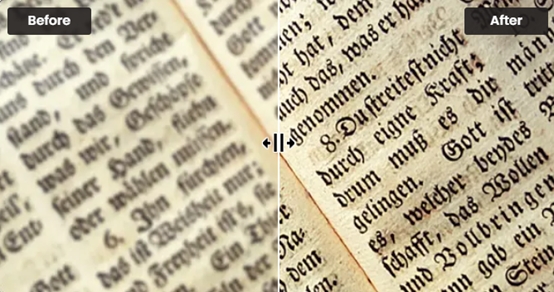
Legible text images can be essential — e-signatures, e-contracts, and scanned files. VanceAI Image Upscaler provides a text model called Text_4x_TextSharpV1 to AI upscale images with blurred text. If you're working with paper documents, this online image enlarger keeps the characters legible after scaling.
Low Resolution & Compressed
The Low Resolution & Compressed model can upscale heavily compressed or small pictures to HD in one click. If you need cleaner product photos, portraits, or wallpapers, this model handles them well.
If you're choosing between DPI upscaling tools, here's how the leading options compare.
| # | Tool | Best for | Max upscale | Pricing | Free? |
|---|
| 1 ⭐ | VanceAI Image Upscaler | AI upscale + DPI bump, 5 specialized models, sharpest output | 8X | credits-based from $5.95 / 100 credits | 3 free credits on signup |
| 2 | Photoshop (Image Size) | Manual control, granular curves | unlimited but quality degrades fast | $22.99/mo Creative Cloud | trial only |
| 3 | Let's Enhance | Web-based AI upscaler, batch | 16X | from $9/mo | 10 free credits |
| 4 | img2go (DPI tool) | Simple metadata DPI change (no upscale) | n/a | free with caps | yes |
| 5 | Upscayl (desktop) | Open-source local upscaler | 4X-8X | free | yes |
The decision: if you want a metadata-only DPI tag change for a print shop that just needs the right number in the file header, a basic tool like img2go is fine. If you actually want sharper output at a larger size (which is what most users mean by "increase DPI"), an AI upscaler is the only honest answer.
How to increase DPI in Photoshop (manual method)
For the Photoshop crowd, here's the equivalent manual workflow.
- Open the image (File → Open).
- Go to Image → Image Size.
- Uncheck "Resample" so changing DPI doesn't change pixel count.
- Set Resolution to 300 (or whatever target DPI you need).
- To actually add detail, re-check "Resample" and set Resample method to "Preserve Details 2.0" (Photoshop's AI option). Increase the pixel dimensions.
- Click OK. Export with File → Export → Export As.
The Photoshop route gives more manual control but doesn't match modern AI quality on heavy upscales. For anything beyond 2X, the AI tool produces visibly cleaner edges.
How to avoid taking a photo with a low DPI?
If you take photos with a mobile phone, keep your hand steady to avoid blur — modern phones can already shoot at very high resolution. If you're a photographer, use a good DSLR or mirrorless camera and pick proper lighting. Shoot in RAW where possible so you have the maximum data to work with.
How to check DPI of an image online
- Windows: right-click the file → Properties → Details. The DPI is shown under "Horizontal Resolution" and "Vertical Resolution" in the Image section.
- Mac: open the image in Preview, then choose Tools → Adjust Size. Resolution is shown there.
- Online: services walk you through related resolution checks for video, with similar logic applying to still images.
Conclusion
You should now have a clear idea of how to increase the DPI of an image and why. Many tools claim to upscale, but if you want to enlarge images without losing quality you need an AI-powered model that reconstructs detail rather than stretching it. The VanceAI Image Upscaler handles that in seconds, supports 5 specialized models, and offers free credits to test on your own photos before paying. For everything beyond a metadata tag tweak, that's the route that holds up at print sizes.
FAQs
Can you increase DPI of an image online?
Yes, you can increase the DPI of an image online using tools like VanceAI Image Upscaler. These tools use AI algorithms to automatically enhance the image's pixel count and tag DPI without compromising quality.
How do I change the DPI of an image?
To change the DPI of an image, you can use an online tool or image editing software. Upload the image, adjust the DPI setting (or upscale first, then tag), and the tool will resize the image accordingly. Use AI tools if you want actual detail added; use a free DPI-tag tool if you only need the metadata changed.
Can a JPEG be 300 DPI?
Yes, a JPEG image can be set to 300 DPI. DPI refers to print resolution metadata, and JPEGs can be adjusted to have a higher DPI for printing purposes. Note that tagging a 72 DPI JPEG as 300 DPI without upscaling doesn't actually add detail.
Can you upscale DPI?
Yes, you can upscale DPI using online tools or software. AI-based tools increase the image's pixel count so the new file genuinely supports higher DPI without losing clarity. Traditional interpolation methods can change the DPI tag but may soften the image.
What is the difference between DPI and PPI?
DPI (Dots Per Inch) measures print resolution — physical ink dots from a printer. PPI (Pixels Per Inch) measures display resolution — pixels per inch on a screen. They're often used interchangeably, but DPI is about print and PPI is about display.
What is a good DPI for printing photos?
300 DPI is the professional standard for printing photos — sharp enough for magazines, framed prints, and most product photography. 600 DPI is sometimes used for fine art or very small text. Below 200 DPI, prints start looking soft at any meaningful size.
Can I change a 72 DPI image to 300 DPI?
Yes, but it depends on what you want. If you just change the DPI tag from 72 to 300 without upscaling, the file metadata updates but the print size shrinks proportionally — you'll need to print smaller. To actually print bigger at 300 DPI, you need to upscale the image first to add real pixel count.
Does increasing DPI improve quality?
Increasing DPI on its own (without upscaling) doesn't add detail — it just changes the metadata tag. To genuinely improve quality, you need to upscale the image so it has more pixels, then tag the new file at the higher DPI. AI upscalers do both in one step.
How do I check the DPI of an image on Windows or Mac?
On Windows: right-click the file → Properties → Details → "Horizontal Resolution" and "Vertical Resolution". On Mac: open the image in Preview → Tools → Adjust Size → Resolution field. Both show the DPI tag stored in the file metadata.
Is 300 DPI enough for poster printing?
For most posters viewed at normal distance, yes — 300 DPI is enough. For very large format prints (24×36 inch or larger) viewed from a distance, even 150-200 DPI can look acceptable because viewers stand further away. For close-inspection prints (gallery work, fine art), aim for 300-600 DPI.