
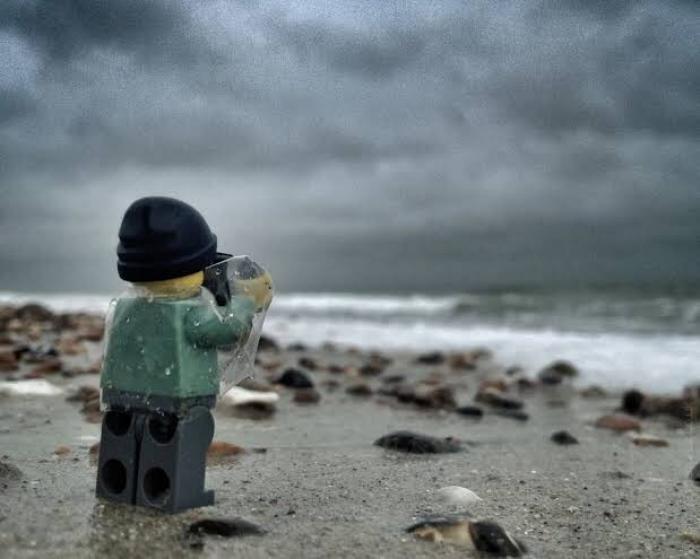
Lego photography is one of the fastest ways of learning to play with lights. It is also an explicitly distinctive way of photography. Moreover, lego photography art is all about taking pictures of colorful pieces and arranging them in an interesting way. Sometimes, you can even make small movies with legos.
One of the best things about lego photography is that it is really simple to get started. All you need is a camera, some legos, and an idea. You can find legos at almost any store, and they are relatively inexpensive. Creative lego photography can be a good way to improve your photography skills in your free time. It can also be a great way to have fun with your friends and family. You don’t need a lot of expensive equipment to get started, either – just some LEGO bricks and a camera.
If you want to take a closer look at something in a picture, AI upscale image tool can help you zoom in and see the details that you may have missed. This can be useful for things like examining a piece of jewelry or looking at a small object in a photo.
Enhance Photo With VanceAI Image Upscaler

Adding a touch of artificial intelligence (AI) to your photos is a great way to make them more interesting and engaging. VanceAI Image Upscaler is a great tool for doing just that, and it’s free to use.
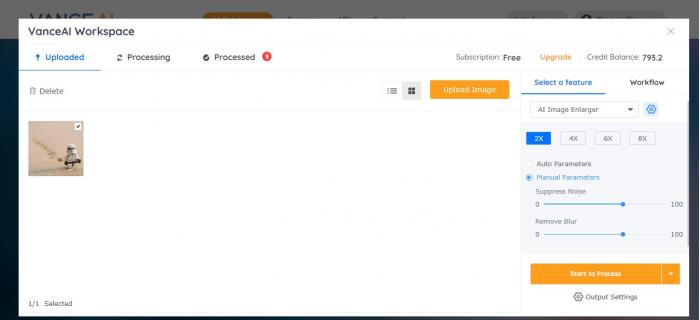
With such a Photo Enhancer, you can enlarge photos without losing quality. It’s based on cutting-edge AI technology that can improve the quality of your photos. Here’s a step by step on how to enlarge your photo,
Step 1
Go to the official website of Image upscaler.

Step 2
To use VanceAI, simply upload the photo you want to enlarge. The tool will ask you to select the enlargement percentage and output format. You can also choose to keep the original aspect ratio or crop the photo to a specific size.
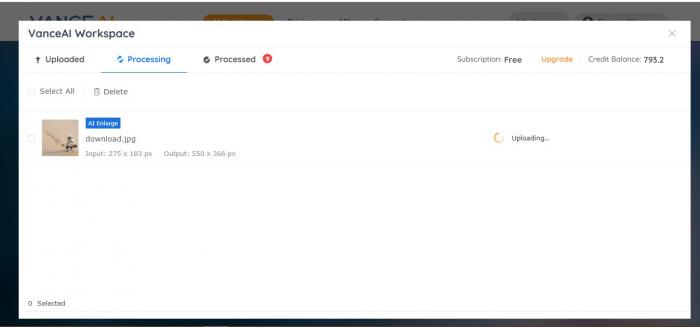
Step 3
Once you’ve uploaded the photo, AI image upscale will start working on it. The process usually takes a few seconds, but it may take longer if the photo is large or of poor quality.
Step 4
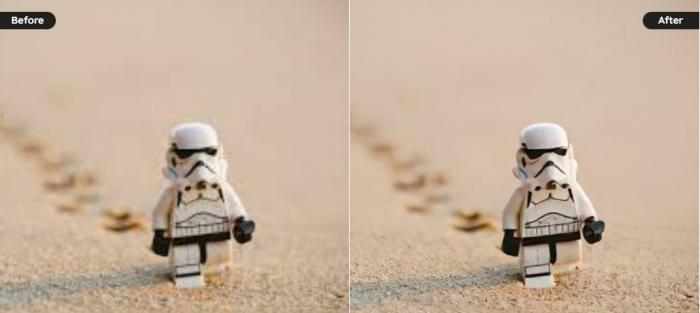
When the photo is ready, you can download it in either JPEG or PNG format. You can also share it on social media or embed it on your website.
What Is Lego Photography?
Lego photography is the process of taking photographs of Lego models, either in a studio setting or on location. This type of photography can be used to capture the detail and beauty of Lego creations, as well as to document the construction process.
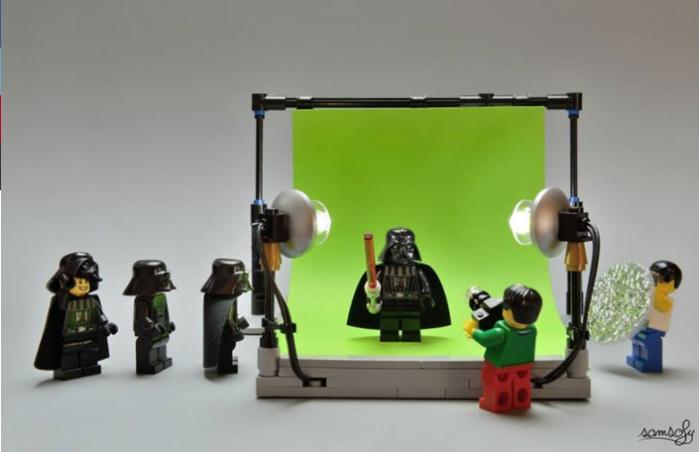
When shooting Lego photography, it's important to use the right gear and techniques in order to get the best results. This includes using a tripod for stability, controlling the light with reflectors and flash, and editing the images in post-processing.
10 Ideas Highlights Your Lego Photography
Get In Close
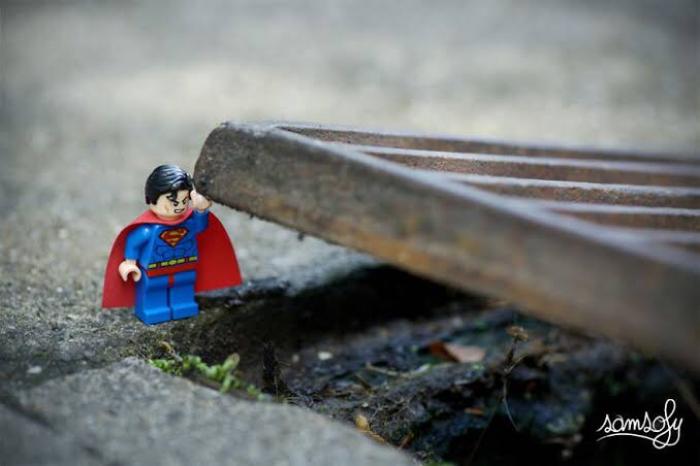
When you are photographing Lego, getting in close can really help to bring out the detail and colors of the bricks. This is especially true if you are photographing mini-figures, as they are so small. Getting close also allows you to fill the frame with your subject, making it the focal point of the photo.
Use A Macro Lens

If you want to get really close to your Lego subjects, then using a macro lens is a good option. Macro lenses are designed for close-up photography and can allow you to get some stunning shots.
Use A Tripod
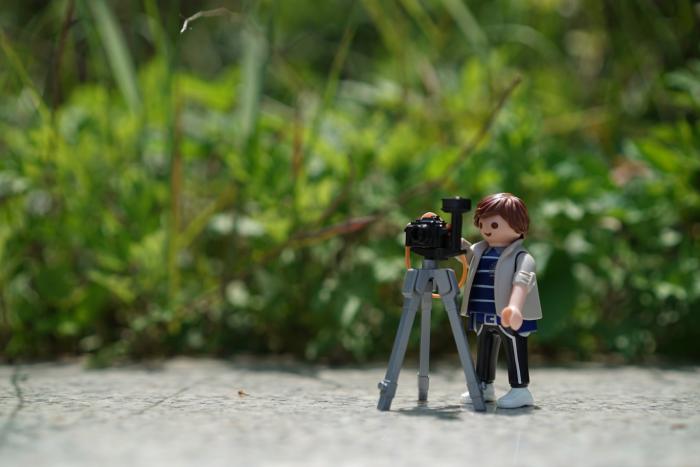
If you want to avoid blurry photos, then using a tripod can be helpful. Tripods provide stability for your camera, meaning that you are less likely to move and cause blur. In addition, unlike traditional photo post-editing tools that typically generate hazy and even pixelated results, VanceAI's enlarge image tool can upscale an image with AI in under 3 seconds.
Set Up Your Lego Scene In Advance
If you know what kind of shot you want to get, it can be helpful to set up your Lego scene in advance. This way you can make sure that all of the elements are in place and that there is nothing in the background that will distract from your subject.
Use Natural Lighting
Whenever possible, try to use natural lighting when photographing Lego. The best time to take photos is during the day time; when there is plenty of light available. If you have to use artificial light, try to use a lamp or some other form of soft lighting.
Experiment With Different Angles And Viewpoints
Don’t be afraid to experiment with different angles and viewpoints when photographing Lego. Often the most interesting photos are those that are taken from an unusual perspective.
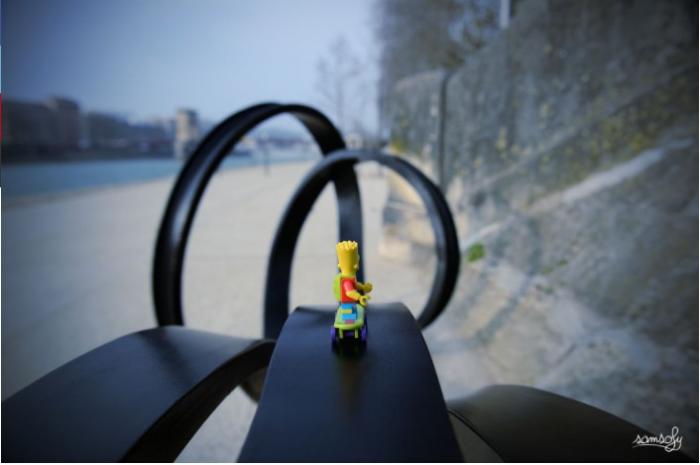
Capture Action Shots

If you want to add some excitement to your photos, then try capturing some action shots. Lego is perfect for this, as there are often lots of moving parts. Try taking photos of minifigures in mid-air or capture a scene that is being played out.
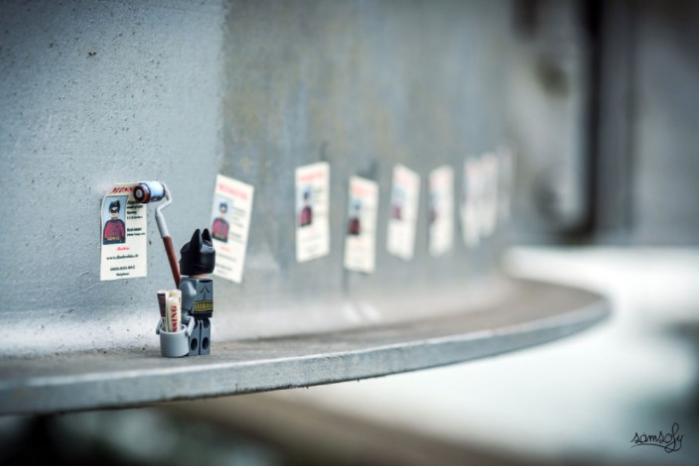
Use Props
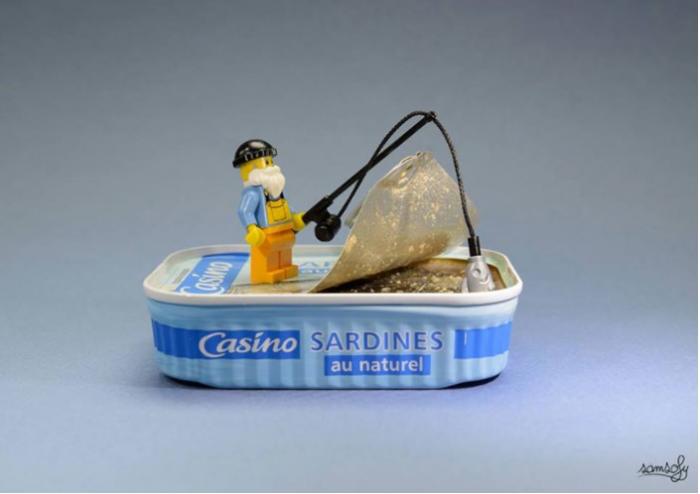
Props can be a great way to add interest to your photos. Lego props can include things like trees, flowers, or even other minifigures.
Get Creative With Your Editing

Editing your photos can be a great way to add some extra creativity to them. There are lots of different editing techniques that you can try, so experiment until you find one that you like.
Share Your Photos Online

Once you have taken some great photos, be sure to share them online. There are lots of different websites and forums where Lego fans gather, so post your photos and see what other people have been up to.
FAQ
How to deal with glare Lego photography?
Glare can be a big problem when trying to photograph Lego, as the shiny plastic can often reflect light in undesirable ways. You can use a diffuser, angle your light source or use a reflector.
Conclusion
Lego toy photography is one of the best ways to showcase your photography skills as well as improve them. Not only is it a lot of fun, but you can also create some pretty amazing shots. Besides, VanceAI image upscaler will give you a nice experience in photo enhancement and photo editing. Try it out if you don’t trust us!
Read more:Best 5 Portrait Photography Tips
Read More to Know Deeper:

Popular Posts