How to Get Rid of Noise in Photoshop
Also read: Top 15 Denoise AI Tools for Effortless Noise Reduction
What causes noise in a photo?
There can be multiple reasons for an image to have high noise. Shooting photos in low light can cause image noise as well as a high ISO. Noise is a result of an issue or disturbance in the camera sensors. There are multiple types of image noises as well, with the most common and well-known being the color noise. Color noise is what causes the red, blue, and green outlines throughout an image. If you are not satisfied with the result, you can use some tools to make photo hd.
What tool can help with noise reduction?
Best Recommended Product - VanceAI Image Denoiser
The AI Image Enhancer product of VanceAI is an overall well-rounded image editing application online and offline that deals with multiple types of image editing tasks such as image enlargement, image sharpening, colorization, and more. With VanceAI Image Denoiser, you can automatically reduce image noise and get the result in a very short time. If you do not want to go through the process of image sharpening manually, then VanceAI Image Denoiser is the perfect application for you.

If you like VanceAI Image Denoiser, please click the upvote button to help it get featured on Producthunt!
How to get rid of noise in Photoshop?
1. How to get rid of noise in Photoshop: Color Noise
Now we will get into how to get rid of noise in Photoshop. Follow these steps to make the process simpler to understand and execute. Have a try on Photoshop!
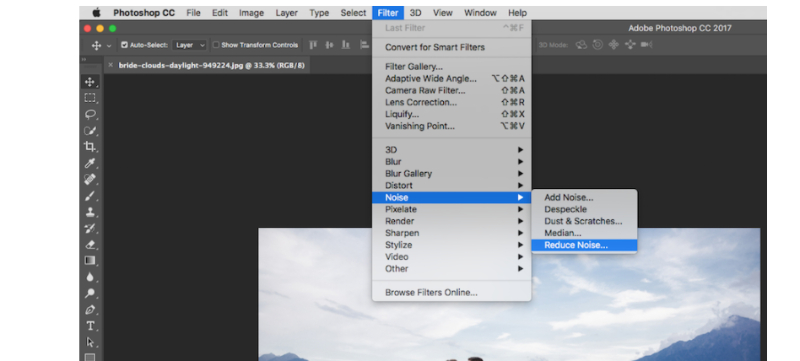
1. First, launch your Photoshop software and go to the menu to open the image that you want. From there, go to Filter, choose Noise, and finally click on Reduce Noise.
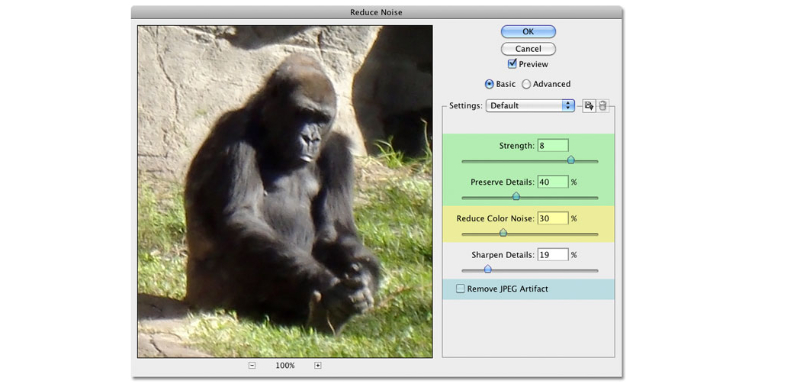
2. You will see a dialog box that has multiple settings regarding image noise. Adjust them and check as they are applied to see the effect on the image.
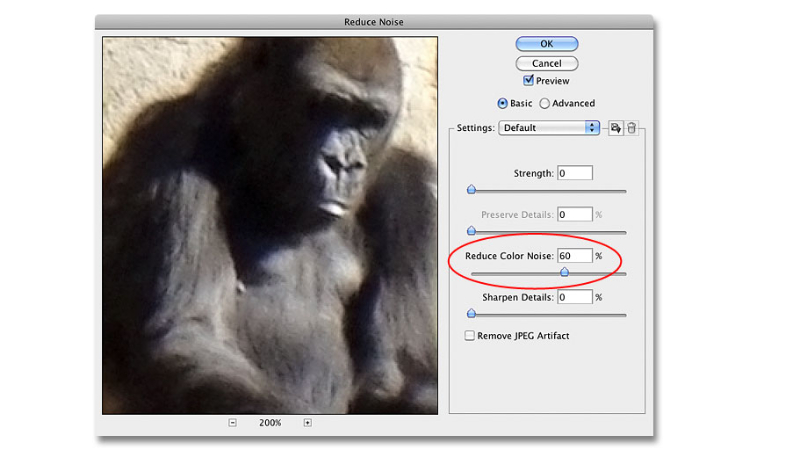
3. Finally, use the Reduce Color Noise bar to minimize the image noise as much as possible. Unfortunately, it is not possible to completely get rid of noise, even with Photoshop. It is rather advised to minimize it, which you can do with image noise reduction automatic tools.
Also read: How to Denoise Photo with VanceAI.
2. How to get rid of noise in Photoshop: Luminance Noise
The other type of noise is considered to be luminance noise, which basically looks like the grain that we commonly see in images. So this is a guide for how to get rid of grain in Photoshop. Luminance Noise is defined by its shades of grey color.
1. Again, if you want to get rid of grain through Photoshop, you will first need to open the image in the software. After that, go to Filter > Noise and select Reduce Noise. This will open up the dialog box.
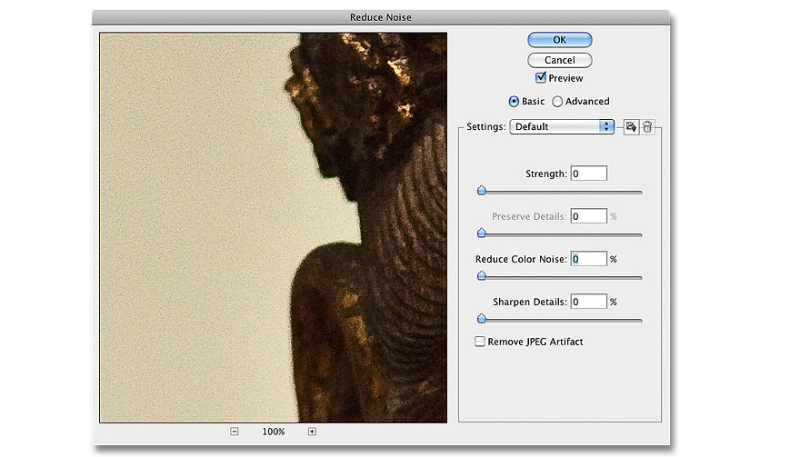
2. Keep the Strength amount to absolutely zero and keep adjusting the Preserve Details till the image looks at its best possible state.
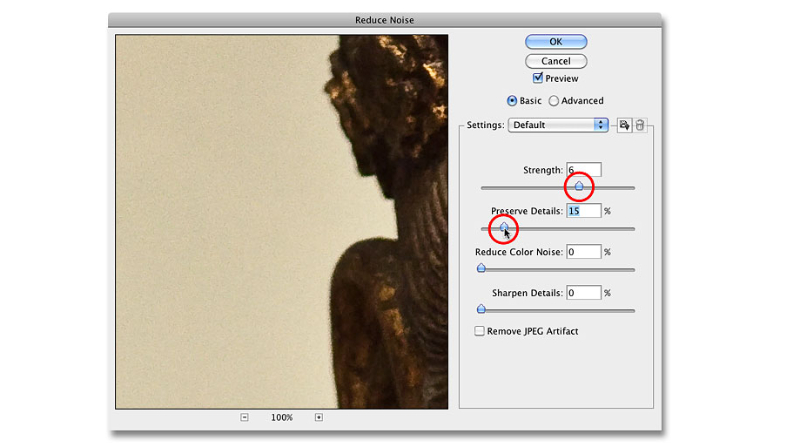
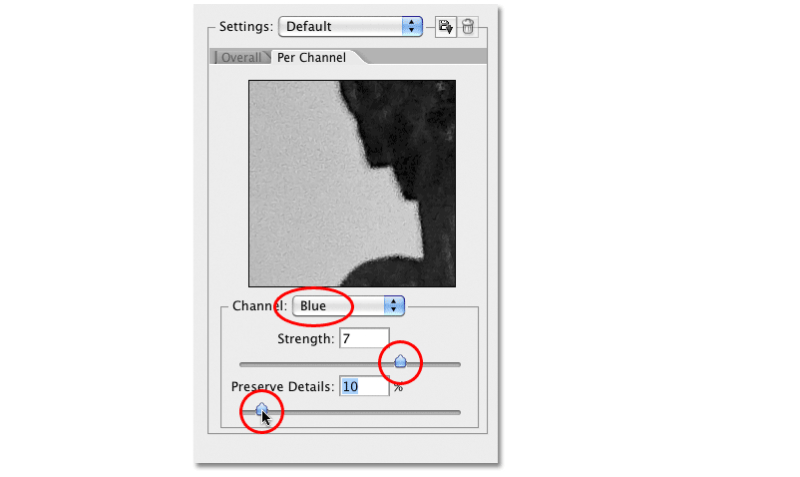
3. Additionally, you can switch to the Advanced tab and make changes there as well.
Conclusion
The AI Image Denoiser and Photoshop have different ways of dealing with image noise. With Photoshop, you can have full control of how exactly you want to get rid of noise while it can get difficult to deal with strong image noise. In such situations, you can switch to the AI Denoiser tool which deals with noise automatically though it doesn’t offer any manual control. Also read: Selective Tools for Image Noise Reduction 2022.
FAQs
How to get rid of grain in Photoshop?
The grain that we mention and usually see in photos can also be described as Luminance Noise, which marks a photo with noise that has shades of grey in color. This makes the image bloaty and reduces the sharpness of the image significantly. You can still go to Filter > Noise > Reduce Noise and make use of the slider bars to adjust the noise to a manageable level.


