In this era of clean and high-resolution pictures, some people still lament the death of grainy images. While photographers have mastered the art of “clean” pictures, there is a new trend in photography which is bringing back film grain.
Through this article, we will find out what is film grain and why is it making a come-back. If you are interested, you can try Denoise AI to removes grains and unnecessary noise of the image. There will be lesser grains in the picture so that it does not lose its original charm. Meanwhile VanceAI offers you powerful AI photo enhancer tools to improve image quality online. It can increase image resolution up to 800%, enhance real detail, and adjust color 100% automatically.
What is Film Grain?
Before learning about film grain, you need to understand the meaning of the word celluloid in photographic film. A celluloid film is a plastic sheet which is used to capture images. Celluloid is quite flexible, however, it is replaced by digital media storage formats such as Blu-rays and DVDs.
After the rebound of film grain, film producers and photographers have learned the importance of celluloid. But now, the role of celluloid is mainly to add aesthetic to the film or a photo by giving them an old charm.
Now that we have understood the significance of celluloid, let’s return to understanding film grain. A film contains negative emulsions and silver crystals are visible inside it. These silver halides are sensitive to light and turn into pure metallic silver when exposed to light. The process is how an image is captured on a film, making grains an essential part of the photo.
History of Film Grain Overlay
Film Grain (1800s-Present):
Film grain has been ever-present in photography since the early days. The size and character of the grain depended on the film stock used. Faster film speeds typically resulted in more noticeable grain.
Digital Age (1960s-Present): With the advent of digital photography and video, film grain disappeared – at least unintentionally. Digital captured a cleaner, sharper image.
Film Grain as an Aesthetic Choice (1980s-Present):
Even though digital technology eliminated grain, filmmakers and photographers began to appreciate the aesthetic qualities it brought. Grain can add texture, a sense of realism, and evoke a certain era or mood.
Film Grain Overlay (Likely 1990s-Present):
This is where film grain overlay comes in. With the rise of digital editing tools, it became possible to add a digital texture of film grain to a digital image. This allowed creators to intentionally incorporate the stylistic elements of film grain even in digital productions.
When And Why You Should Use Film Grain Overlay?
A film grain overlay was once a result of imperfections but filmmakers in the recent times are adding grains post production. This means the editors have to do extra work to add such imperfections to the film which might sound bizarre to some. Why would filmmakers want an imperfect grainy outcome?
This question can be answered with several reasons and possibilities, none of which is incorrect. Every filmmaker has a vision in mind. Some might want to add a nostalgic impression in the films, others might have to add it to fulfill the requirement of the film.
The adding of unconscious nostalgia makes a film feel like a walk in a memory lane of some fictional character the audience barely knows. Emotions are attached with film grain overlay because it feels close to heart, intimate and natural.
The natural and transparent film grain overlay effect makes a connection with the audience. The natural aspect of film grain makes the photos believable and the audience can feel like they can relate to it.
Another reason for using old film grain overlay is the roughness of grains. For example, if a photographer is trying to show a harsh environment or a scene from war then film grain overlay is the best option to use. Using grains in such photos will help the audience go back in time.
The old charm attached with film grains makes them popular amongst the audience. They can feel nostalgia and old vibes by looking at the grainy images. The texture of the film grains is quite old-fashioned which is key to win audience’s hearts. If you are not satisfied with the result, you can use some tools to make photo HD online.
Add Film Grain Overlay In Photoshop
First of all, you need to prepare the film grain overlay photoshop. Start by uploading a picture on photoshop to begin the editing part.
Step 1
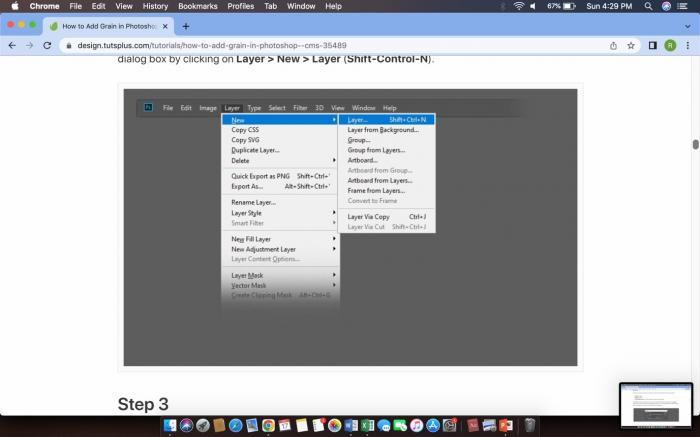
After you have uploaded the photo or “opened” the image on photoshop. The next task comes of preserving the original layer. Select the “New Layer” option by clicking on the “layer” in dialogue box then select New and then Layer. Shortcut: (Shift-Control-N).
Step 2
After adding the new layer, name it ‘Film Grain’ for your ease. Go to photoshop options to choose the film grain effect.
First, select ‘Mode’ and then select ‘Overlay.’
Next, go to the ‘Opacity’ and select ‘100%’
Check the box at the end of the options which says, ‘fill with overlay-neutral color (50% only).
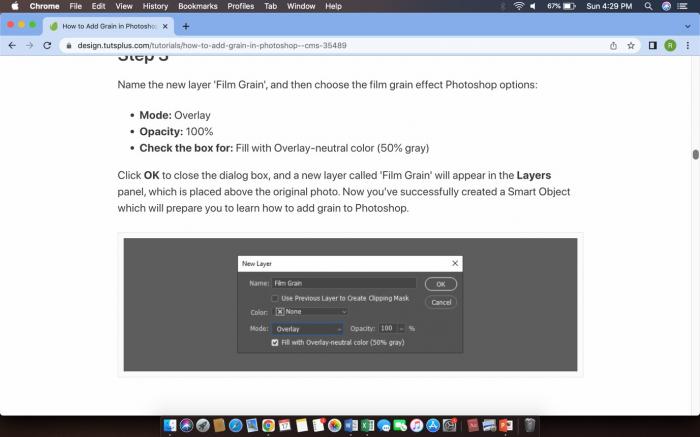
Now that the settings are done, click OK to close the dialogue box. A new layer with the name ‘film grain’ is added above the original layer.
A new layer is added, you can practice and play with it without ruining the original layer. The next big step is to convert the layer into “Smart Object.”
Step 1
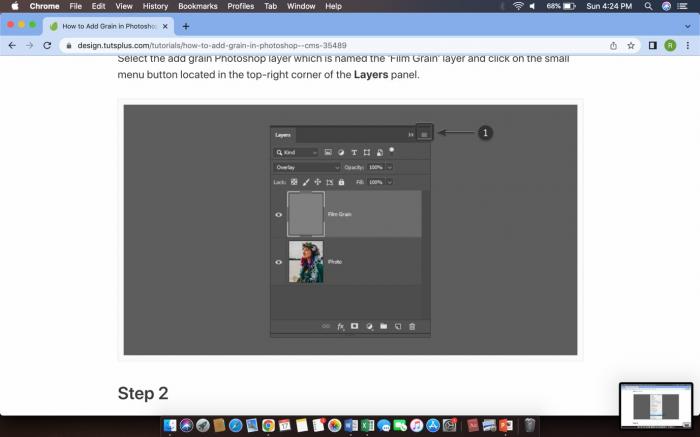
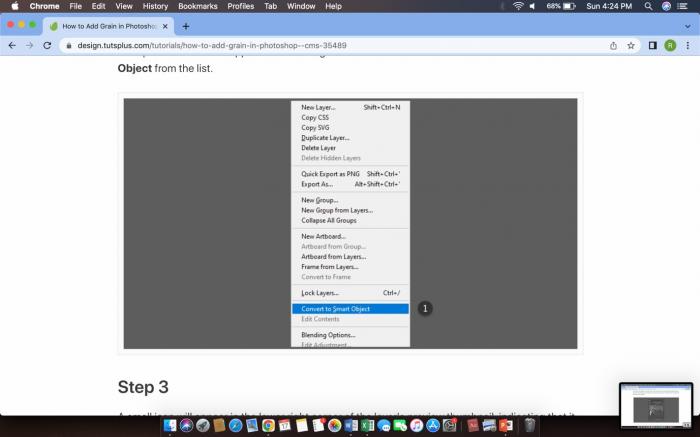
Select the small menu button located on the layer dialogue box. First click on the ‘film grain’ layer and then select the menu button. After clicking on the menu button, a drop down menu will open where you will select “covert to smart object.”
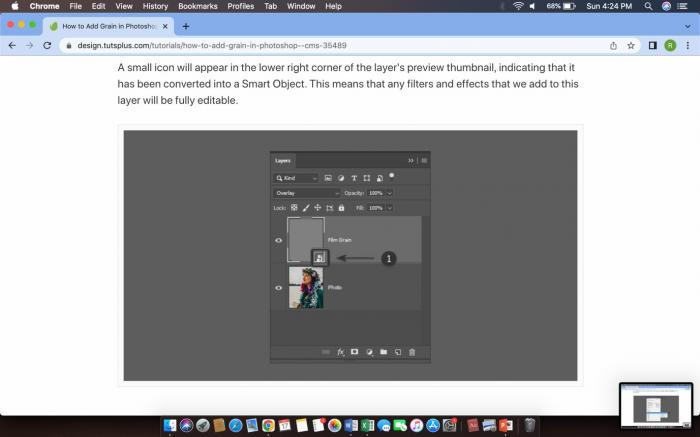
Step 2
A small symbol will appear in the lower corner of the layer indicating that the layer has been converted to a smart object and every filter can be edited.
Step 3
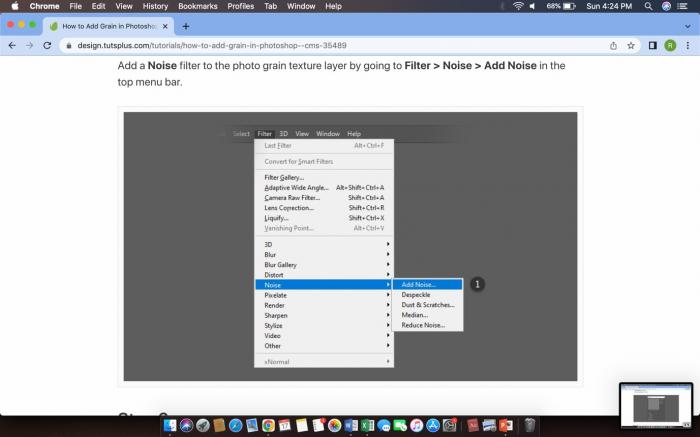
This step will indicate you on what to do next. To add film grain, go to the Filter option, then select Noise and finally select ‘Add Noise.’
Step 4
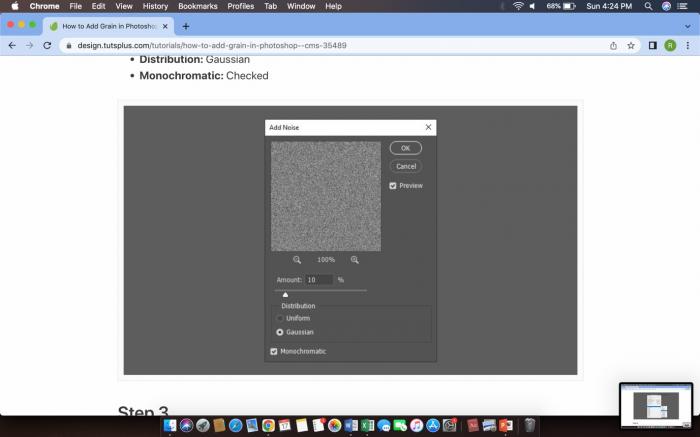
An ‘Add Noise’ dialogue box will appear. Change the settings to achieve film grain overlay effect. Note that it is an “effect” and not the real overlay because it only occurs in films.
Change the Amount to 10%
Change the Distribution to ‘Gaussian’
Check the Monochromatic box.
Step 5
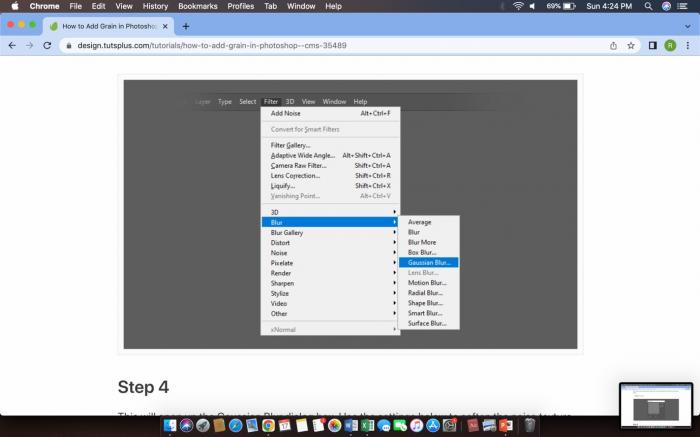
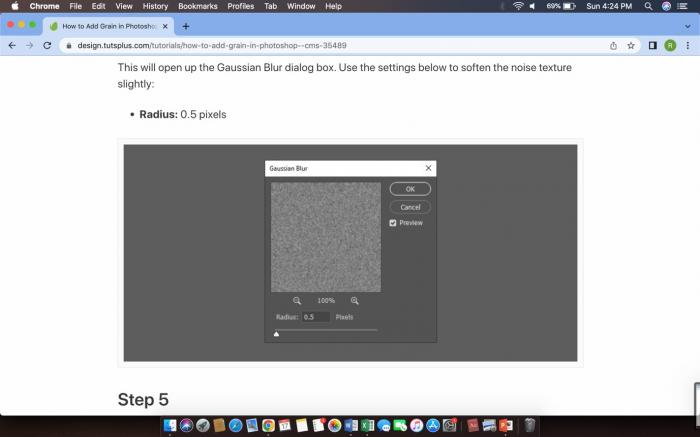
Keeping the Film Grain layer selected, select the Filter option, go to Blur and select Gaussian Blur.
Step 6
The Gaussian Blur dialogue box will be opened. Change the Radius to 0.5 pixels to slightly soften the noise texture.
Step 7
Select OK which closes the dialogue box. Now you can apply the Gaussian Blur to the Film Grain layer. A subtle grain is now successfully added to your photo.
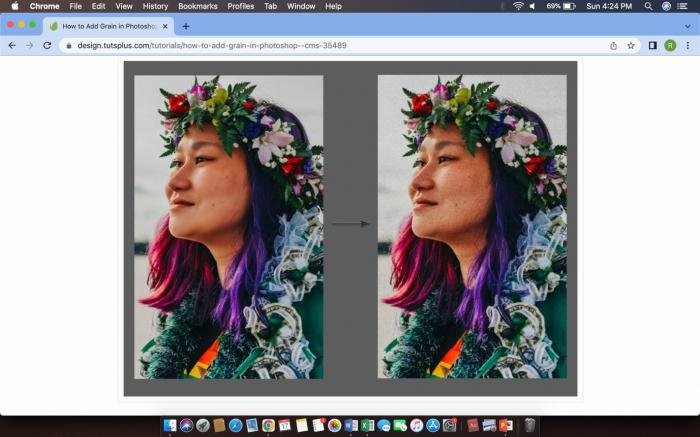
Photoshop has processed the photo by adding grains. The final outcome looks breathtaking!
Some users might feel like their editing has added a bit too much of grain. They should not worry about re-editing the image on photoshop because Image Denoiser removes grains and unnecessary noise of the image. There will be lesser grains in the picture so that it does not lose its original charm.Besides, unlike traditional tools which often produce blurry and even pixelated results, photo enhancer tools offered by VanceAI can enhance an image by reducing blur and recovering original details.
Conclusion
The article has hopefully helped you understand the functions of film grain overlay. You can edit the images by using photoshop by following the steps given above. Play you’re your creativity and produce images with grains channeling the old world charm.


