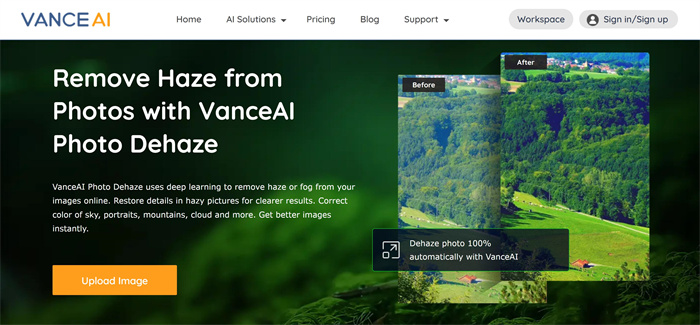
How to Use VanceAI Photo Dehaze for Outdoor Portraits?
Using trusted image enhancing and editing software applications to refine your images is always an essential step in maximizing your image’s potential. After capturing a photo, especially outdoors, there is a chance that it may have unwanted haziness. To combat this, you can make use of VanceAI Photo Dehaze tool from VanceAI. Here are the simple steps on how to use Photo Dehaze once it’s released:
- Use the link above and go under AI Solutions to find the VanceAI Photo Dehaze. Use the Start Now button to proceed.
- Click on the upload box or drop an image on it and click on Start to Process.

- Go to Processed > Preview > Download Image in order to save the image.
Also, here’s a Before-After from AI Photo Dehaze:
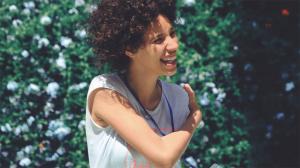
Before:
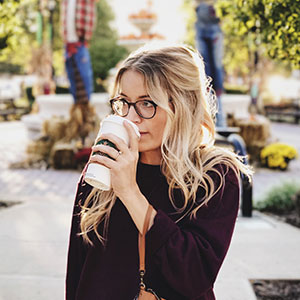
After:
Best 5 Outdoor Portrait Photography Tips
1. Make Use of the Golden Hour
One of the best things about the golden hour is that you can get a lot of portrait photography ideas outdoor at this time. The golden hour refers to the time just before sunset or exactly at sunrise, wherein the light is balanced and sensitive. With just a little bit of positioning and experimentation, you can capture all kinds of outdoor portraits with great results. Also, you can definitely try to shoot in an area with beautiful historical structures or you could also make something like a restaurant work in your favor.
The effect of the sun coupled with the frame taken adds a striking contrast and mood.
2. Go with Fixed Focal Length Lens
Experimentation is definitely key to creative photography but at the same time, it is important to know the technically ideal ways of taking outdoor portraits. When it comes to outdoor portrait photography tips, one of the most common is to make use of a 50mm lens. Another popular choice is the 85mm lens but you definitely need to ensure that other elements such as the depth of field, composition, and lighting align properly with your lens. The perfect 50mm shot can manage to add a bokeh effect to the background, which surely elevates the quality of outdoor portraits.
The background with the bokeh effect blends well with the portrait, especially the colors.
3. Avoid Photos in Direct Sunlight
When it comes to outdoor portrait photography, it is important to use the sun or sunlight in a complementary way, instead of using it in a way that makes it obstruct most of your photo with strong light. What this means is taking photos where the sun is directly facing the camera. This results in a terrible imbalance of your composition and often unseeable pictures, especially if the photo was taken in the late morning or afternoon. Instead, one of the better alternative outdoor portrait photography tips would be to have the person stand in a shadow.
While there is ample light, it has been distributed with the trees and shadows.
4. Use RAW As Much As Possible
This is one of the most essential tips for outdoor portrait photography as well as for photography as a whole. The RAW image file format is the purest form of the visuals that you capture. This format also has the highest image quality and the most flexibility when it comes to software image editing, such as Photoshop. The issue with other formats such as JPG lies in the fact that they strip away a lot of detail from the original image in favour of lesser image size. Lastly, you can upscale image and convert it to other formats eventually, if need be.
5. Focus on the Eyes
Since the type of photography is outdoor portraits, it is natural that the main focus of the photo will be the person. To get the best possible and most personable portrait, it is crucial to keep the lens focused on the eyes since eyes are arguably the most striking visual of all. If you are using a smartphone, you can simply turn on the eye focus feature and let the camera detect the position of the eyes. Once it has done that, start taking photos. You can also make use of the golden hour in order to further elevate the eyes with a good sense of lighting.
Conclusion
With these simple to follow outdoor portrait photography tips, you can start improving and revitalizing your outdoor portraits and portraits in general. The key to any good photo is some solid foundational knowledge added with a lot of creativity. Luckily, outdoor portraits allow photographers to try out many different things, mix and match, and come up with stunning work. Not to mention that you can make use of amazing tools such as VanceAI Image Upscaler to further enhance your image quality.
FAQs
1. How to take outdoor portraits?
Outdoor photography is a useful skill on many fronts and surely takes practice but with these tips, you can get an edge. You can start small and simple by taking portraits during the golden hour with a single person. All you need is a camera or a decent smartphone to get started. After taking a photo, be sure to further enhance it with good tools such as the AI image upscaler.
2. What is the best time for outdoor portrait photography?
While outdoor portraits can be taken at any time of the day, it is the golden hour which is highly preferred. The golden hour can be considered as either the early morning during sunrise or the time of sunset. The reason behind these two time periods having a higher preference is because sunlight is much softer and timid. With that and some good positioning, you can easily take some really great portraits.
3. How to improve the quality of outdoor portraits?
It has to say that with the aid of VanceAI Image Enhancer, you can more easily work with outdoor portraitsas this service provides a one-click AI solution to help enhance photo details. In that way, it becomes easier for you to get super HD photos in the visual manner. First you should go to the homepage and don't need to change the original size of your picture. Aftering clicking on that link, you need to press the button Upload Image to upload the target you want to enhance. Then you will naturally see VanceAI Enhancer Workspace. After that, you should hit Start to Process and wait for several seconds to see the final result.
Read More to Know Deeper:

Popular Posts