The One Idea Behind Every Good Topaz Setting
Most "best Topaz settings" lists hand you a single magic preset and wish you luck. That is exactly why so many people get mediocre results: there is no universal setting, because the right configuration depends entirely on what is wrong with your footage. A grainy low-light interview, a soft 1080p drone clip, an interlaced VHS capture, and a piece of flat-shaded anime each need almost opposite treatment.
So before any numbers, internalize the one idea that makes the rest obvious: in Topaz Video AI, choosing the right model matters more than tuning the sliders, and the sliders should usually do less than your instinct says. The model decides what kind of reconstruction happens. The sliders only nudge it. Push them too far — especially Sharpen and Recover Detail — and you trade a soft clip for a crunchy, plastic one, which is a worse problem to have.
This guide gives you a model-by-model map, sane slider ranges, copy-ready settings for the most common footage types, the mistakes that quietly ruin exports, and — because it is the honest answer for a lot of readers — when the smartest "setting" is to skip the desktop tuning entirely and let a tool like VanceAI Video Upscaler make the decisions for you.
Step One: Match the Model to Your Footage
Topaz ships more than a dozen models, and 90% of your result is decided here. Picking the wrong model is the single most common reason an upscale disappoints — no slider value rescues Proteus on heavy interlacing or Gaia on a noisy live-action night shot. Use this as your decision table.
| Model | Use it for | Avoid it on |
|---|---|---|
| Proteus | General live-action; the do-everything default with manual control | Heavily interlaced or extremely degraded sources |
| Iris | Faces, talking heads, interviews — preserves natural skin and eyes | Wide landscape or graphic/animated content |
| Nyx | Heavy noise and low-light footage where grain is the main enemy | Already-clean sources (it can over-smooth) |
| Gaia | Anime and cel/CG animation; respects flat color and line art | Live-action faces and textured scenes |
| Dione | Interlaced video (old broadcast, camcorder, DVD) — deinterlaces as it scales | Progressive footage that needs no deinterlacing |
| Artemis | Soft, low-detail footage that needs gentle sharpening | Noisy sources (sharpens the noise too) |
| Starlight | Severely degraded material — VHS, 240p/360p, badly compressed | Clean modern footage (overkill, very slow) |
The practical move: name the primary problem with your clip in one word — noisy, soft, interlaced, animated, or just low-resolution — and let that pick the model before you touch anything else.
The Core Sliders, in Plain English
Once a model is chosen, four or five controls do the fine-tuning. Understanding what each actually does is what separates a clean result from a crunchy one.
- Revert Compression — undoes blocky compression artifacts (the macro-blocking you see in low-bitrate web video). Safe to lean on; this is usually the most valuable slider for downloaded or streamed sources. A starting value around 40 works for typical web footage.
- Recover Detail — reconstructs fine texture. Useful on genuinely soft live-action, dangerous on clean or low-detail sources where it invents artifacts. Mid-values (around 50) on detailed live-action; near zero on anime and clean footage.
- Sharpen — adds edge contrast. This is the slider people abuse. A little goes a long way; too much creates halos and a brittle look. Keep it low, and at zero for anime.
- Reduce Noise — smooths grain. Match it to the actual noise: high for a noisy Nyx job, near zero for clean footage so you do not flatten real detail and skin texture.
- Anti-Alias / Deblur (when present) — cleans stair-stepped edges and motion blur. Use sparingly; aggressive values look artificial.
A useful community starting point that circulates among Topaz users for general web footage is roughly Revert Compression 40, Recover Detail 50, with Sharpen low and Reduce Noise matched to the source. Treat it as a baseline to adjust per clip, not a law — your footage decides the final numbers.
Best Topaz Settings by Content Type
Here is the copy-ready part. Each block assumes you have selected the model named, then sets the sliders and export to suit that kind of footage.
- General live-action (modern but soft 1080p → 4K) Model: Proteus. Revert Compression ~40, Recover Detail ~50, Sharpen low (5–10), Reduce Noise low. Output 4K, match source frame rate. This is the everyday workhorse setup.
- Faces and interviews (talking-head footage) Model: Iris. Keep Recover Detail moderate and Sharpen low — faces punish over-sharpening faster than anything else. The goal is natural skin, not a wax figure. Reduce Noise only as much as the source needs.
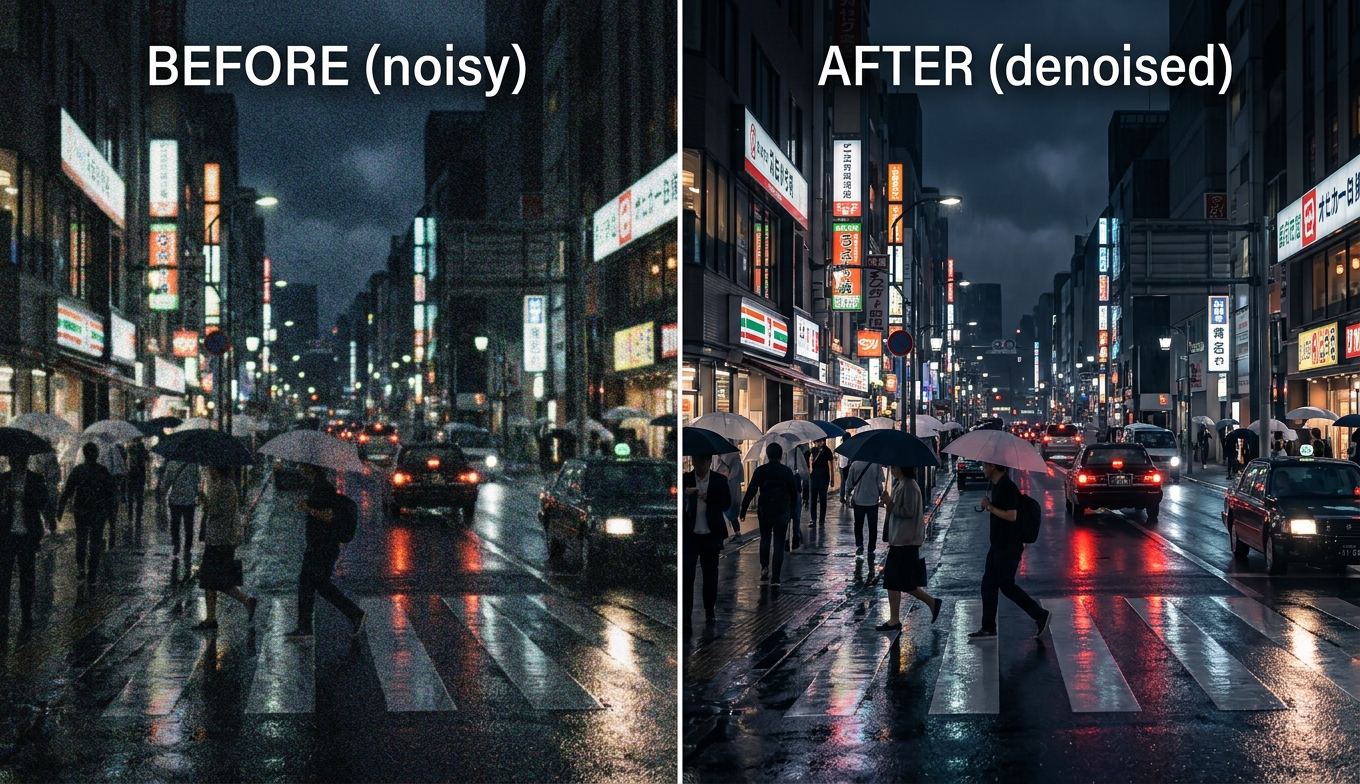
- Low-light and noisy footage Model: Nyx. Reduce Noise higher here, Recover Detail low (you do not want to "recover" amplified grain as if it were detail), Sharpen minimal. Denoise first, sharpen barely.
- Old SD home video (VHS, camcorder, DVD) Model: Dione if it is interlaced (it deinterlaces while scaling), otherwise Proteus or Starlight for very degraded tape. Revert Compression high, Reduce Noise moderate-to-high, modest Recover Detail. Target 1080p rather than forcing 4K out of a 240–480p source.
- Anime and animation Model: Gaia. Sharpen 0, Recover Detail 0–10, Reduce Noise 0–5. Export HEVC at a high bitrate to protect flat colors from banding, and never interpolate the frame rate. Anime wants the model to do as little as possible.
- Severely degraded clips (240p/360p, badly compressed) Model: Starlight. It is slow but built for this. Let it carry the reconstruction and keep manual sharpening near zero so you do not amplify what it is trying to fix.
The Export Settings People Forget
Your model and sliders can be perfect and a bad export will still wreck the result. Three choices matter.
- Codec. Use HEVC (H.265) for the best balance of quality and file size, especially on footage with flat color regions like animation or skies. It holds gradients together far better than older codecs at the same bitrate.
- Bitrate. This is the silent killer. A beautifully upscaled 4K clip exported at a low bitrate shows banding in skies and shadows and blocking in motion. For 4K, aim for 30 Mbps or higher; for 1080p, do not starve it either. If your output looks worse than the preview, low bitrate is the first suspect.
- Resolution and frame rate. Scale to a resolution your source can justify — 4K from a soft 1080p source is reasonable, 8K from a 480p tape is wishful thinking that just multiplies render time. And unless you have a specific reason, match the source frame rate; interpolating to 60 fps introduces the "soap opera" look and visible artifacts on fast motion.
The Mistakes That Quietly Ruin Footage
After the model choice, these are the errors that turn a promising upscale into something you would not publish.
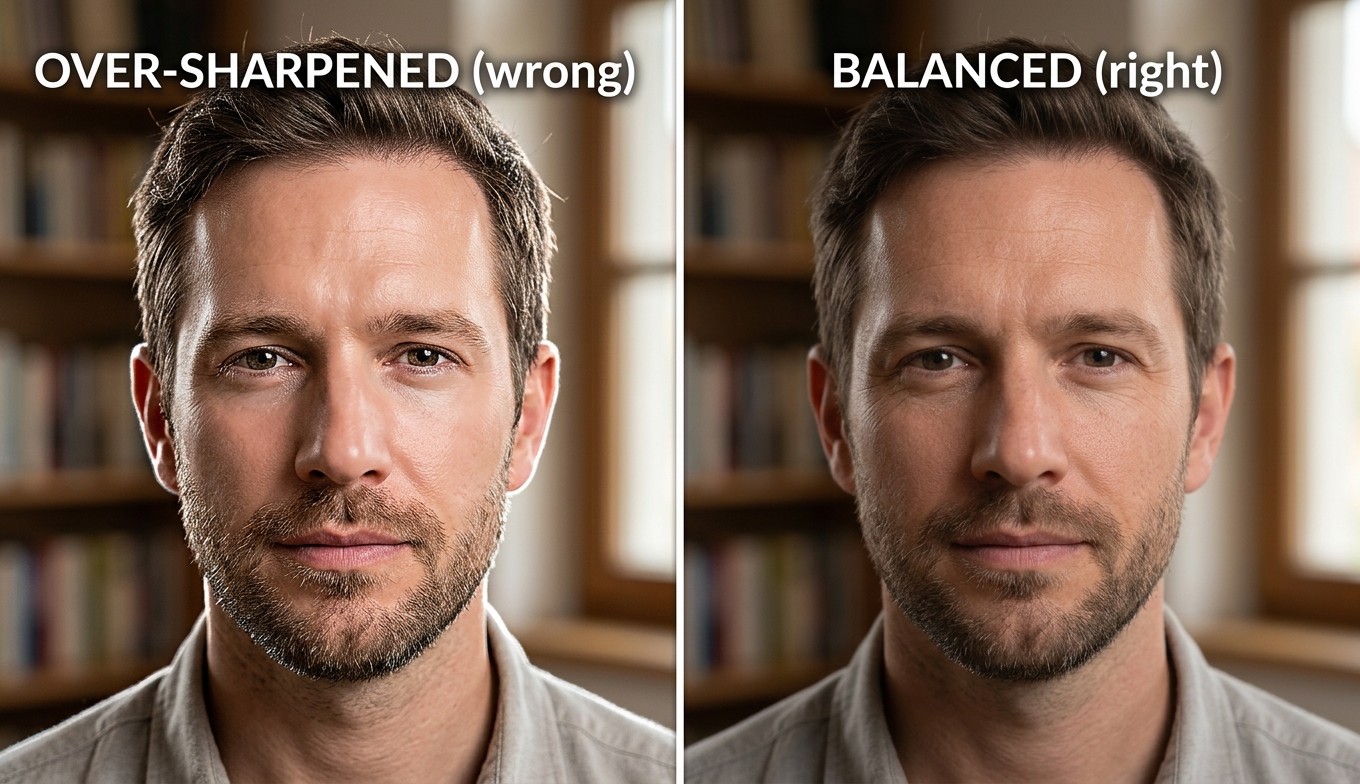
- Over-sharpening. The number-one mistake. Cranking Sharpen (or Recover Detail) stamps bright halos around edges and gives skin a plastic, over-defined look. The fix is almost always to dial back, not push further. As the comparison above shows, the "wrong" side is not blurrier — it is harsher, and harsher reads as fake.
- Over-denoising clean footage. High Reduce Noise on a source that was not very noisy erases fine texture and flattens faces. Match denoise to the actual grain.
- Using one model for everything. Proteus is a great default, but running it on interlaced VHS or flat anime gives you a worse result than the model built for that job. Re-pick the model when the footage type changes.
- Denoising and sharpening in the wrong order of priority. On noisy footage, let denoise do its work and keep sharpening minimal; sharpening first just amplifies the grain you are about to remove.
- Trusting a still preview. A frozen frame can look flawless while motion reveals shimmer and flicker. Always scrub a fast-motion section before committing to a full render.
The Honest Catch: Good Settings Are a Tax
Here is the part the settings guides do not say out loud. Even with the perfect configuration, Topaz Video AI asks a lot of you. The models are heavy — on a mid-range RTX card, the slower ones crawl to just a few frames per second, so a single clip can occupy your machine for a long time and a full project becomes an overnight job. You also pay for the privilege now: Topaz moved to subscription pricing in 2026 at $299/year, and a lapsed plan locks you out of the app entirely.
And the dirty secret of "best settings" content is that it exists because the tool is hard to get right. Every block above is a decision you can make incorrectly. For professionals restoring footage daily on strong hardware, that control is worth it. For everyone else — someone who just wants a soft clip to look sharp without a tutorial — the best setting is no setting at all.
When to Skip the Settings Entirely: VanceAI Video Upscaler
If reading the tables above made you tired, that is a signal. VanceAI Video Upscaler takes the opposite approach: it runs in a browser, makes the model and processing decisions for you, and removes the install, the GPU requirement, and the slider anxiety in one move. The processing happens on VanceAI's servers, so a basic laptop produces the same output as a workstation — no overnight renders pinning your machine.
You still get the one choice that actually matters — the model — without the dozen that mostly cause trouble:
- Nexa handles everyday footage and outputs 720p, 1080p, 1440p, or 4K with a 1×, 2×, or 4× scale.
- Cineva is the cinema-focused model for standard-definition sources up to 1024×540 input, applying a fixed 4× upscale — the right pick for old SD video heading toward near-HD.
It accepts MP4 and MOV up to 10GB and 4K input, returns an MP4 that stays available for three days, and — the feature that replaces all the trial-and-error — lets you spend a single credit on a five-second preview before the full render. Instead of guessing slider values and waiting an hour to see if you guessed wrong, you preview, confirm, and commit. The how to upscale 480p to 1080p guide walks through that flow on a typical low-res source.
On cost it is credit-based rather than a yearly lock-in: free trial credits with no credit card, and you pay only for what you process. There is no subscription to lapse and nothing that locks you out.
How to Get a Clean Upscale Without Touching Settings
- Open VanceAI Video Upscaler in your browser and upload an MP4 or MOV (up to 10GB, up to 4K input).
- Pick Nexa for everyday footage or Cineva for a standard-definition source — that is the only real decision.
- Choose your target resolution or scale factor (720p to 4K, or 1×/2×/4× on Nexa).
- Click Preview to generate a five-second sample for one credit and confirm the quality.
- Process the full clip and download your MP4 — it stays available for three days.
No models to memorize, no sliders to balance, no GPU to feed.
Frequently Asked Questions
What are the best overall Topaz Video AI settings?
There is no single best preset — the right settings depend on your footage. For general soft live-action, a good starting point is the Proteus model with Revert Compression around 40, Recover Detail around 50, Sharpen low, and Reduce Noise matched to the source, exported to 4K in HEVC at 30 Mbps or higher. Adjust per clip, and switch models when the footage type changes.
Which Topaz model should I use?
Match the model to the main problem with your clip: Proteus for general live-action, Iris for faces and interviews, Nyx for noisy or low-light footage, Gaia for anime, Dione for interlaced video, Artemis for soft sources, and Starlight for severely degraded material. The model choice decides most of the result.
What is the best Topaz setting for faces?
Use the Iris model, keep Sharpen and Recover Detail low, and apply only as much noise reduction as the footage truly needs. Faces show over-sharpening faster than any other content — the goal is natural skin texture, not a glossy, over-defined look.
Why does my upscaled video look fake or plastic?
You are almost certainly over-sharpening or over-recovering detail. High Sharpen and Recover Detail values create halos around edges and a waxy, artificial surface, especially on skin. Lower both, and let the model do the reconstruction rather than the sliders.
What bitrate should I export at in Topaz Video AI?
For 4K output, aim for at least 30 Mbps; for 1080p, do not starve it either. Low bitrate is the most common reason an export looks worse than the in-app preview, showing banding in skies and shadows and blocking in motion. Use HEVC (H.265) for the best quality-to-size ratio.
Should I upscale to 4K or 8K?
Scale to what your source can justify. 4K from a soft 1080p clip is reasonable; 8K from a low-resolution or SD source mostly enlarges existing softness while dramatically increasing render time. For the vast majority of footage, 4K is the practical ceiling.
Why is Topaz Video AI so slow?
Its models run locally and lean heavily on your GPU. On a mid-range card the heavier models process only a few frames per second, so long clips take a long time and tie up your computer. A cloud tool like VanceAI Video Upscaler offloads processing to remote servers, so your machine stays free and you avoid overnight renders.
Do I need to change settings for every clip?
For best results, yes — at minimum re-pick the model when the footage type changes, and adjust noise reduction to the actual grain. If that sounds like too much, a tool that chooses settings for you, like VanceAI Video Upscaler, removes the per-clip tuning while still letting you pick a general or cinematic model.
Is there a tool that upscales video without settings?
Yes. VanceAI Video Upscaler runs in a browser and handles the processing decisions automatically — you choose a model (Nexa or Cineva) and a target resolution, preview for one credit, and download. There are no sliders to balance and no software to install.
Can I preview Topaz settings before rendering the whole video?
Topaz offers a preview window, but a still frame can hide motion artifacts, so always scrub a fast-motion section. With VanceAI, a five-second rendered preview costs a single credit and shows you the actual moving result before you commit to the full export.
The Verdict
The "best" Topaz Video AI settings are not a preset — they are a process: pick the model that matches your footage, lean on Revert Compression, keep Sharpen and Recover Detail restrained, match noise reduction to the source, and protect your export bitrate. Do that and Topaz rewards you, especially on a strong machine. But the reason guides like this exist is that the tool makes it easy to get wrong, and in 2026 you also pay $299 a year for the chance. If dialing in models and sliders is the work you enjoy, the tables above will get you there. If you would rather upload a clip, preview it, and download a clean result — no install, no GPU, no guesswork — VanceAI Video Upscaler is the setting-free alternative, and the free trial credits let you see the difference on your own footage first.