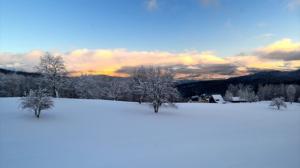
Night photography is a very difficult art form that takes a lot of practice to get right even with the best equipment. There are many things you need to take into account when shooting at night that daytime photographers rarely have to consider.
Overcoming low visibility is an obvious one but manipulating aperture, ISO, shutter speed and other factors are not to be ignored either. The effort is well worth it if you manage to pull it off, though, as night photography can yield some incredibly beautiful pictures.
Of course, you probably won’t be able to take the best photos when you’re just starting out, but don’t worry because I will show you 10 great tips that aim to help you to shoot stunning night photographs in no time. Plus, you will also learn the quickest way to tweak night photographs using AI Denoise tool.
10 Best Tips for Night Photography
Here are 10 useful tips that you can follow when you bring your camera out for shooting. Not only can you go through all of them in this article, but also check out this YouTube video to get more details.
1. Scouting is Key
It’s always a good idea to scout the location beforehand during the day in order to avoid any potential surprises. This is a pretty obvious tip but a very important one regardless.
Night photography is usually not something you want to do on a whim. If possible, make sure you arrive at the location with plenty of time to spare so you won’t have to scramble around trying to set up your equipment. This is particularly important if you’re planning to also grab some photographs during sunset while you’re there. If you are not satisfied with the result, you can use some tools to make photo hd.
2. Don’t Forget Your Tripod
A tripod is one of the most important pieces of equipment you can have in your arsenal when learning how to shoot night photography. Of course, the tripod continues to be useful even after you’ve got some experience under your belt, but is particularly handy during your first few sessions.
Good nighttime photographs tend to require long exposure times and it’s unlikely that you can keep the camera perfectly still for that long. Hence, why you need a tripod, preferably a durable one.
3. Experiment With ISO
The amount of ISO you need to use when shooting at night depends on the type of camera if you have.
Most night photography for beginner guides recommend using relatively low ISO settings, which you should definitely do if you’re using a regular consumer-grade camera. If you happen to have a high-end camera, however, you should experiment with using as much ISO as you can get away with.
Using too much ISO can lead to a lot of noise in many instances but that shouldn’t be a problem if your camera is advanced enough.
4. Experiment with Shutter Speeds
You’ll need to adjust your shutter speed settings depending on whether you’re trying to capture static or moving objects.
Working with moving objects is trickier but can also yield very interesting results. For instance, you can use slow shutter speeds to create awesome light streaks when photographing moving cars or stars during a clear night.
You’ll want to switch to Shutter Priority mode and experiment with various settings to achieve this effect. If you want to play around with longer shutter speeds, on the other hand, try out Bulb mode instead.
5. Learn Your Equipment by Heart
Memorizing all the important settings and options found on your camera is a must for night photography because you don’t want to stumble around in the dark looking for a specific button or dial.
Make sure to learn your way around the equipment during the day when it’s much easier to see what’s going on. Attaching a tripod or changing a lens in the dark can be very frustrating but it can be done if you know all your equipment by heart.
6. Manual Focus
Nowadays we’ve come to rely on autofocus, especially when taking pictures with our phones. But even though professional cameras also have very good autofocus, it often doesn’t work as well as you would expect for night photography.
The darker the scene, the more your camera will struggle to focus on whatever it is you’re trying to capture. If you’re used to letting autofocus do all the work it’s going to feel a bit strange to focus manual at first, but as with a lot of other things, it becomes second nature with enough practice.
7. Switch to RAW
Some night photography techniques are simpler than others. For instance, just by switching the file format from JPEG to RAW you’ll notice a significant increase in quality.
Unlike various other formats used in digital photography, RAW leaves images uncompressed and unprocessed. In other words, it preserves the original quality of the image.
The downside is that RAW files take a lot more space but you can (and should) then convert the images to JPEG during the editing process.
8. Pack a Clip-on Flashlight
A very obvious tip but one that should not be forgotten. These days a lot of people use their phones instead of a flashlight whenever they need a light in the dark, but that’s not necessarily the best solution.
Phones are fairly unwieldy when used as flashlights and you may not want to waste your phone battery on something like that anyway.
A small clip-on flashlight is a much better choice as it allows you to use both hands when setting up or moving your equipment.
9. Don’t Forget About Supplies
Photography sessions can often end up being lengthy and cold, so it’s not the sort of thing you want to engage in without preparation.
Packing essential supplies like food, water, and warm clothes is very important if you know you’re going to spend several hours outside. A pair of gloves and some hot coffee or tea wouldn’t hurt either.
Basically, you’ll want to make sure you’re as comfortable as possible while shooting. Otherwise, you might end up calling it a day faster than you would like, and potentially miss out on capturing some great photos in the process.
10. Test Shots
You’re not always going to be able to capture amazing photographs on your first try, especially during the night.
Start off by doing a few test runs and experiment without various camera settings before you commit to the winning shot.
This is particularly important during your first few attempts at night photography when you’re not entirely sure what to expect.
How to Retouch Night Photographs Using AI
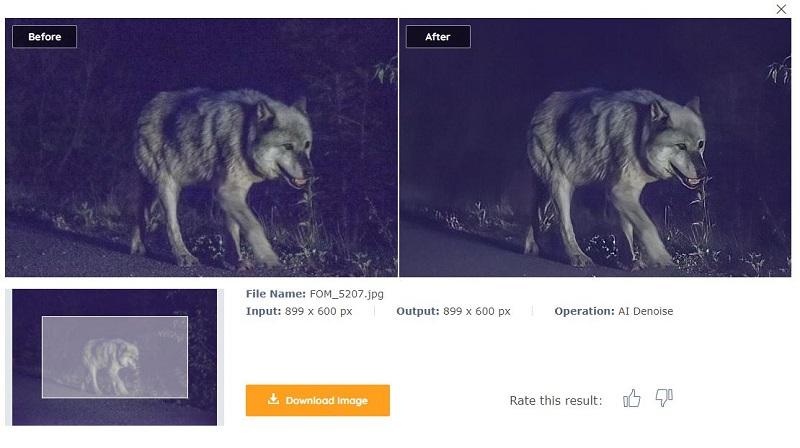
Even when following all the tips mentioned above it’s possible to end up with photographs that contain a lot of artifacts or noise. This happens quite a lot with night photography but don’t worry because there are tools that can mitigate that.
One great example is VanceAI Image Denoiser, a simple yet very effective tool powered by artificial intelligence. The tool automatically eliminates noise from any type of digital photograph and works very well with nighttime images.
A subscription to VanceAI Image Denoiser costs as little as $9.90 per month but you can test it for free to see how it works.
Also read: How to Denoise Photo with VanceAI.
Here are the 3 basic steps:
1. Visit the official VanceAI website and go to the AI Solutions section to find the denoiser tool.

2. Upload an image from your computer to VanceAI and select one of the provided samples.
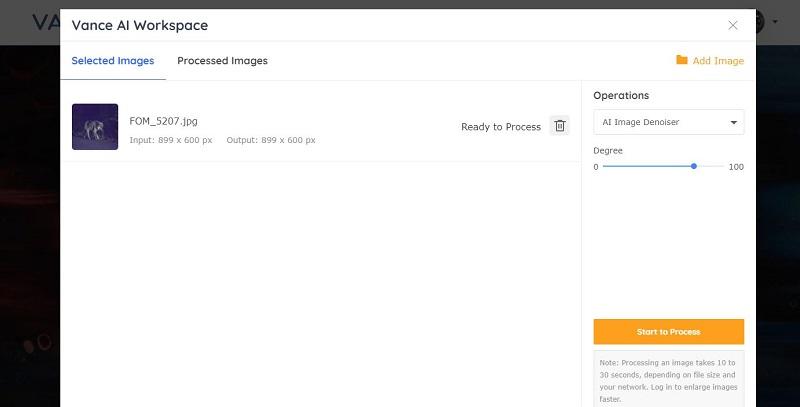
3. Adjust the amount of denoise you want to apply using the slider and then click the button labeled Start to Process. Click Download once the image has been processed.
Also read Simplify Photo Editing with VanceAI's New Customizable Workflow to get more stunning night view images with smiple steps.
Final Thoughts
Learning how to shoot night photography is not only a great way of passing the time but also a great hobby that can yield truly incredible images. The tips we discussed in this article should make things a little bit easier but remember that the best way to get better is to practice as much as you can. Also read: Best 5 Low Light Photography Tips: Shoot in Low Light without Flash.
Read More to Know Deeper:

Popular Posts