
One of the most popular kinds of pictures is those that include landscapes, beautiful scenery, or modeling. These images are also usually the kind to have a lot of details in them. Some details often turn out to be unnecessary or unwanted by us, such as an object, a photo-bomber, or even the background. One can then either mask those details or remove them entirely. Earlier, it was a nigh-impossible task to do anything about such unwanted details but now with advancements in Artificial Intelligence technology, tasks such as to create bokeh backgrounds are a piece of cake.
What is bokeh? It is a technique through which photographers create a focus on one object while rendering everything else blurry. One could simply search for bokeh photography images or AI background remover tools online and find thousands of suitable options. Well, actually there is no need for you to scan through those thousands of options as this review here will provide you with the best remover from VanceAI Photo Enhancer and other useful tools that will play up to your expectations while looking at their strengths and weaknesses.
Our Best Choice: BGremover
Price: There are three different versions of VanceAI's image enhancer products. The Free version allows for editing images up to five times per month which is indicated by credits. So one credit equals one use. You can use the Free version anytime by simply visiting the site and using the app. The paid options are the Basic and Pro versions, which cost $9.90 per month and $19.90 per month respectively. With Basic, you can have 200 credits per month while the Pro version will allow unlimited credits. The paid options also offer additional features and upgrades over the Free version.
Compatibility: Luckily VanceAI has a good range of compatibility and support with Windows, Linux, Android, iOS, and MacOS all capable of running it. However, users are expected to have modern browsers such as Firefox, Chrome, etc ready.
VanceAI PC is full-featured desktop software developed by VanceAI that lets you instantly process local photos in bulk with more customization options, which will significantly simplify your workflow and boost your productivity. Free Download
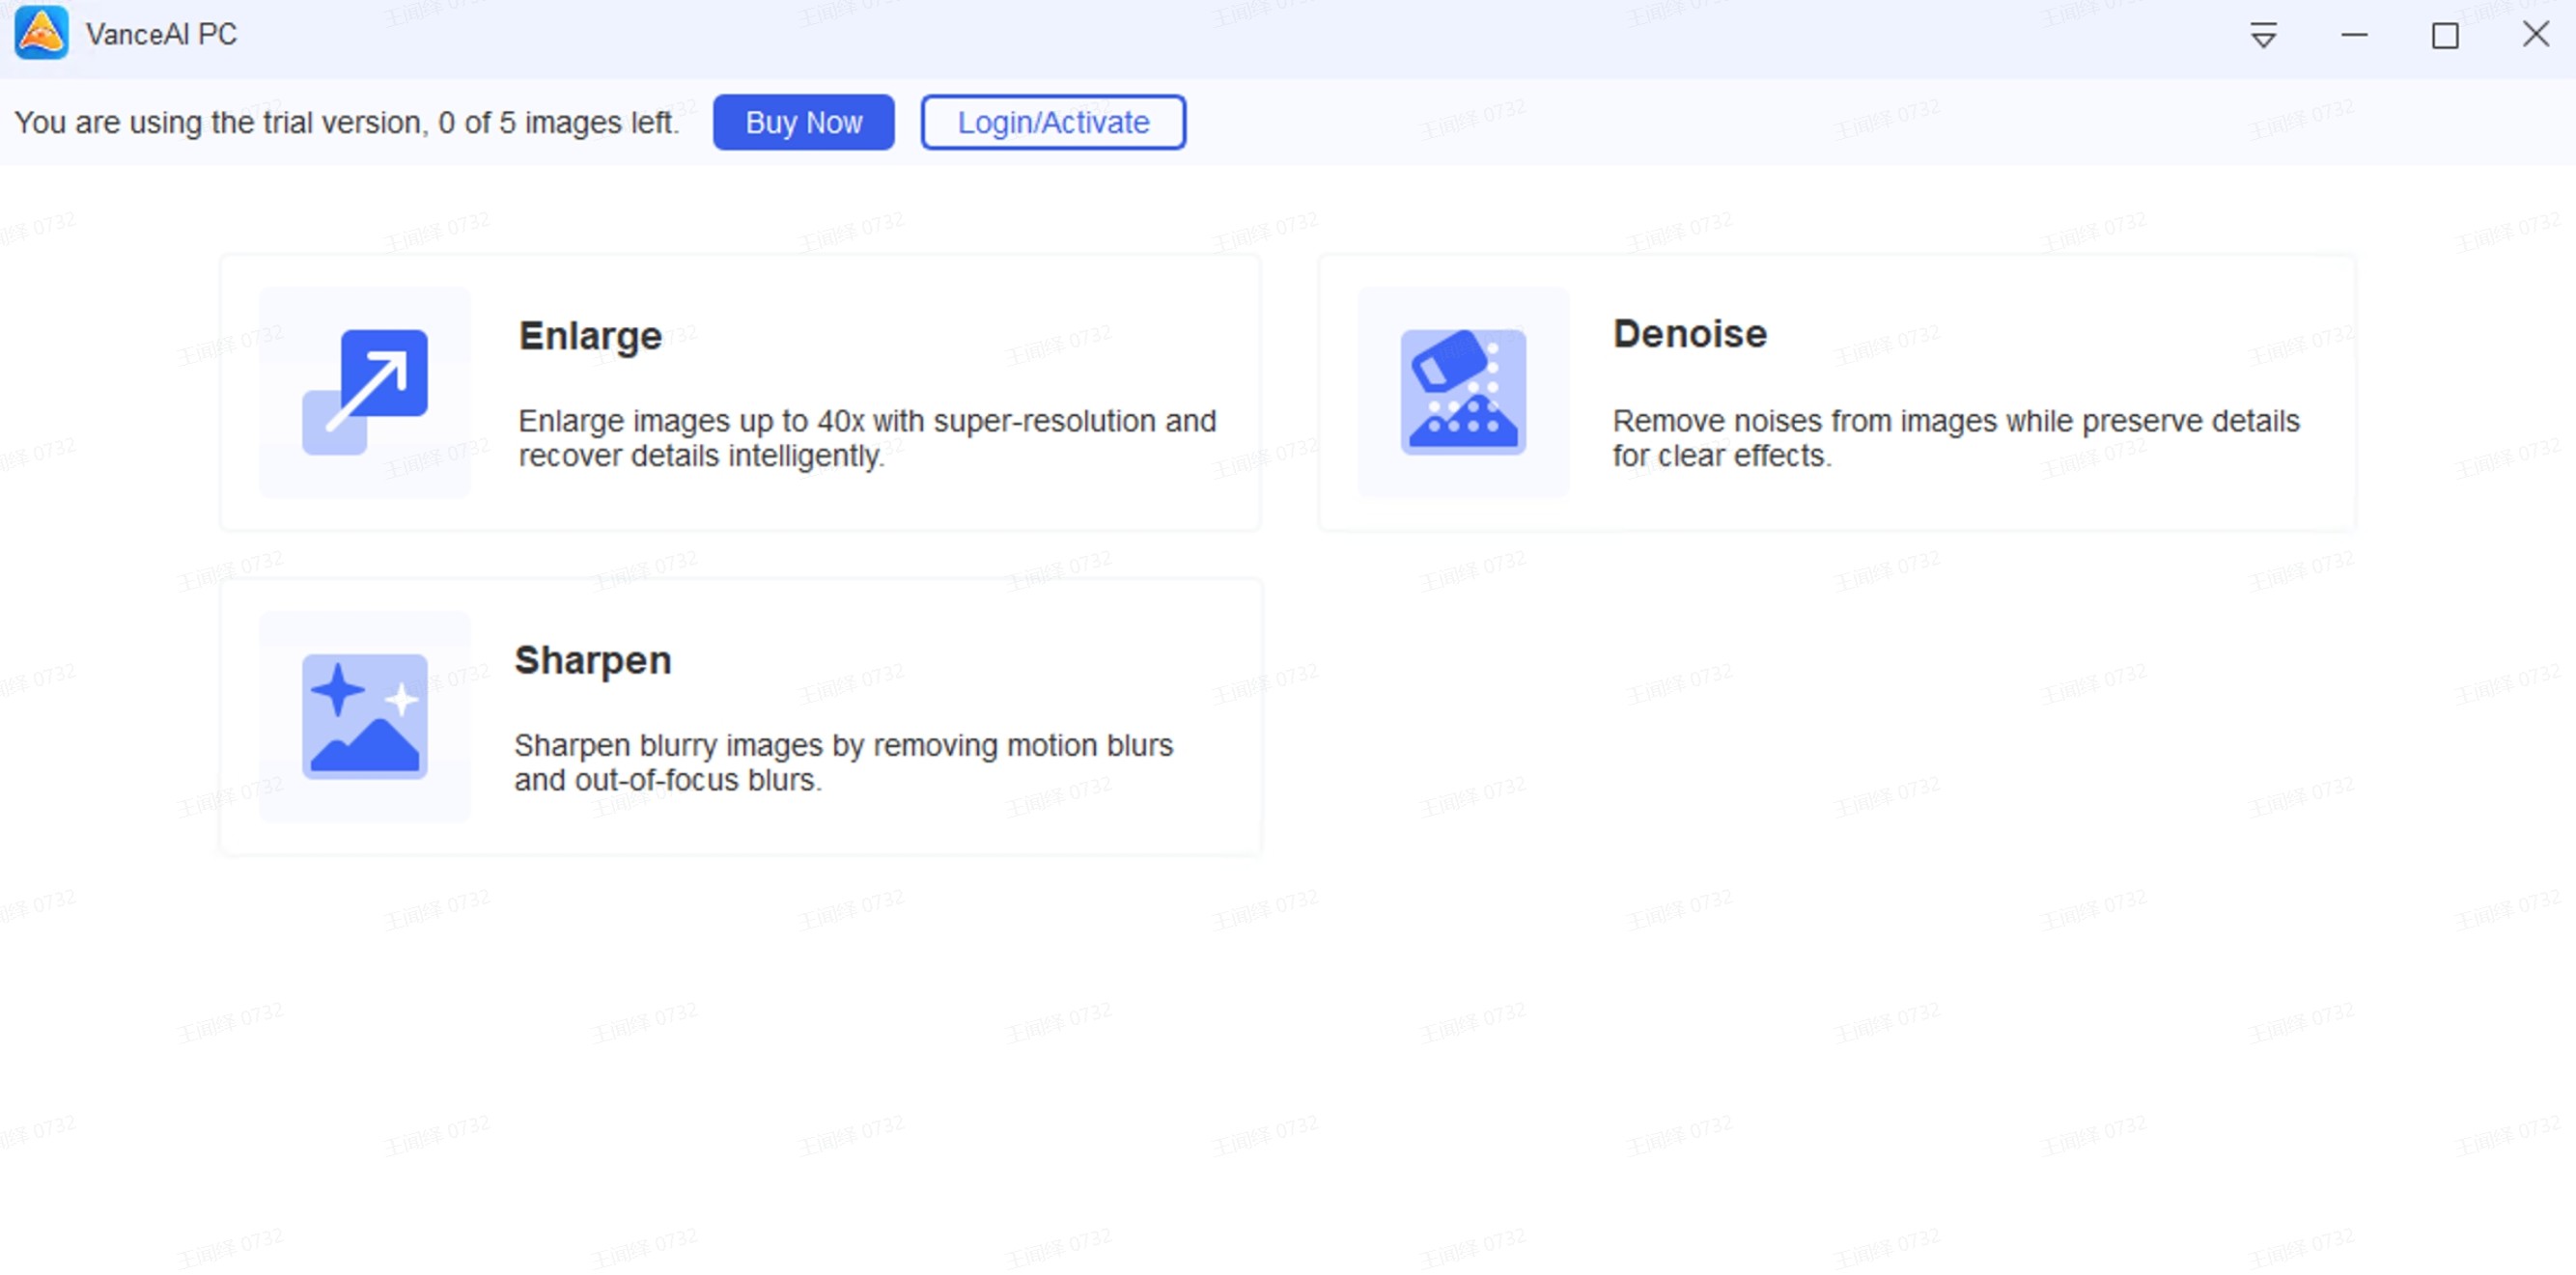
Features: The BGremover is the latest addition to VanceAI’s line of products, hence it is still to be upgraded further as time goes by. But even now, this tool has some really solid features. According to its home page, it is suitable for the kind of images used for e-commerce websites such as Amazon, eBay, Etsy, and more. It also features an editing page wherein you can replace your transparent backgrounds with their custom colored ones or a custom scenic one made by them. This app has been tested on various images such as people, graphics, animals, etc as seen from the home page. The AI Background Remover works automatically as well.
How to use:
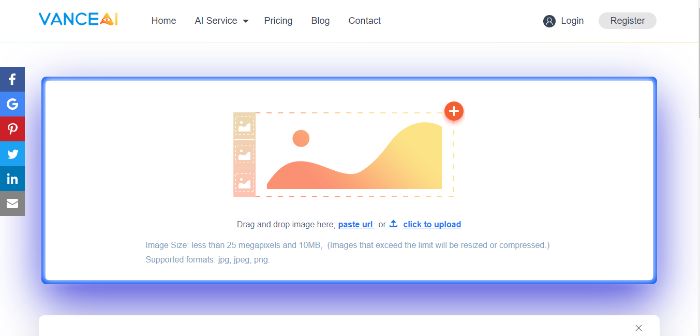
- First, you will need to visit the home page of AI Background Remover. You can read about it on there or simply click on Remove Background to progress further.
- You will then see the function from which you can upload images. You can click on it to search for the image on your system or drag and drop it directly. However, you can also paste the image URL by clicking on the pasted URL prompt. Do note that your images need to be within 25 megapixels and 10 MB. The app supports jpeg, png, and jpg images.
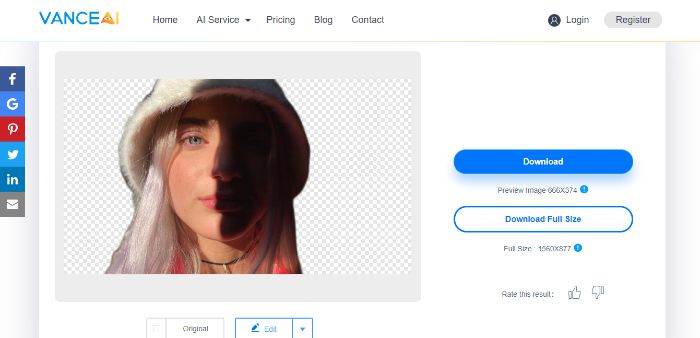
- Once you upload, wait for the tool to process your image and display the output.
- Once done, you can then download the preview image or use a free sign up by VanceAI or Google to get the full-size image.
- You can meanwhile make use of the Original and Edit options under the photo to compare or edit your image.
Pros:
- It is very easy to use and works quickly.
- Decent accuracy.
- The option to upload by URL is convenient.
Cons:
- The Free version can be limiting.
About VanceAI
VanceAI is an online and downloadable image processing tool that consists of many different products, including BGremover, VanceAI Image Denoiser, AI Image Enlarger, etc. The important detail is that all VanceAI products can be used for free, at least for a limited amount of time.

Making these kinds of image effects happen is tasking and requires solid technology. According to VanceAI, it makes use of Machine Learning and Artificial Intelligence-powered methodologies and techniques to enhance photo quality online. At the same time, it is able to enhance the resolution of your picture to a higher level within several seconds. It is called Deep Convolutional Neural Networks or ConvNet. Hence, the AI Background Remover is equipped to remove background from an image with AI. VanceAI is also designed in a way that edits your images automatically. What this means is that you do not have to do anything besides uploading your images. Additionally, you will not need to download any kind of software for it to work.
Best 5 Tools to Create Bokeh Background
| Software | Price | Quality of Effects | Features Options | Support Device | User Friendly (Grades) |
| BeFunky | Free/ $2.89/m | Good | Filters, overlays, stock images | Browsers | A |
| Adobe Photoshop | Free/ Varies | Excellent | Dissect images, motion blur, extensive UI | Desktop, iPad | C |
| Movavi Photo Focus | Free/ $19.99 | Good | Detailed editing, AI image enhancer | Windows, macOS | B |
| Watermark-Software | Free/ $24.90 | Moderate | Simple design, multiple editing options | Windows | B |
| AfterFocus | $0.99 | Good | Focus options, professional filters | Android, iOS | A |
1. BeFunky
Price: You can use BeFunky online for free with limitations, including that of the bokeh effect. You can otherwise opt for BeFunky Plus costing $2.89 per month to be billed annually to get access to everything that it has to offer. Learn more about BeFunky.
Compatibility: This is an online tool for browsers.
Features:
- BeFunky is an amazing tool for creating overlays and artistic effects as it has a huge template of filters to offer. These filters are bokeh effects, layers, touch-ups, and many more.
- You can also add graphics and shapes for creating comical frames.
- The app offers a diverse set of stock images for you to choose and edit from.
- You can select from multiple bokeh effects and modify them based on your preferences.

How to use:
- When you arrive at the website, look for the Create button and select Photo Editor.
- This will open up the editing page. You can upload your image by clicking on Open and upload through whichever means you find convenient.
- In the left toolbar, the bottom square symbol stands for Textures. Click on it and you will find the Bokeh tab.
- Click on the effect and set the intensity of it by the bar given. Click on the green tick to apply the changes.
- Click on Save and choose the destination for your image.
Pros:
- A large variety of artistic capabilities that can complement your blurry bokeh lights.
- Amazing stock images library.
- The website is responsive.
Cons:
- Too many features are blocked away.
2. Adobe Photoshop
Price: Adobe Photoshop is available for a free trial so that you can test out its features first or you can buy it straight away at various prices such as a $22 annual plan to be paid monthly.
Compatibility: Photoshop works on desktops and iPad. It also has a cloud-based accessibility through its Creative Cloud application. Learn more about Photoshop.
Features:
- It can dissect images and make them separate from the rest of the picture, allowing you to add effects to specific parts.
- Similar to what you see in video games, Photoshop allows you to add motion blur into backgrounds which contribute to the bokeh effects.
- To create a bokeh overlay in Photoshop, all you need is a few clicks. The UI is designed with everyone in mind.
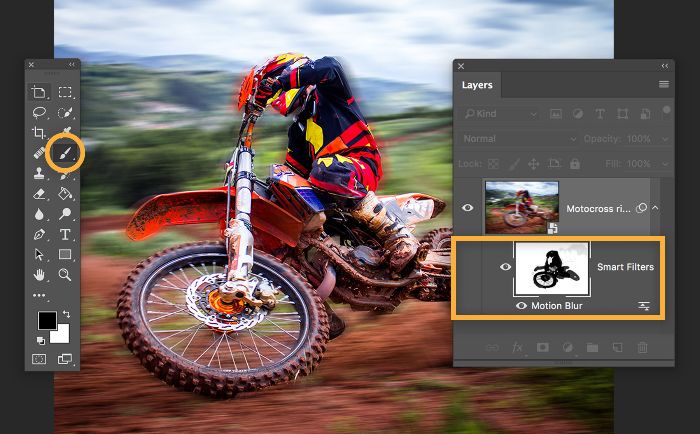
How to use:
- Launch Photoshop and go to the Layers tab. Convert the intended objects into Smart Objects by right-clicking on them.
- Go to Filter, Blur Gallery, and then Field Blur to set the bokeh or blur effect on the image. You can do this multiple times on different objects.
- You can additionally choose to include Motion Blur in the Filter tab as well. Use the Distance bar to set the bokeh.
- Once done, simply save the file.
Pros:
- One of the most feature-heavy applications that you will find.
- The biggest image editing software to date.
Cons:
- It is not exactly beginner-friendly.
3. Movavi Photo Focus
Price: A Business license for a lifetime on one PC costs about $19.99 but you can download a free trial from the website.
Compatibility: Movavi Photo Focus will work on Windows and macOS.
Features:
- It is possible to edit in detail with Photo Focus as it allows you to add effects to any part of an image.
- Just like VanceAI which also helps improve image quality online, it is capable of maintaining and even enhancing the original quality of the image. Make better images with AI image enhancer easily. One click to increase image resolution and get your images crisper, cleaner, and ultra HD.
- You can mix your bokeh effects with other artistic effects provided by the application.
- There are multiple ways of using bokeh. For one, you can simply emphasize on one object and leave the rest blurry. Otherwise you could also apply a background bokeh with various options in it too.
- Motion blur is possible.
- Multiple image file format support.
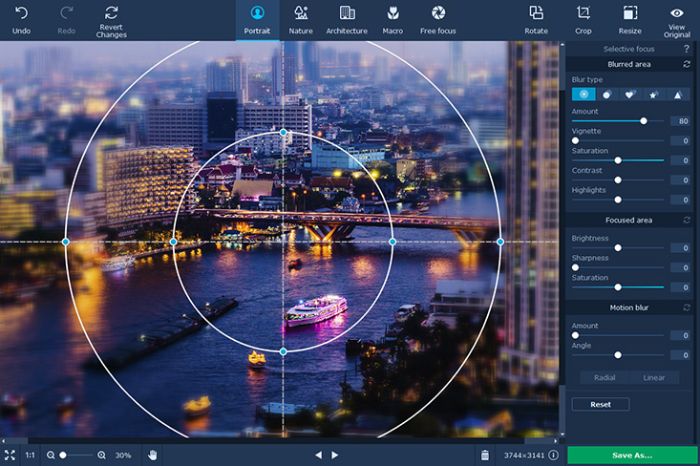
How to use:
- First, launch the Movavi software. Once it opens, upload the image from your system.
- From the top bar, click on Portrait. You will then see the settings for each type of bokeh effect the application provides.
- You can edit by sliding the bar as you see fit and it will reflect upon the image.
- Once you are done editing, click on Save As at the bottom right side to save your image to your system.
Pros:
- A lightweight software with easy to use UI.
- Competent editing and technology.
Cons:
- A greater number of effects would help.
4. Watermark-Software
Price: Watermark Software is free to use the software. For all features, you can purchase it at $24.90.
Compatibility: It supports Windows XP, Vista, 7, 8, 8.1, 10, and more.
Features:
- This application is designed for the casual user, reflecting in their simple design. For example, displaying a mini-tutorial for the bokeh effect to guide users.
- You can use multiple ways of creating a bokeh effect, through eraser or brush.
- The software is pretty lightweight and doesn’t burden your system with heavy requirements.
- There are multiple editing options for you to use one after the other. Thus, it is not just a bokeh making software.
How to use:
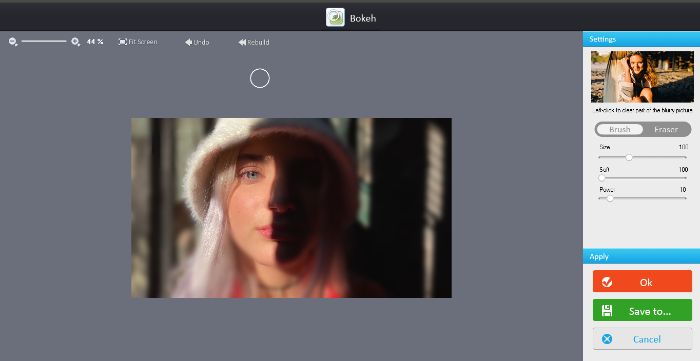
- Once you launch the application, you will see the button through which to upload your image. Do that by selecting the file from the window.
- Once the image is uploaded, click on the Effect tab above. Look for the Bokeh button on the left under the Brush tab.
- The software will process the image then enables you to mark the parts where you want or avoid bokeh. Use the brush or eraser to mark.
- Simply click on Save To in order to save the edited image.
Pros:
- Lightweight software which runs fast.
- Fully free to use anytime.
- Multiple editing options and filters to choose from.
Cons:
- The UI seems really outdated and could use an overhaul.
5. AfterFocus
Price: AfterFocus costs $0.99 for purchase on iOS. It is free to download on Android.
Compatibility: It supports Android and iOS operating systems.
Features:
- It has many bokeh options such as creating a focus on a particular object or to render the entire background as per your needs.
- You can choose your editing mode as well, mainly between auto, manual, and smart. These help in deciding how much control you want to hand over to the app to make the edits.
- It offers professional-looking filters for your images.
- After editing, you can easily share your images over the net.
How to use:
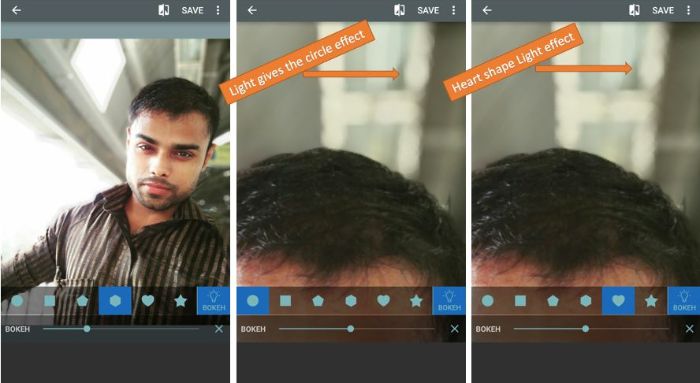
- When you open the app, you will see three options. Choose from Camera or Album to get the image instantly.
- Now, press on Aperture and look for Bokeh at the rightmost side of the bar.
- Use the slider bar to set the bokeh amount for the image.
- Use the Save option to get the edited image.
Pros:
- It is a simple to use application.
Cons:
- The bokeh effect can get weird on some images.
Conclusion
These applications here are overall pretty apt at meeting your needs, whether they are for bokeh or image background related needs. Furthermore, these applications cover virtually all of the operating systems that you usually work with. Bokeh is an extremely artistic filter and these tools are surely competent in that. Moreover, some tools like VanceAI as an image quality enhancer also provide some really great effects, overlays, background replacements, and similar options that mix well with any kind of bokeh effects. In particular, it also helps you finish the task of image enhancement with one single click even if you have not sophisticated skills. So the work of enhancing the image is merely a breeze if you take advantage of the tool.
If you want to know more about how to unblur image, you can click on to get more useful tools to do that. Click to see Selective Tools for Sky Replacement.